
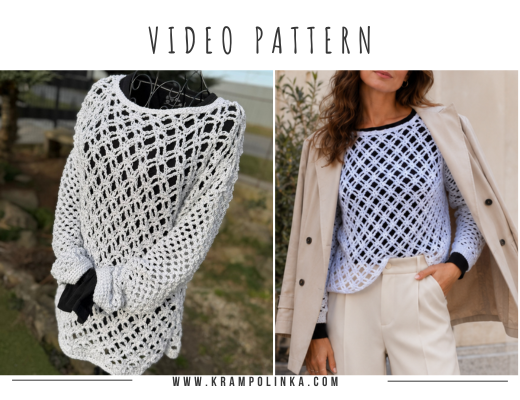
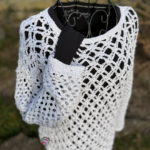
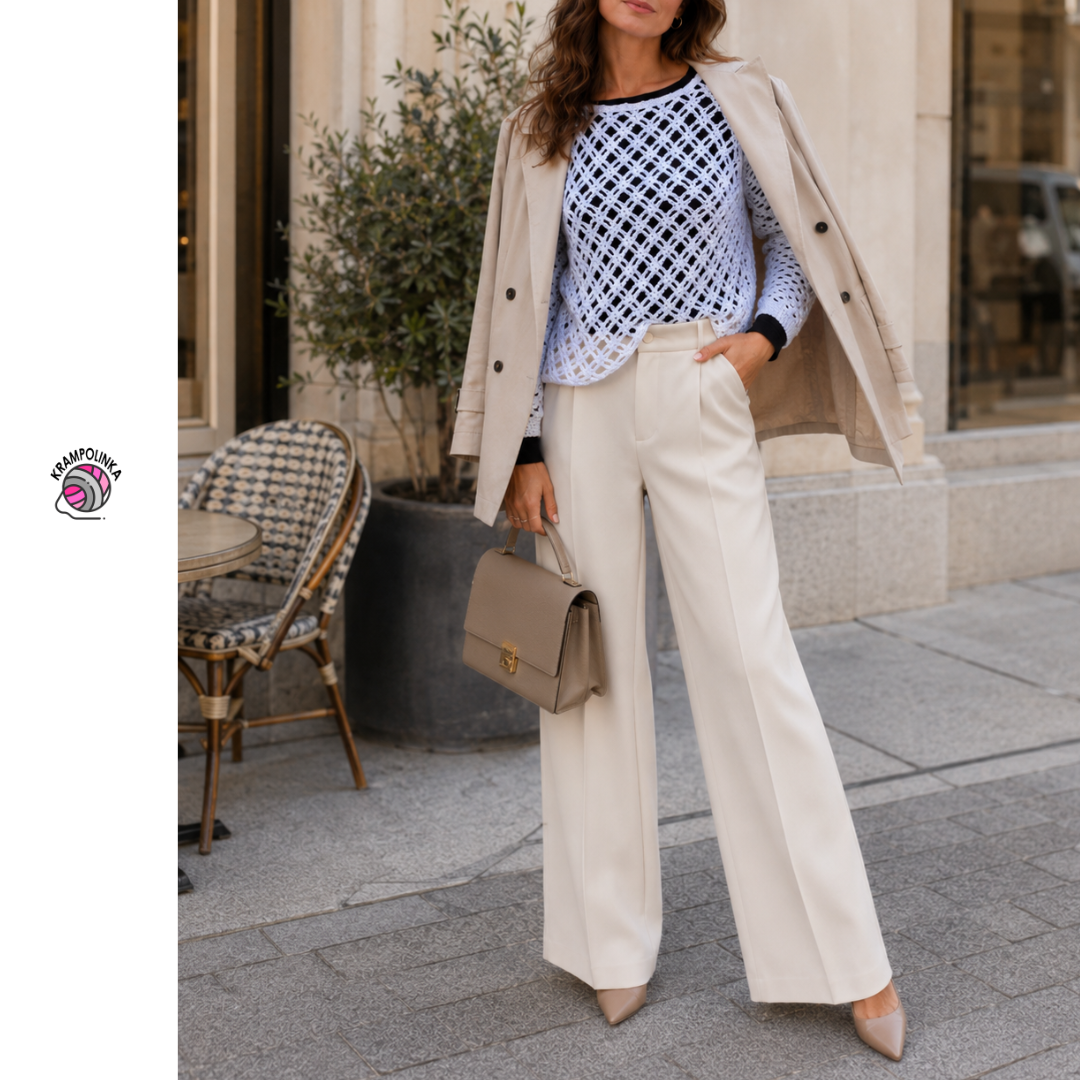
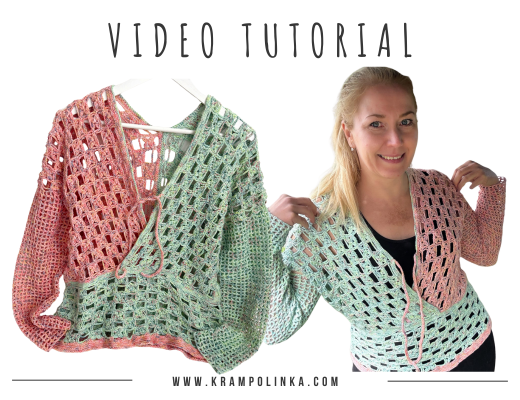
A crochet cardigan with an airy stitch pattern that grows incredibly fast! This beautiful sparkly cardigan is made from acrylic yarn balls by Pierotka with a lurex thread.
The acrylic yarn balls prepared for you by Mrs Milena Pierotka weigh 50 g and have a length of approximately 100 metres. It is a 100% acrylic yarn with a lurex thread. We introduced this yarn in the podcast Yarn Talk #120, and you can take a look at the article here.
-
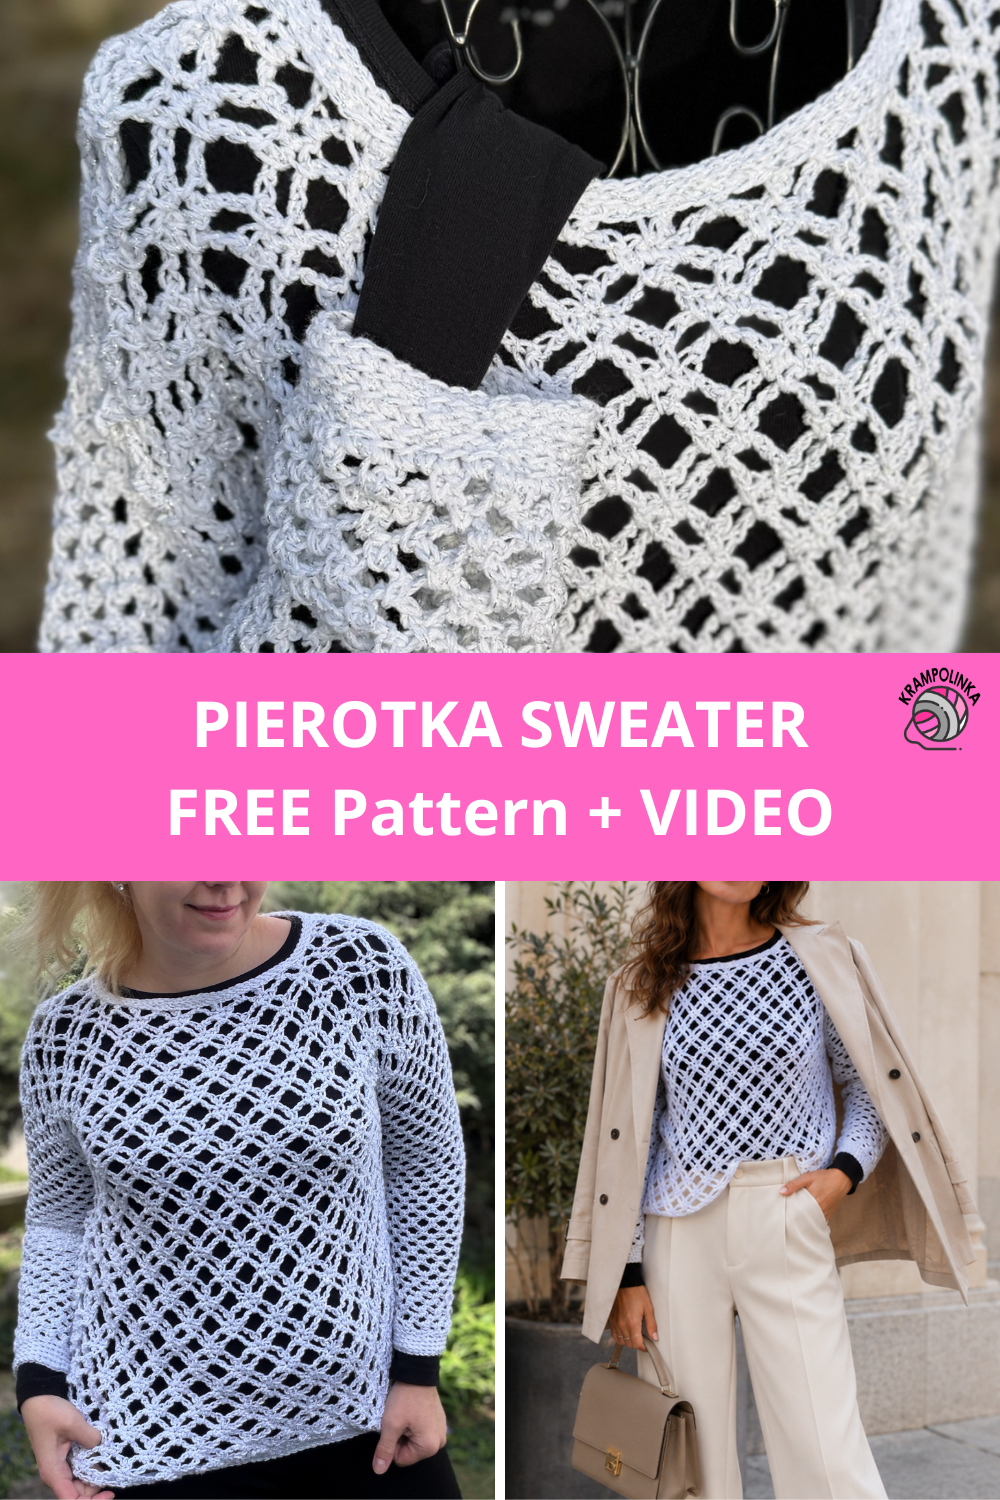
- PIN IT! Free Crochet Sweater Pattern
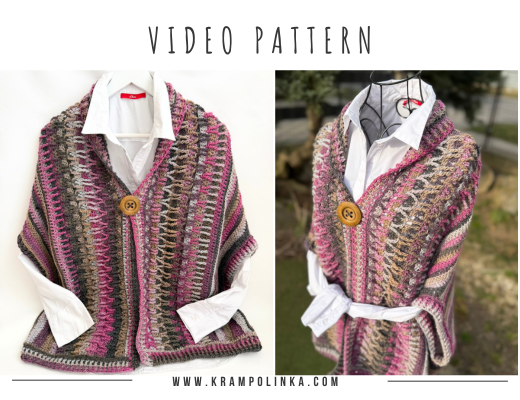
PART I – VIDEO TUTORIAL PREMIERE with automatically generated subtitles added. Did you know that you can slow down the video on YouTube and adjust it to your own crochet pace?
PART II – VIDEO TUTORIAL PREMIERE with automatically generated subtitles added. Did you know that you can slow down the video on YouTube and adjust it to your own crochet pace?
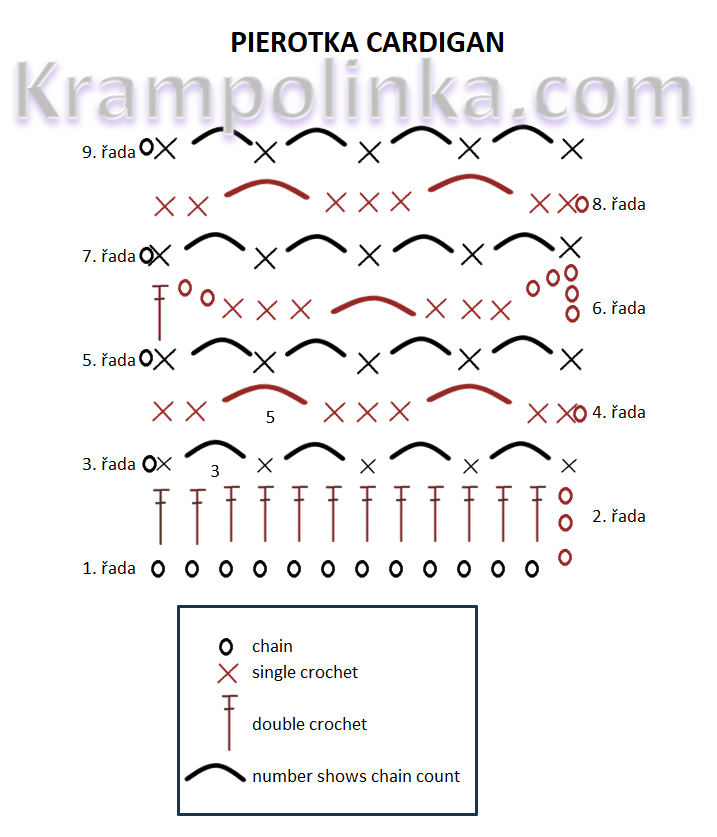
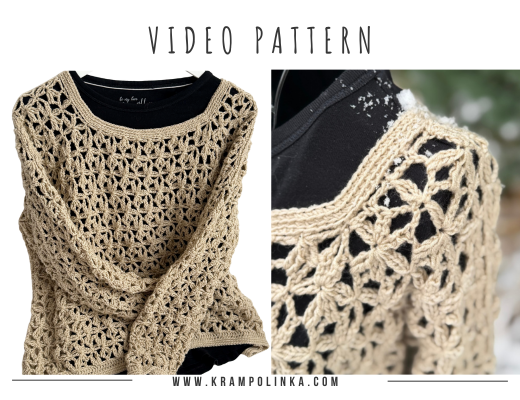
The cardigan is made from a front and a back panel, with the back panel shaped around the neckline. Both panels are crocheted in rows, back and forth, using a simple airy stitch pattern made of single crochet stitches and chain stitches. When crocheting, pay special attention to the beginning and end of each row so that the stitch pattern continues correctly and lines up nicely. The stitch pattern is worked over a multiple of 6 stitches + 3 turning chains. A total of 2 + 2 rows are repeated.
After completing the front and back panels, crochet the shoulder and side seams together. Then crochet the sleeves directly into the armholes. The sleeves are made with a simple arch pattern using chain stitches and are gradually decreased as you crochet. The cardigan edgings are worked either with single crochet stitches into the back loop only, or with the herringbone single crochet stitch. Thanks to the larger hook, the work grows beautifully fast and the cardigan can be finished in just a few evenings.
I hope you enjoy making your Pierotka Cardigan. If you would like to inspire others or share your crochet or styling experience with this cardigan, I would be very happy to see your photos. You can share your photos in the Krampolinka Facebook group. On Instagram, please use the hashtag #svetrikpierotka so they are easy to find. If you tag me in projects made from my patterns, I may reshare them in my Instastories to inspire others.
PIEROTKA CARDIGAN
Yarn: Acrylic yarn by Pierotka, 50 g / 100 m
Yarn consumption: 400 g
Hook: 8 mm and 6 mm for the edgings
Measurements: front length 56 cm, width 53 cm, sleeve length 46 cm
Size: the cardigan is crocheted for size 42, bust circumference 96 cm
Other materials: tapestry needle, decorative label, stitch markers
Time needed: approx. 24 hours
Skill level: beginner-friendly
-

- PIN IT! Free Crochet Sweater Pattern
Abbreviations
ch – chain stitch
sl st – slip stitch
dc – double crochet
sc – single crochet
BLO sc – single crochet into the back loop only
hb sc – herringbone single crochet
Front and back panel, 8 mm hook
Row 1: Crochet 72 chain stitches. Turn.
Row 2: Ch 3 instead of the first dc, insert the hook into the 4th stitch and crochet dc. Then crochet dc into each stitch. Turn.
Row 3: Ch 1 and sc into the same stitch. The pattern is: ch 3, skip 2 stitches and crochet sc into the 3rd stitch. Finish the row with sc into the 2nd stitch of the turning chain. Turn.
Row 4: Ch 1 instead of sc and sc into the same place, then sc under the arch. Crochet the pattern: ch 5 and sc under the following arch, then sc into sc and sc under the following arch. Finish the row with sc under the arch and sc into the turning chain stitch. Turn.
Row 5: Ch 1 instead of sc and sc into the same place. Crochet the pattern: ch 3 and sc under the arch, ch 3 and sc into sc. Repeat to the end of the row. Finish the row with sc into the turning chain stitch. Turn.
Row 6: Ch 3 and ch 2 for the pattern. Sc under the arch, sc into sc, sc under the following arch, ch 5 above sc and visually skip the flower motif. Crochet sc under the following arch, then sc into sc and sc under the arch, ch 5. Repeat to the end of the row. Finish the row with ch 2 and dc into the turning chain stitch. Turn.
Row 7: Ch 1 and sc into the same place. Ch 3 and sc into sc, ch 3 and sc under the arch. Finish the row with sc into the 3rd stitch of the turning chain. Turn.
Row 8: Same as Row 4.
Row 9: Same as Row 5.
Row 10: Same as Row 6.
Row 11: Same as Row 7.
Back panel, 8 mm hook
Rows 12–50: Repeat Rows 4–7. Finish with Row 6.
Shaping the back neckline, 8 mm hook
Place a stitch marker into the middle sc of the 4th flower motif from the edge. Skip 4 flower motifs for the neckline and place another stitch marker into the middle sc of the 5th flower motif.
Row 51: Crochet the last row. Ch 1 instead of sc and sc into the same stitch, ch 3 and sc into sc, ch 3 and sc under the arch. Finish with sc into the sc where the stitch marker is placed. Fasten off and join the yarn at the next stitch marker. Crochet the other side as a mirror image: ch 1 and sc into the same place. Ch 3 and sc under the chain space, ch 3 and sc into sc. Fasten off.
Front panel, 8 mm hook
Rows 12–47: Repeat Rows 4–7. Finish with Row 7.
Shaping the front neckline, 8 mm hook
Count the single crochet stitches from the edge and mark the 8th one with a stitch marker. Repeat on the opposite side.
Row 48: Ch 1 instead of sc, sc into the same stitch, sc under the arch, ch 5, sc under the arch, sc into sc and sc under the arch. Finish the row with ch 3 and dc into the sc where the stitch marker is placed. Turn.
Row 49: Ch 1, sc into the same place. Ch 3 and sc into sc, ch 3 and sc under the arch. Finish the row with sc into the sc where the stitch marker is placed. Turn.
Row 50: Ch 1 instead of sc, sc into the same stitch, sc under the arch, ch 5, sc under the arch, sc into sc and sc under the arch. Finish the row with sc into the sc where the stitch marker is placed. Turn.
Row 51: Ch 1 instead of sc and sc into the same place, ch 3, sc under the arch, ch 3 and sc into sc. Finish the row with sc into the sc where the stitch marker is placed. Turn.
Joining the shoulders, 8 mm hook
Place the panels together with the right sides facing each other and the wrong side facing out. At the shoulders, insert the hook into the edge stitches of both the front and back panels. Pull the yarn through both stitches. Ch 1 instead of sc.
When joining with sc, crochet 2 sc under the arch and 1 sc into sc through both panels. You can also use slip stitches: insert the hook into the chain stitches through both panels. The scheme is the same, i.e. 2 slip stitches into the chain stitches and 1 slip stitch into sc. Crochet loose slip stitches. Join the opposite shoulder in the same way.
Joining the sides, 8 mm hook
Insert the hook into the bottom stitches of the lower edge and crochet ch 1 instead of sc. Crochet slip stitches. Insert the hook through the edge double crochet and crochet sl st.
In a row that started or ended with sc, crochet 1 sl st through the edge stitches. In a row where there is dc or 3 chain stitches, crochet 2, or possibly 3, slip stitches through the edge stitches. Make sure both panels line up evenly.
Crochet to the required height and leave space for the armholes, approximately 7 pattern repeats / 20 cm. Do not fasten off and continue by crocheting the sleeves directly into the armholes.
Sleeves, 8 mm hook
Row 1: Ch 1 instead of sc and sc into the seam. The pattern is: ch 3, sc around the edge double crochet, ch 3 and sc into the middle one of the edge sc stitches. Repeat the pattern to the end of the row. The sleeve must not pull or ripple. Finish the row with ch 1 and hdc. You finish in the centre of the arch. Turn. You have 18 arches.
Row 2: Ch 1 instead of sc, sc into the same arch. The pattern is: ch 3 and sc under the arch. Repeat to the end of the row. Finish the row with ch 1 and hdc. You finish in the centre of the arch. Turn.
Rows 3–11: Crochet Row 2.
Row 12: Decrease at the beginning of the row. Crochet ch 1 instead of sc, sc under the arch, and without any chain stitches crochet sc under the following arch. Then repeat Row 2.
Row 13: Crochet Row 2.
Row 14: Decrease at the beginning of the row. Crochet ch 1 instead of sc, sc under the arch, and without any chain stitches crochet sc under the following arch. Then repeat Row 2.
Rows 15–22: Crochet Row 2.
Rows 23–24: Crochet as Row 2, but instead of ch 3, alternate ch 2 and sc, ch 3 and sc. Finish the row with ch 1 and sc.
Row 25: Decrease at the beginning of the row. Crochet ch 1 instead of sc, sc under the arch, and without any chain stitches crochet sc under the following arch. Then crochet ch 2 and sc under the arch. Finish the row with ch 1 and sc.
Row 26: Crochet as Row 2, but instead of ch 3, alternate ch 2 and sc, ch 3 and sc. Finish the row with ch 1 and sc.
Row 27: Decrease at the beginning of the row. Crochet ch 1 instead of sc, sc under the arch, and without any chain stitches crochet sc under the following arch. Then repeat Row 2.
Rows 28–31: Crochet Row 26.
Row 32: Decrease at the beginning of the row. Crochet ch 1 instead of sc, sc under the arch, and without any chain stitches crochet sc under the following arch. Then repeat Row 2.
Rows 33–34: Crochet Row 26.
Row 35: Decrease at the beginning of the row. Crochet ch 1 instead of sc, sc under the arch, and without any chain stitches crochet sc under the following arch. Then repeat Row 2.
Rows 36–39: Crochet Row 26. You have 12 arches.
Sleeve edging, 6 mm hook
Row 1: Crochet on the right side. Ch 1 instead of sc, sc into sc. The scheme is: 2 sc under the arch and sc into sc, sc under the arch and sc into sc. Finish the row with sl st.
Rows 2–5: Ch 1 instead of sc, BLO sc. Finish the row with sl st. Fasten off. Repeat the same process on the opposite sleeve.
Neckline edging, 6 mm hook
Row 1: Join the yarn on the back panel and crochet ch 1. Crochet herringbone sc. Work into the edge stitches. Where there was sc, crochet 1 hb sc. Where there was dc, crochet 2 hb sc. In the arch section, crochet 2 hb sc under the arch and 1 hb sc into sc on the front panel, and 3 hb sc under the arch and hb sc into sc on the back panel. Finish the row with sl st.
Row 2: Ch 1 instead of sc. Crochet herringbone sc into the back loop only. Finish the row with sl st. Fasten off.
Bottom edging, 7 mm hook
Row 1: Join the yarn in the side seam. Ch 1 instead of sc. Crochet herringbone sc into the chain stitches. Finish the row with sl st. Fasten off.
Finishing
Sew in all loose ends. Decorate with a label.
Copyright Notice
This pattern is for personal use only. For commercial use, please contact me directly. Always include the source credit: www.krampolinka.com. The pattern is designed specifically for this yarn, hook size, and my personal tension. If you use a different yarn, hook, or tension, your final product may vary in size or shape.
Enjoy this free pattern and you can follow my latest projects, tutorials, ideas, reviews, video podcasts, tips, and tricks:
- Krampolinka YouTube videos (subtitled since 2024)
- Krampolinka Instagram
- Krampolinka FB group
-
- Sparkly crochet Pierotka cardigan with an airy stitch pattern
-
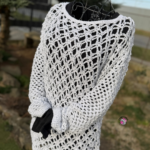
- A lightweight handmade cardigan perfect for layering.

-
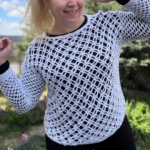
- Fast and easy crochet cardigan made with acrylic lurex yarn.

-
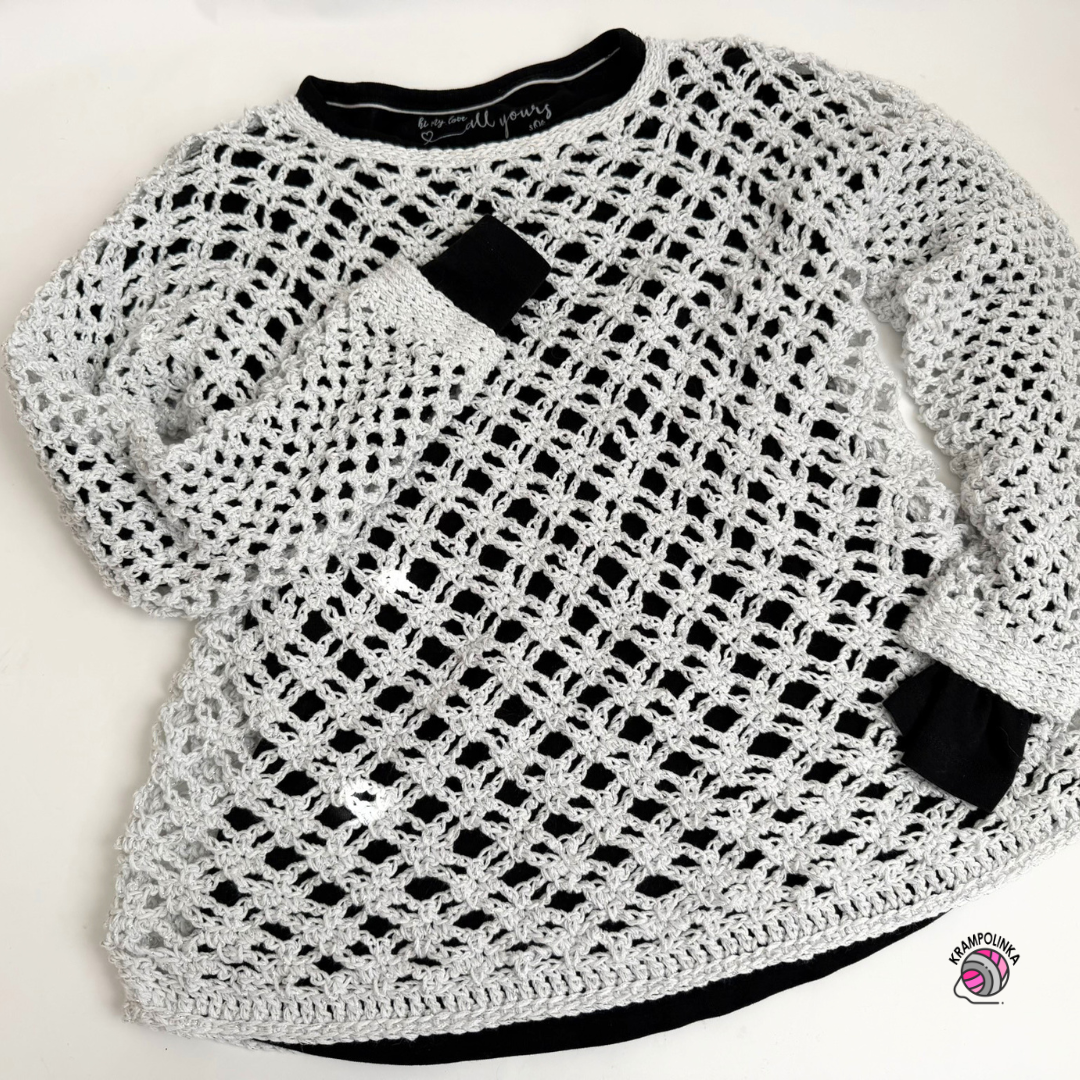
- Airy crochet texture that grows beautifully fast.

-
- Handmade Pierotka cardigan – soft, light and sparkly.

-

- A beginner-friendly crochet cardigan for everyday wear.

-

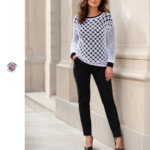
- Simple panels, airy sleeves and a delicate handmade finish.
-
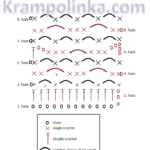
- Crochet Diagram Pierotka Cardigan
No Comments