Bottom hem of the cardigan, 2 mm or 2.5 mm hook
Row 70: Crochet on the right side. Shell: 3 ch instead of the first dc, 2 dc – ch 2 – 3 dc into one stitch, skip 3 stitches, and into the fourth stitch crochet a shell: 3 dc – ch 2 – 3 dc. Skip 4 stitches, and into the fifth stitch crochet a shell. Repeat this pattern to the end of the row. Finish the row with sl st.
Tip: At the beginning of the row, crochet only half of the shell, i.e. 3 ch and 2 dc, then continue with the pattern repeat. At the end of the row, finish with 3 dc and sc into the second chain of the turning chain. This way, you remain in the centre of the shell arch and do not need to move with slip stitches.
Rows 71–73: Use sl st to move under the ch in the shell, where you crochet 3 ch and 2 dc – ch 2 – 3 dc into the centre of the shell under the ch. Finish the row with sl st.
Sleeve, 2 mm hook
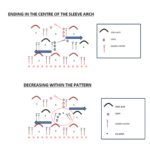
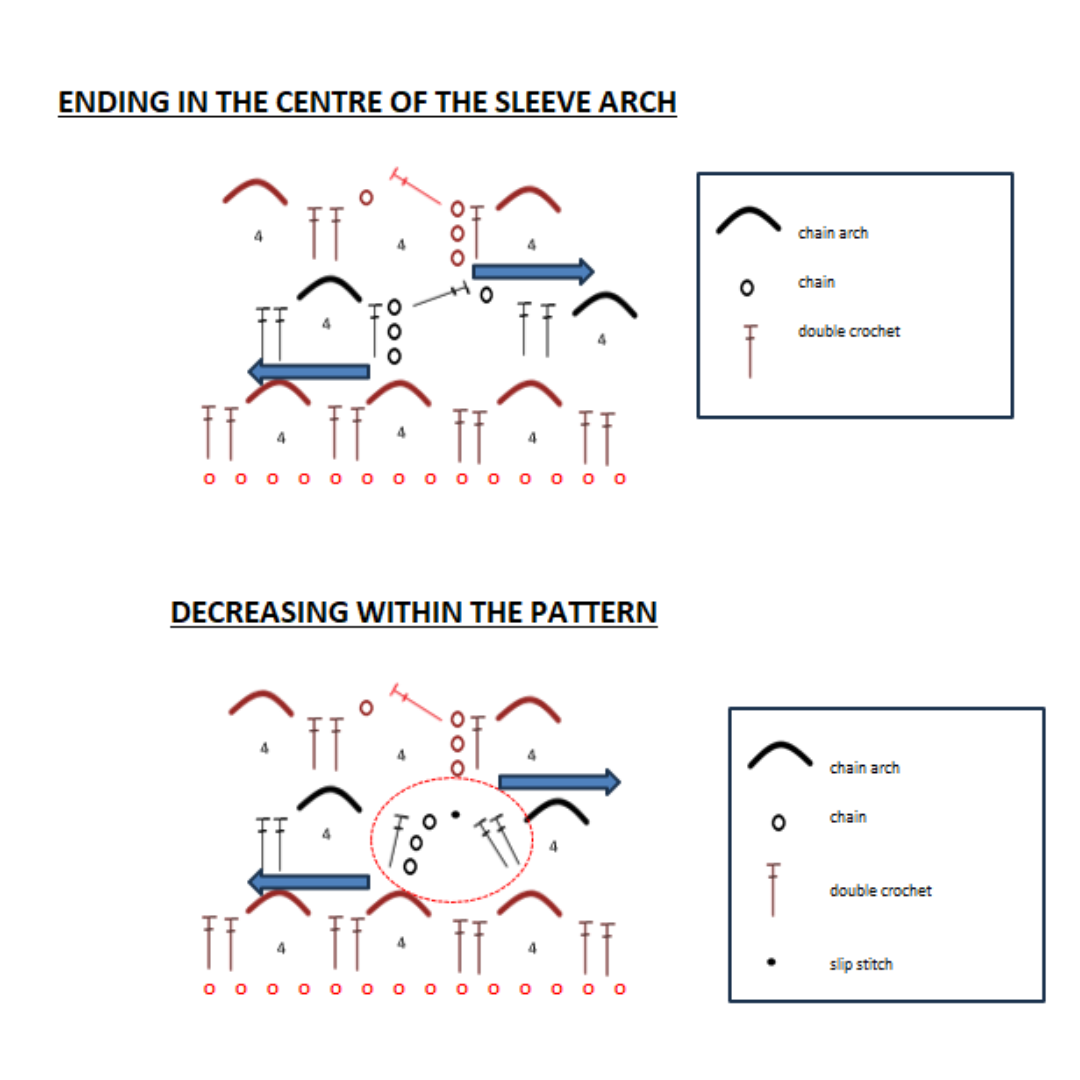
Row 1: Join the yarn in the underarm into the ch and crochet 3 ch instead of the first dc, then dc into the neighbouring stitch. Then crochet 4/3 ch and 2 dc under the ch in the sleeve section. At the end of the row, crochet the last two dc under the ch arch, and instead of the arch, crochet ch 1 and dc into the turning chain stitch. This way, you remain in the centre of the arch. Turn and crochet on the wrong side.
Rows 2–29: Crochet 3 ch instead of the first dc and dc under the arch, 4/3 ch. Continue with the pattern: 2 dc under the arch and 4/3 ch. Finish the row with ch 1 and dc into the turning chain stitch, turn.
Row 30: In this row, decrease. Crochet 3 ch instead of the first dc, dc under ch, 3 ch. To decrease, do not crochet the second-to-last arch in the row, so you will have two dc under one arch and two dc under the following arch. Finish the row with ch 1 and dc into the turning chain stitch, turn.
Row 31: Crochet 3 ch instead of the first dc, dc into sl st, 3 ch. Continue with the pattern: 2 dc under the arch and 3 ch. Finish the row with ch 1 and dc into the turning chain stitch, turn.
Rows 32–33: Crochet 3 ch instead of the first dc and dc under the arch, 3 ch. Continue with the pattern: 2 dc under the arch and 3 ch. Finish the row with ch 1 and dc into the turning chain stitch, turn.
Row 34: In this row, decrease. Crochet 3 ch instead of the first dc, dc under ch, 3 ch. To decrease, do not crochet the second-to-last arch in the row, so you will have two dc under one arch and two dc under the following arch. Finish the row with ch 1 and dc into the turning chain stitch, turn.
Row 35: Crochet 3 ch instead of the first dc, dc under the arch, 3 ch. Continue with the pattern: 2 dc under the arch and 3 ch. Finish the row with ch 1 and dc into the turning chain stitch, turn.
Row 36: Crochet 3 ch instead of the first dc and dc under the arch, 3 ch. Continue with the pattern: 2 dc under the arch and 3 ch. Finish the row with ch 1 and dc into the turning chain stitch, turn.
Row 37: In this row, decrease. Crochet 3 ch instead of the first dc, dc under ch, 3 ch. To decrease, do not crochet the second-to-last arch in the row, so you will have two dc under one arch and two dc under the following arch. Finish the row with ch 1 and dc into the turning chain stitch, turn.
Row 38: Crochet 3 ch instead of the first dc, dc into sl st, 3 ch. Continue with the pattern: 2 dc under the arch and 3 ch. Finish the row with ch 1 and dc into the turning chain stitch, turn.
Rows 39–42: Crochet 3 ch instead of the first dc and dc under the arch, 3 ch. Continue with the pattern: 2 dc under the arch and 3 ch. Finish the row with ch 1 and dc into the turning chain stitch. Crochet the cuff on the right side.
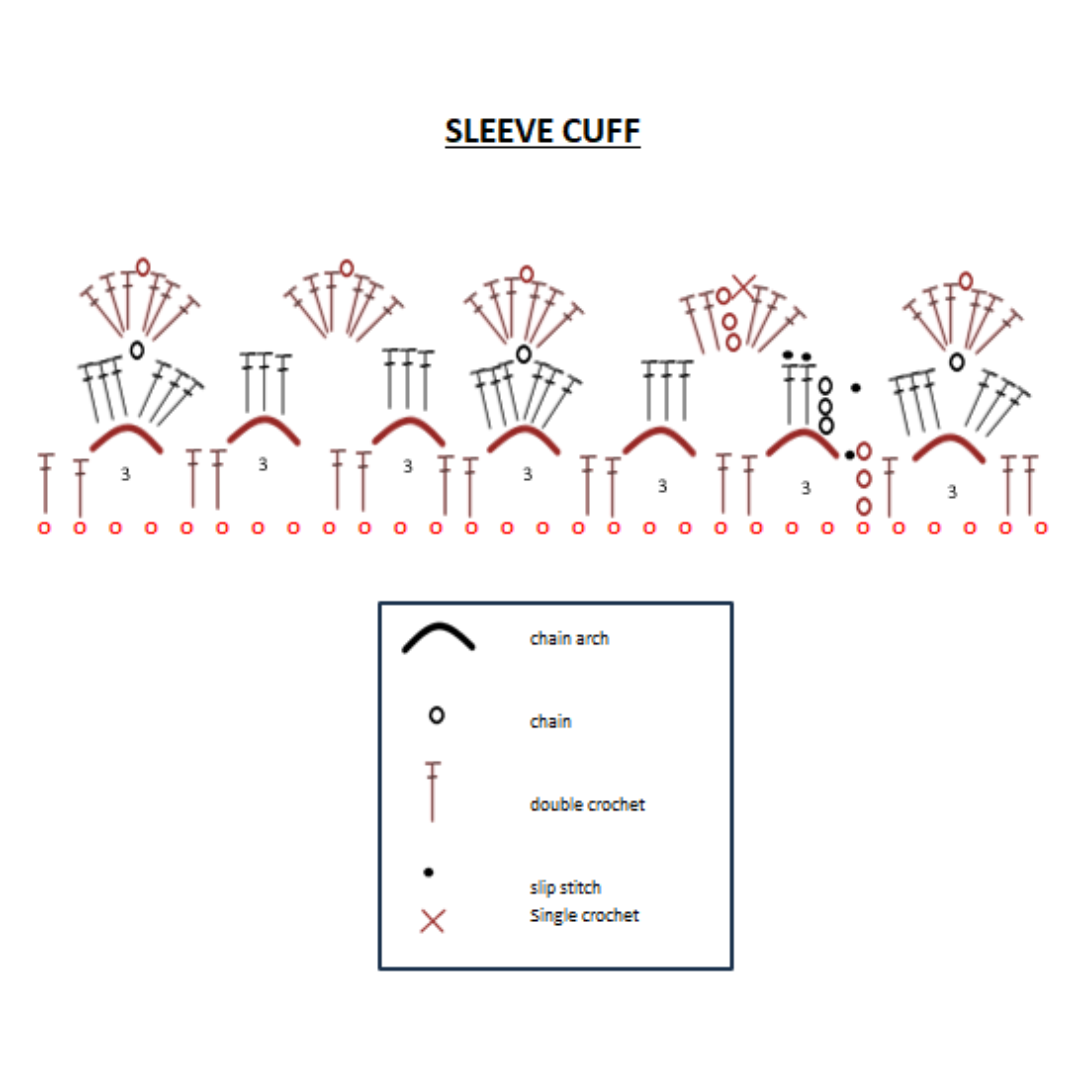
Sleeve cuff, 2 mm hook
Row 1: Crochet 3 ch instead of the first dc, 2 dc under the arch. Crochet 3 dc under the next arch, then a shell: 3 dc – ch 1 – 3 dc under the following arch. Continue to the end of the row with the repeat: 3 dc under the arch, 3 dc under the next arch, 3 dc – ch 1 – 3 dc under the arch. At the end of the row, make sure the shell pattern is complete. Finish the row with sl st.
Row 2: Crochet half of the pattern, i.e. 3 ch and 2 dc under the arch. Then crochet the pattern 3 dc – ch 1 – 3 dc either under ch 1 or between two groups of stitches. Finish the row with 3 dc under ch 1 and sc into the turning chain stitch.
Rows 3–5: Crochet half of the pattern, i.e. 3 ch and 2 dc under the arch. Then crochet the pattern 3 dc – ch 1 – 3 dc under ch 1. Finish the row with 3 dc under ch 1 and sc into the turning chain stitch.
Note: Adjust the number of sleeve rows, the shaping method, and the number of cuff rows according to your arm length.
Neckline edging, 2 mm hook
Row 1: Join the yarn in the first stitch of the yoke. Crochet 3 ch instead of the first dc, 2 dc cluster – ch 1 – 3 dc cluster. Then crochet the pattern 3 dc cluster – ch 1 – 3 dc cluster into each stitch where you crocheted sc. Finish the row with 3 ch and sl st. Fasten off the yarn.
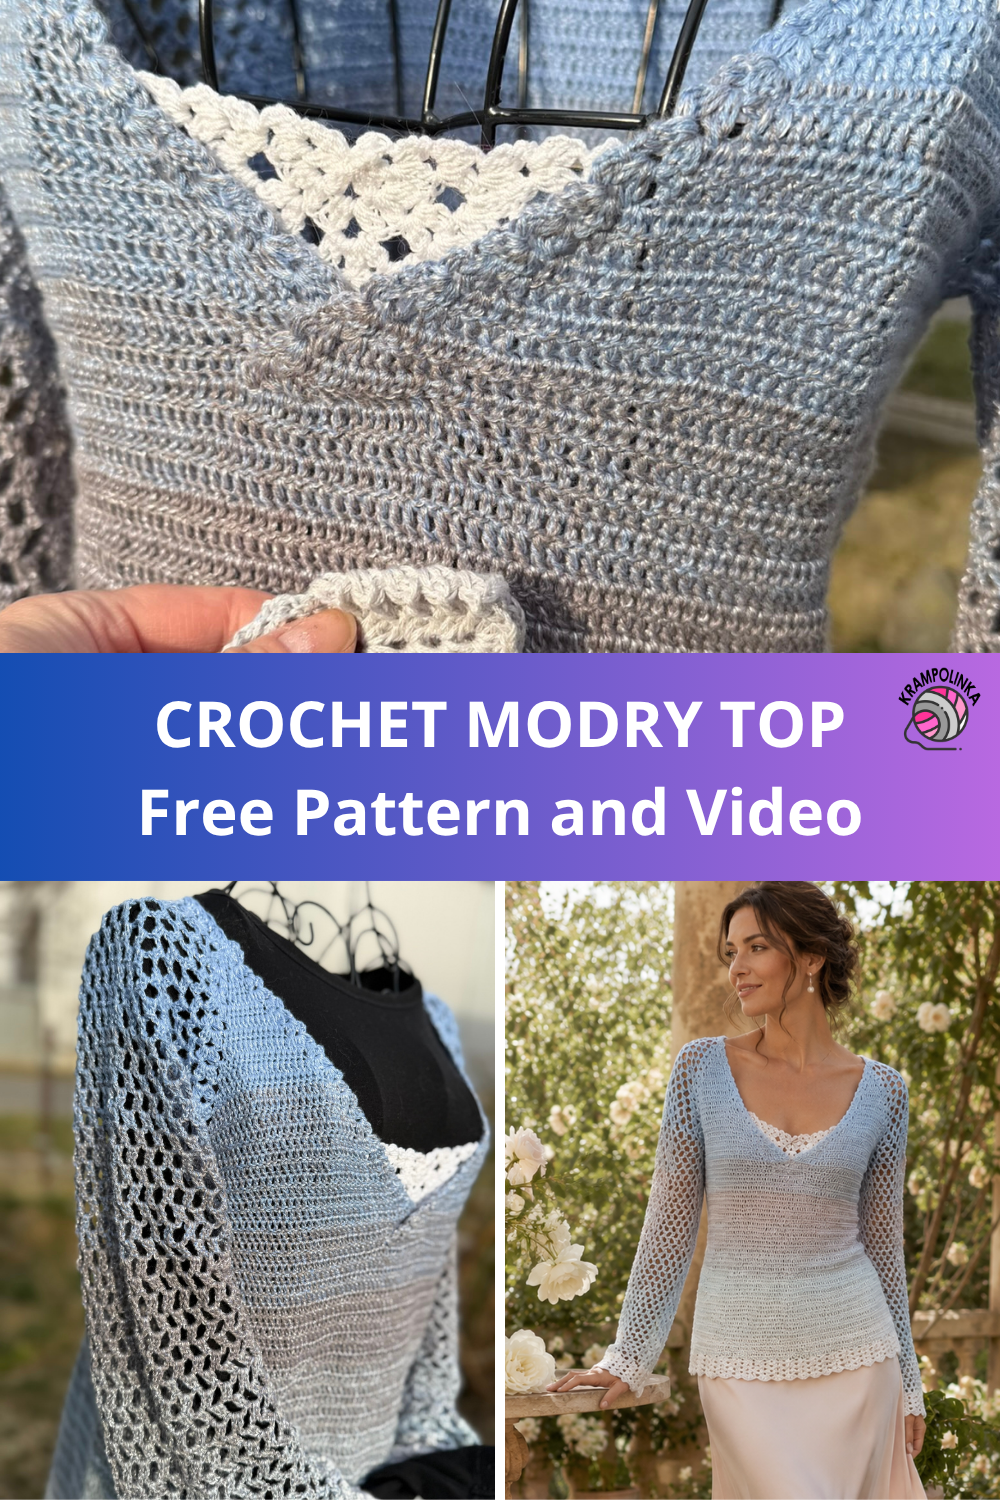
Neckline insert, white Freccia yarn, 2 mm hook
Row 1: Into a magic ring, crochet 3 ch and 2 dc cluster, ch 1 and 3 dc cluster, ch 1. Then crochet the point of the insert: 3 dc cluster – ch 3 – 3 dc cluster, ch 1. Finish with 3 dc cluster – ch 1 – 3 dc cluster. Turn.
Row 2: Crochet ch 1 and sl st under the ch 1 between the stitch groups. Here crochet 3 ch and 2 dc cluster – ch 1 – 3 dc cluster, ch 1. Crochet 3 dc cluster – ch 1 – 3 dc cluster under the ch 1 between the stitch groups. At the point, crochet 3 dc cluster – ch 3 – 3 dc cluster, ch 1. Crochet 3 dc cluster – ch 1 – 3 dc cluster under the ch 1 between the stitch groups, ch 1, and finish with 3 dc cluster – ch 1 – 3 dc cluster under ch 1. Turn.
Row 3: Crochet ch 1 and sl st under the ch 1 between the stitch groups. Here crochet 3 ch and 2 dc cluster – ch 1 – 3 dc cluster, ch 2. Crochet 3 dc cluster – ch 1 – 3 dc cluster under ch 1, ch 2. At the point, crochet 3 dc cluster – ch 2 – 3 dc cluster – ch 2 – 3 dc cluster. Then crochet ch 2 and 3 dc cluster – ch 1 – 3 dc cluster under ch 1, ch 2. Finish with 3 dc cluster – ch 1 – 3 dc cluster under ch 1. Turn.
Row 4: Crochet ch 1 and sl st under the ch 1 between the stitch groups. Here crochet 3 ch and 2 dc cluster – ch 1 – 3 dc cluster, ch 1. Under the ch 1 in the pattern and also between the stitch groups, crochet 3 dc cluster – ch 1 – 3 dc cluster, ch 1. At the point, crochet into the middle cluster stitch: 3 dc cluster – ch 3 – 3 dc cluster, ch 1. Crochet the second half of the insert as a mirror image. Turn.
Row 5: Crochet ch 1 and sl st under the ch 1 between the stitch groups. Here crochet 3 ch and 2 dc cluster – ch 1 – 3 dc cluster, ch 2. Only under the ch 1 in the pattern, crochet 3 dc cluster – ch 1 – 3 dc cluster under ch 1, ch 2. At the point, crochet 3 dc cluster – ch 2 – 3 dc cluster – ch 2 – 3 dc cluster, ch 2. Crochet the second half of the insert as a mirror image. Turn.
Row 6: Crochet ch 1 and sl st under the ch 1 between the stitch groups. Here crochet 3 ch and 2 dc cluster – ch 1 – 3 dc cluster, ch 1. Under the ch 1 in the pattern and also between the stitch groups, crochet 3 dc cluster – ch 1 – 3 dc cluster, ch 1. At the point, crochet into the middle cluster stitch: 3 dc cluster – ch 3 – 3 dc cluster, ch 1. Crochet the second half of the insert as a mirror image. If the edge becomes wavy, skip crocheting under the ch 1 between the stitch groups once on each side. Fasten off the yarn.
Finishing
Weave in all loose ends. Add a decorative label.
This pattern is for personal use only. For commercial use, please contact me directly. Always include the source credit: www.krampolinka.com. The pattern is designed specifically for this yarn, hook size, and my personal tension. If you use a different yarn, hook, or tension, your final product may vary in size or shape.
Enjoy this free pattern and you can follow my latest projects, tutorials, ideas, reviews, video podcasts, tips, and tricks:
-
-
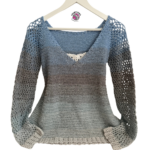
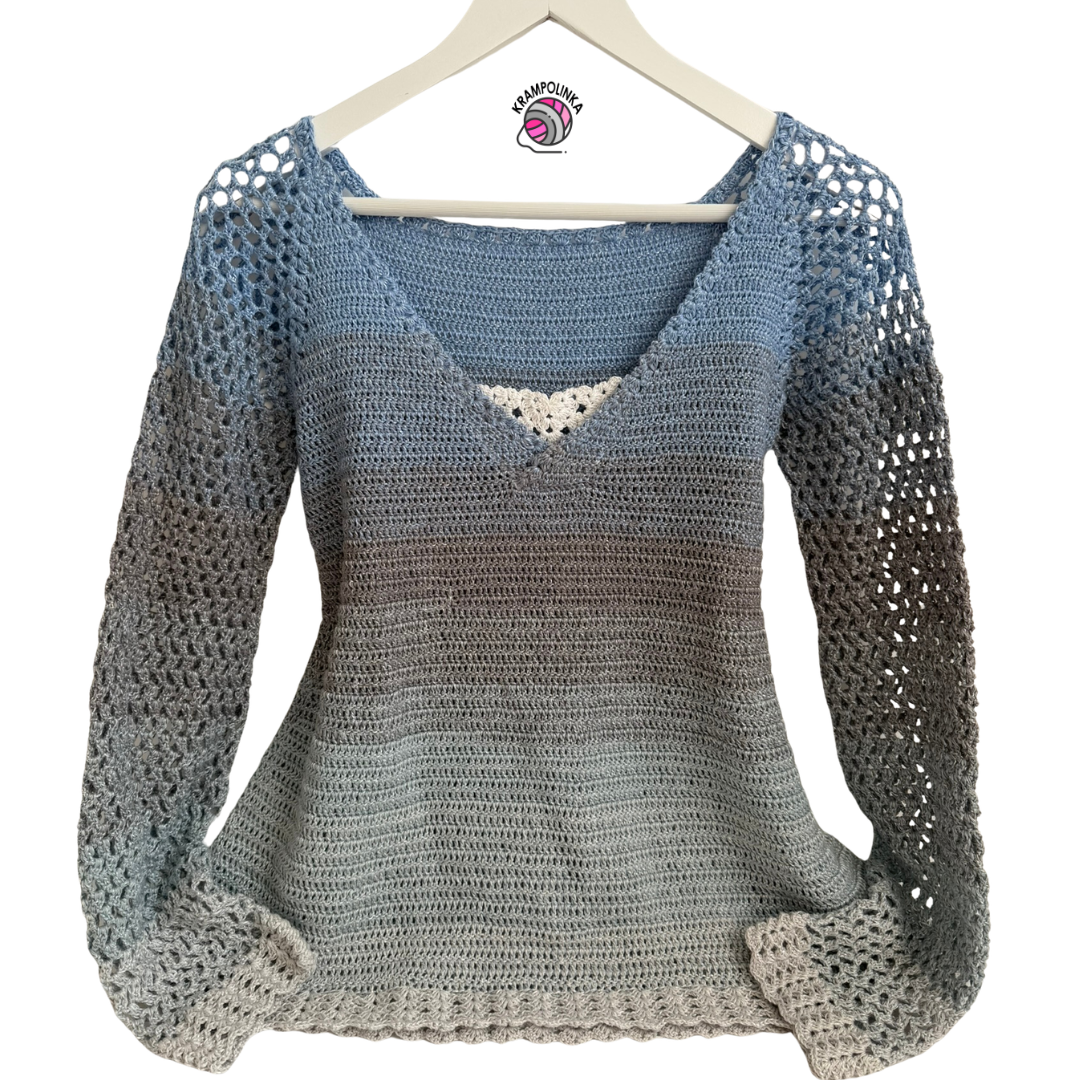
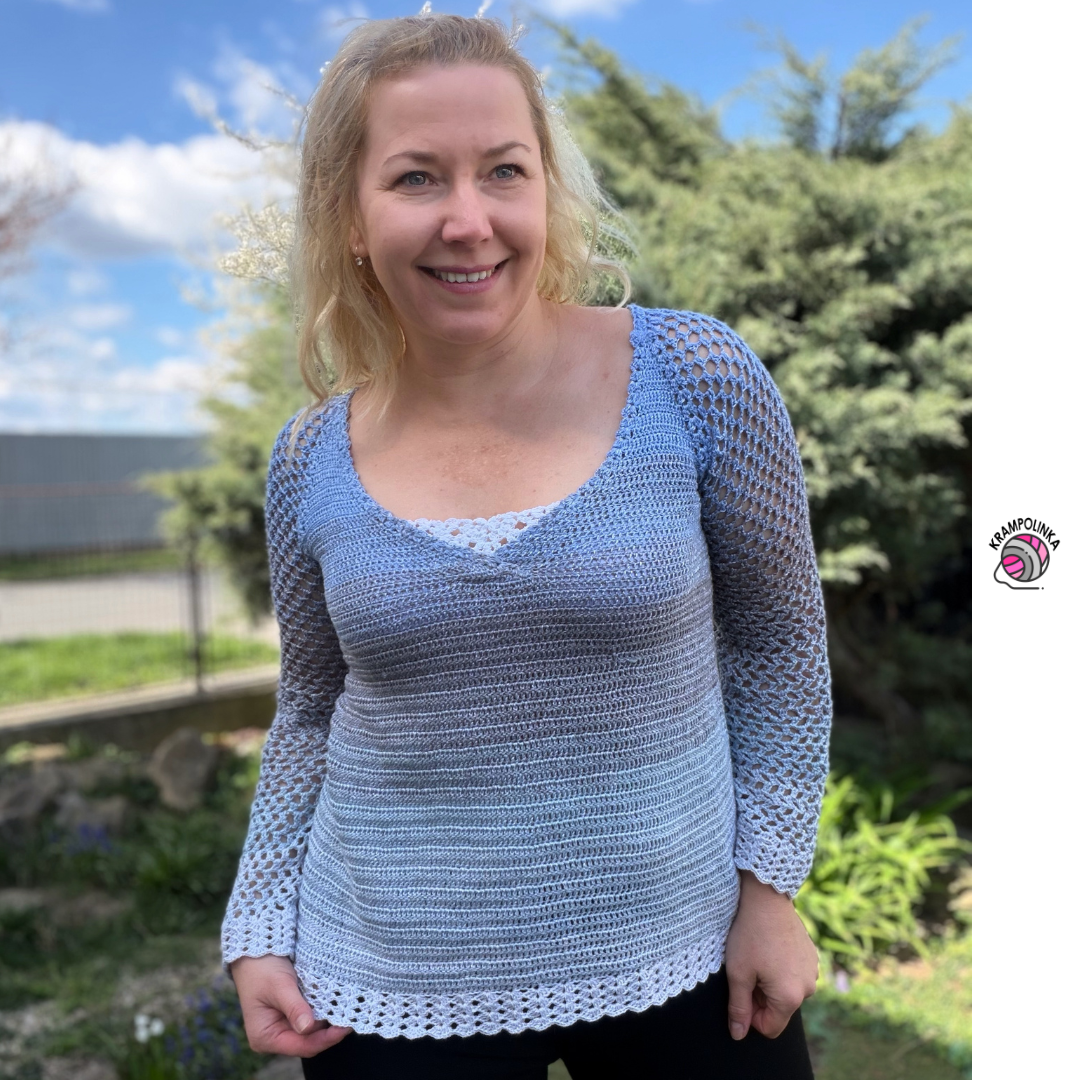
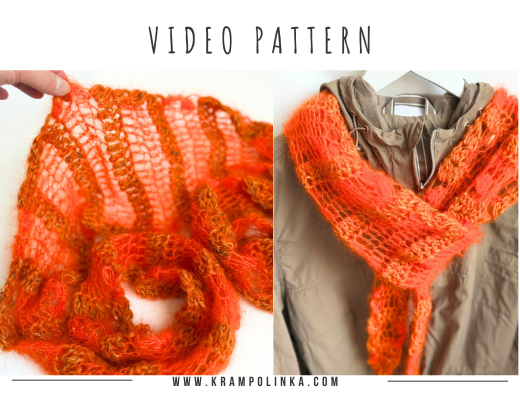
Blue Cardigan – soft, elegant and handmade.
-
-
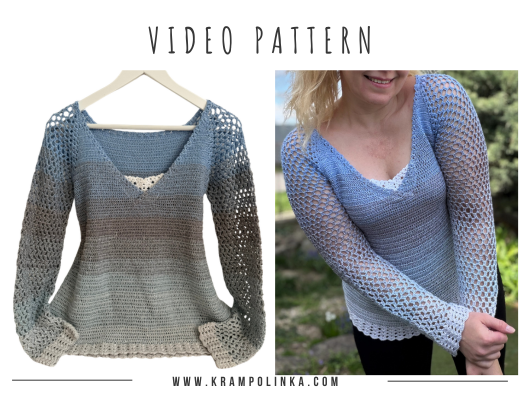
A crochet raglan top with a delicate V-neckline.
-

-
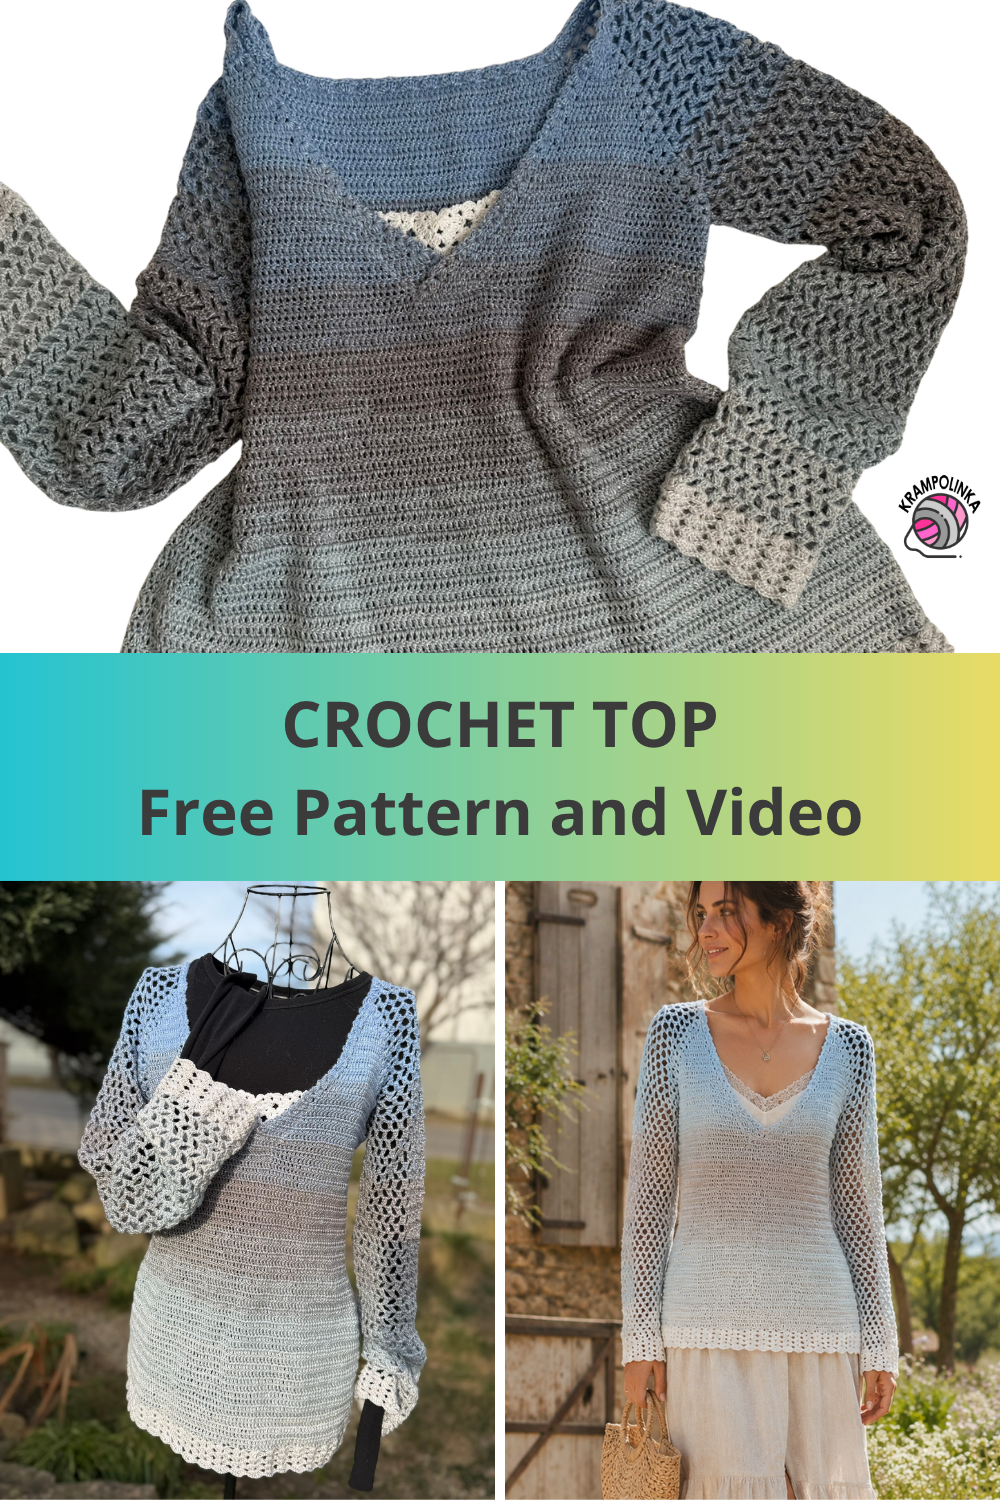
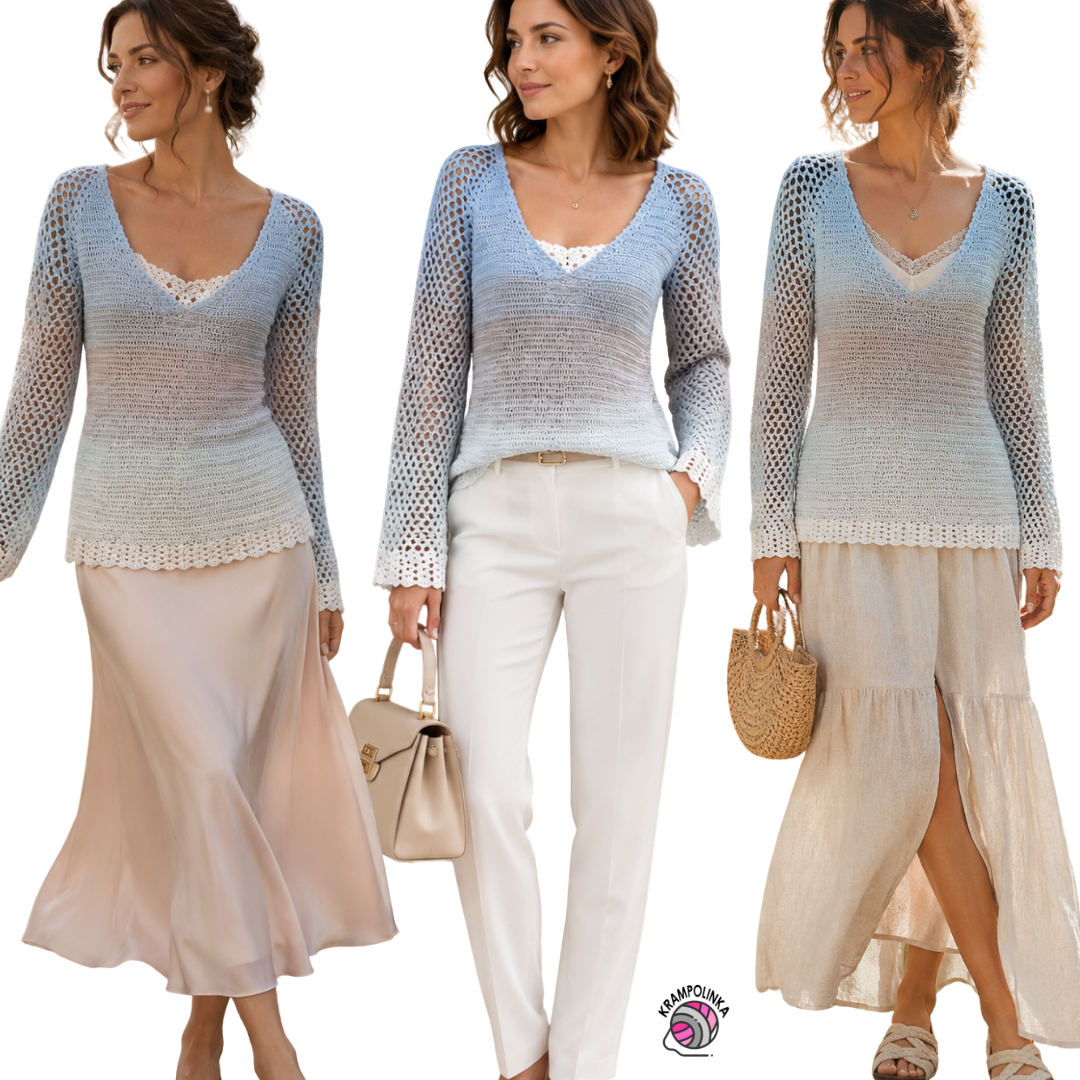
Lightweight crochet cardigan from a gradient yarn cake.
-
-
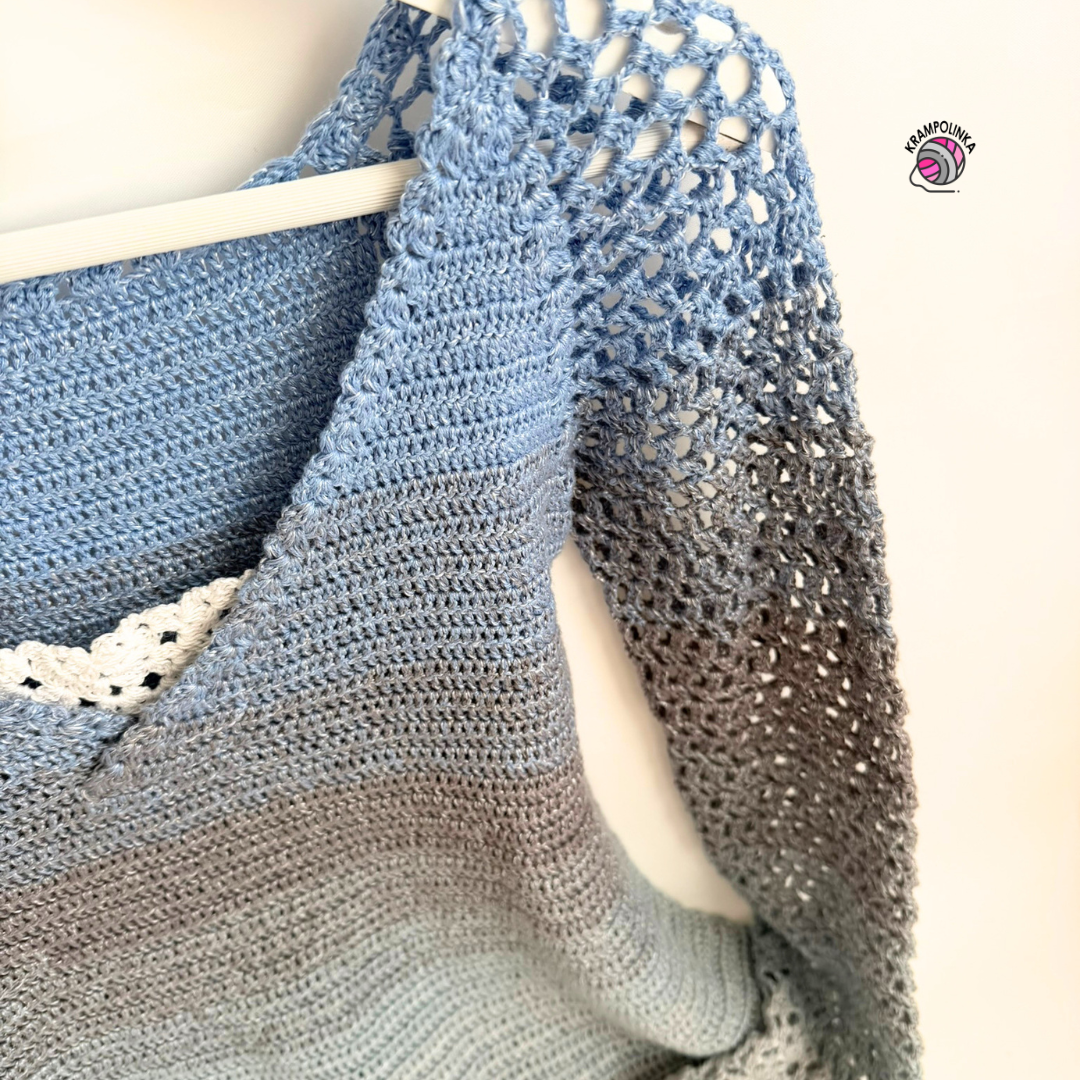
Handmade stitches, soft colours and a subtle shine.
-

-
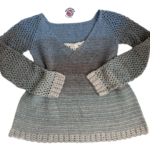
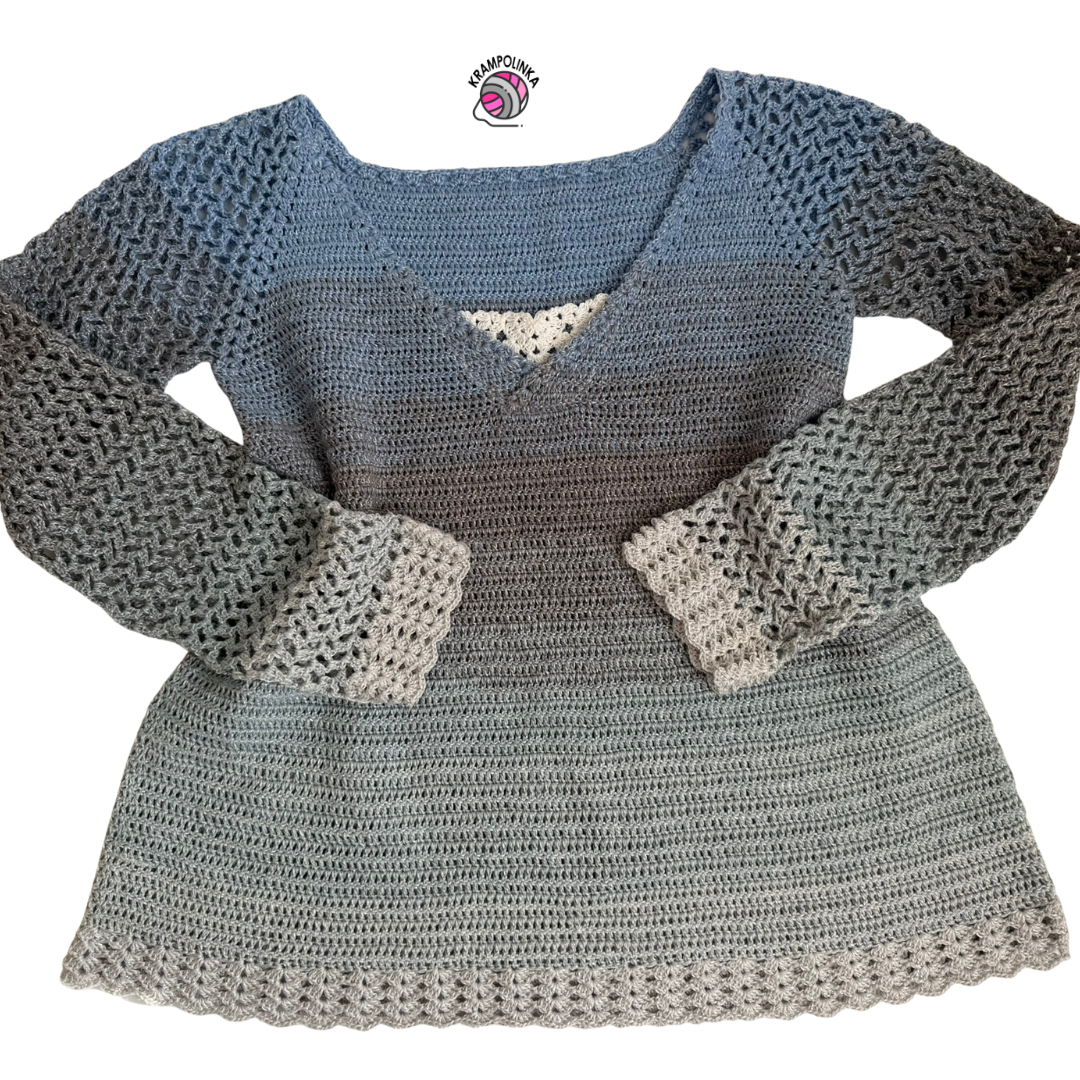
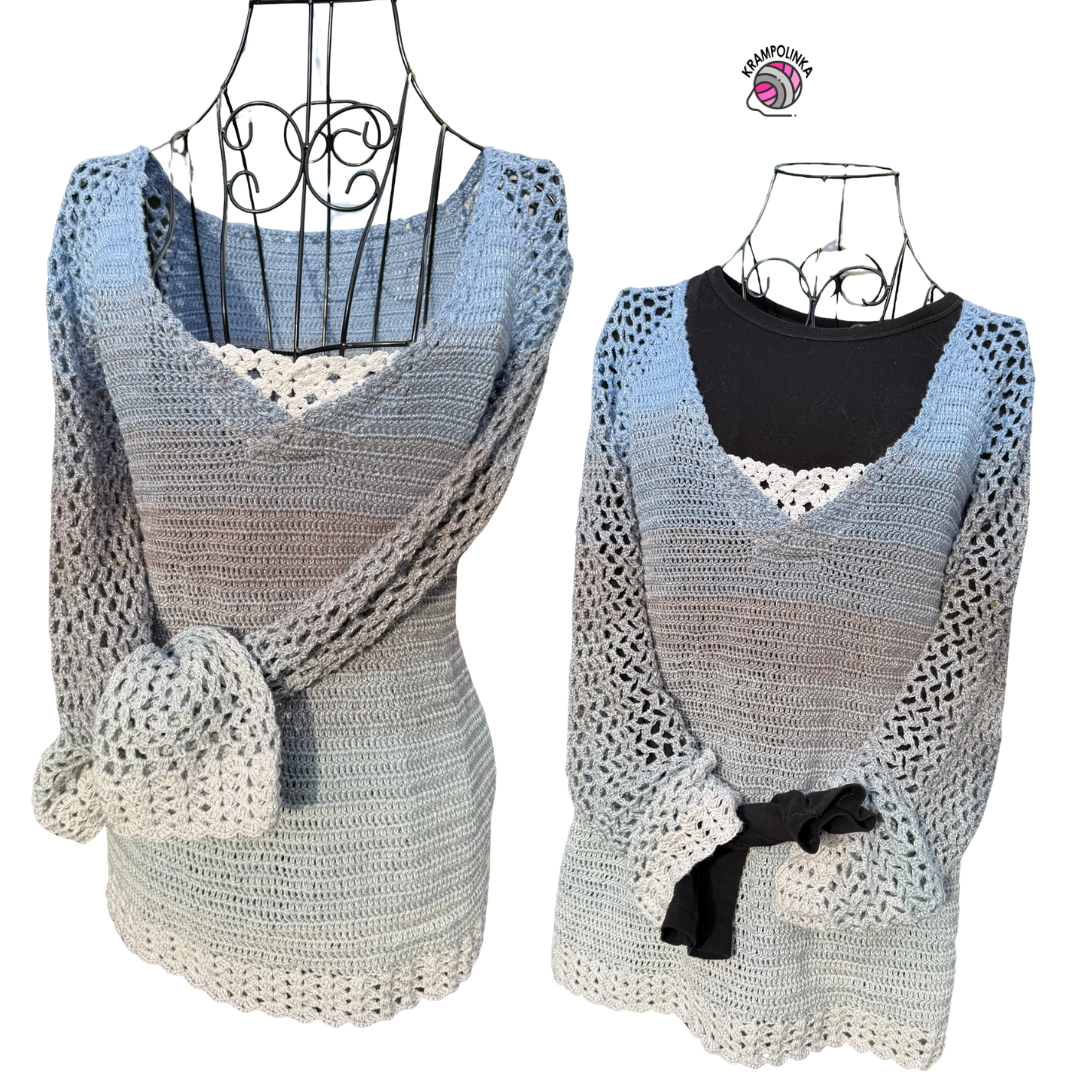
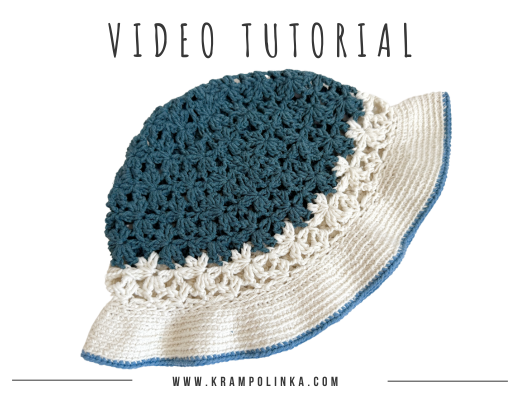
A year-round crochet piece for everyday styling.
-

-
Simple, feminine and full of crochet details.
-
-
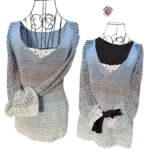
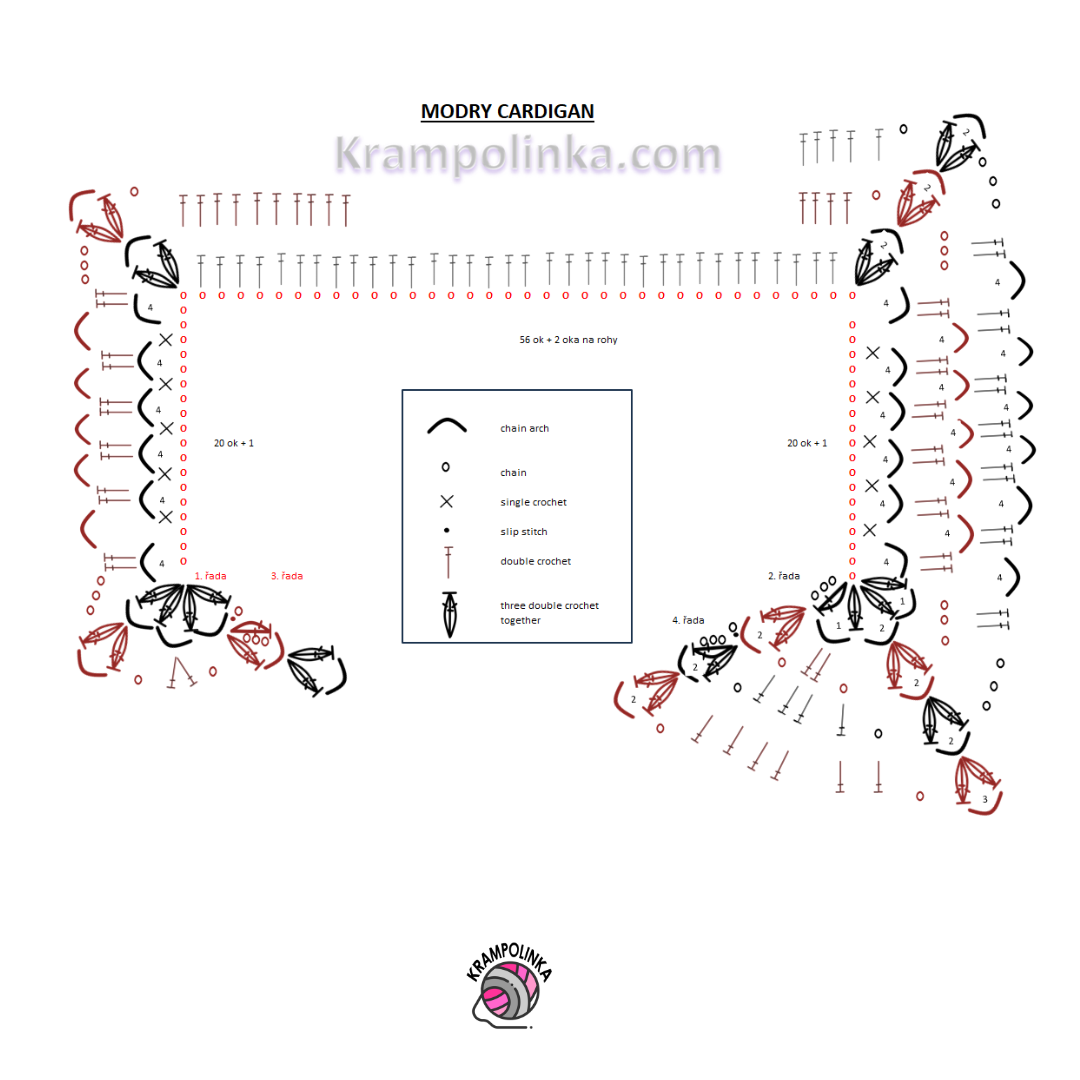
Yoke Modry Cardigan
-

-
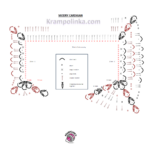
Pattern diagram
-
-
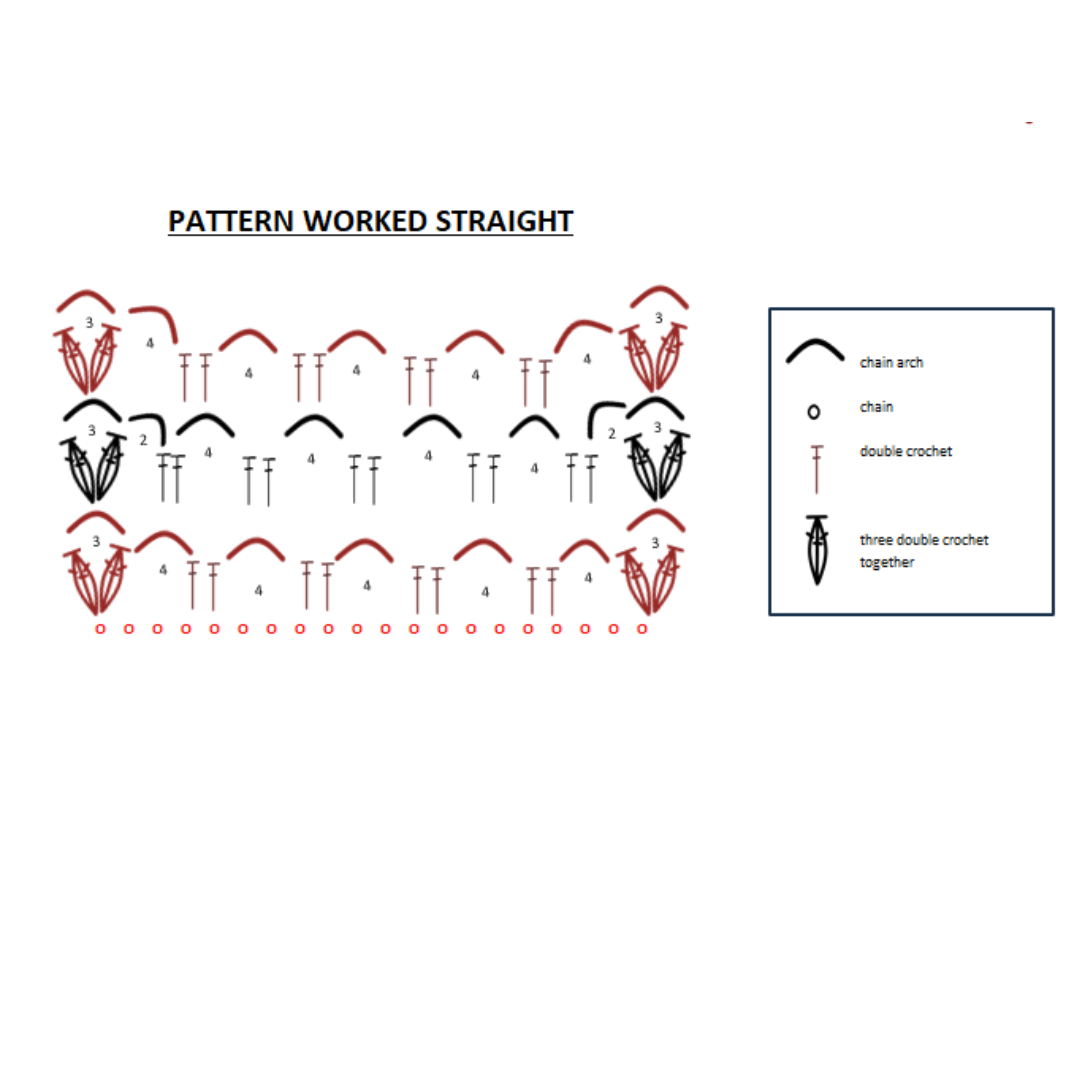
Sleeve pattern diagram
-

-
Sleeve Cuff Crochet diagram

No Comments