
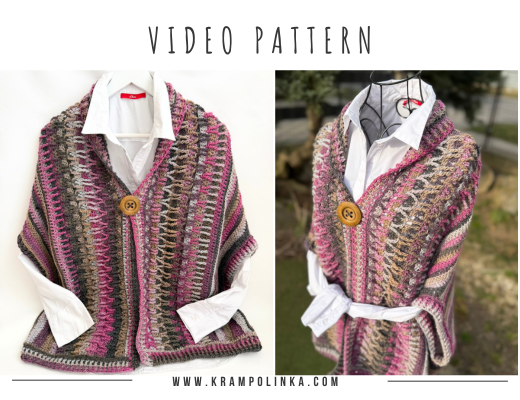
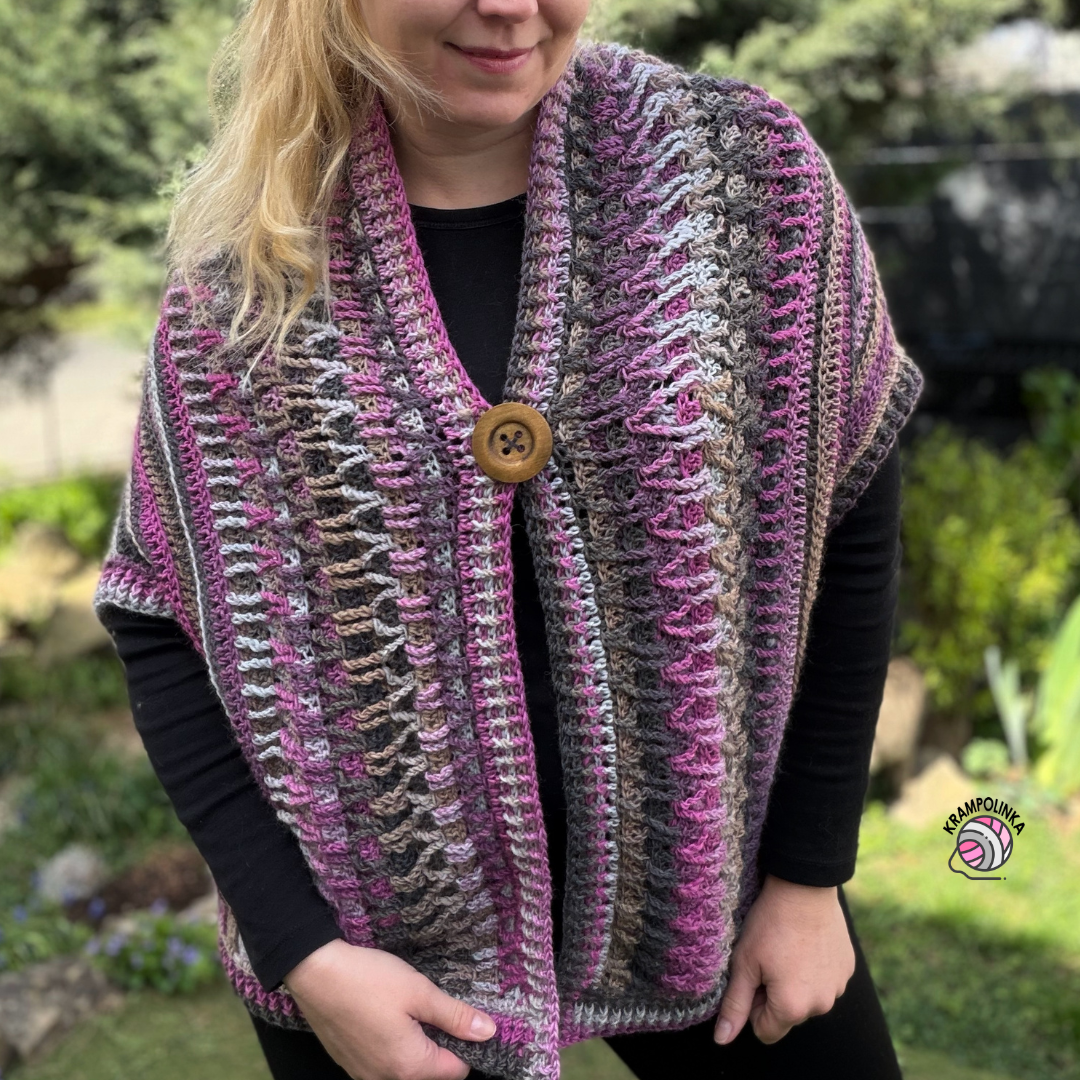
Comfortable vest made with the beautiful sock yarn Regia Virtuoso Color. The vest is crocheted in one piece in a “T” shape with minimal seaming. A relaxing stitch pattern, suitable even for beginners.
For the vest, I used the self-patterning sock yarn Schachenmayr Regia Virtuoso Color, made of 75% wool and 25% polyamide. One ball has 150 g and 375 metres. It is perfect for socks, but thanks to its quality and composition, it is also suitable for hats, scarves, cowls, sweaters, vests, blankets or skirts. Skirts especially benefit from this yarn, as they do not stretch out when sitting and the fabric does not wear thin at the back.
You can watch the yarn unboxing in the Povídání u klubíčka #119 podcast, and you can find the article here. The yarn comes in a beautiful range of colours and is available from Bavlnkarna.cz, Bavlnkaren.sk, Muziker, or Klubíčka od srdíčka.
-
- Easy one-piece crochet vest made with Regia Virtuoso Color yarn
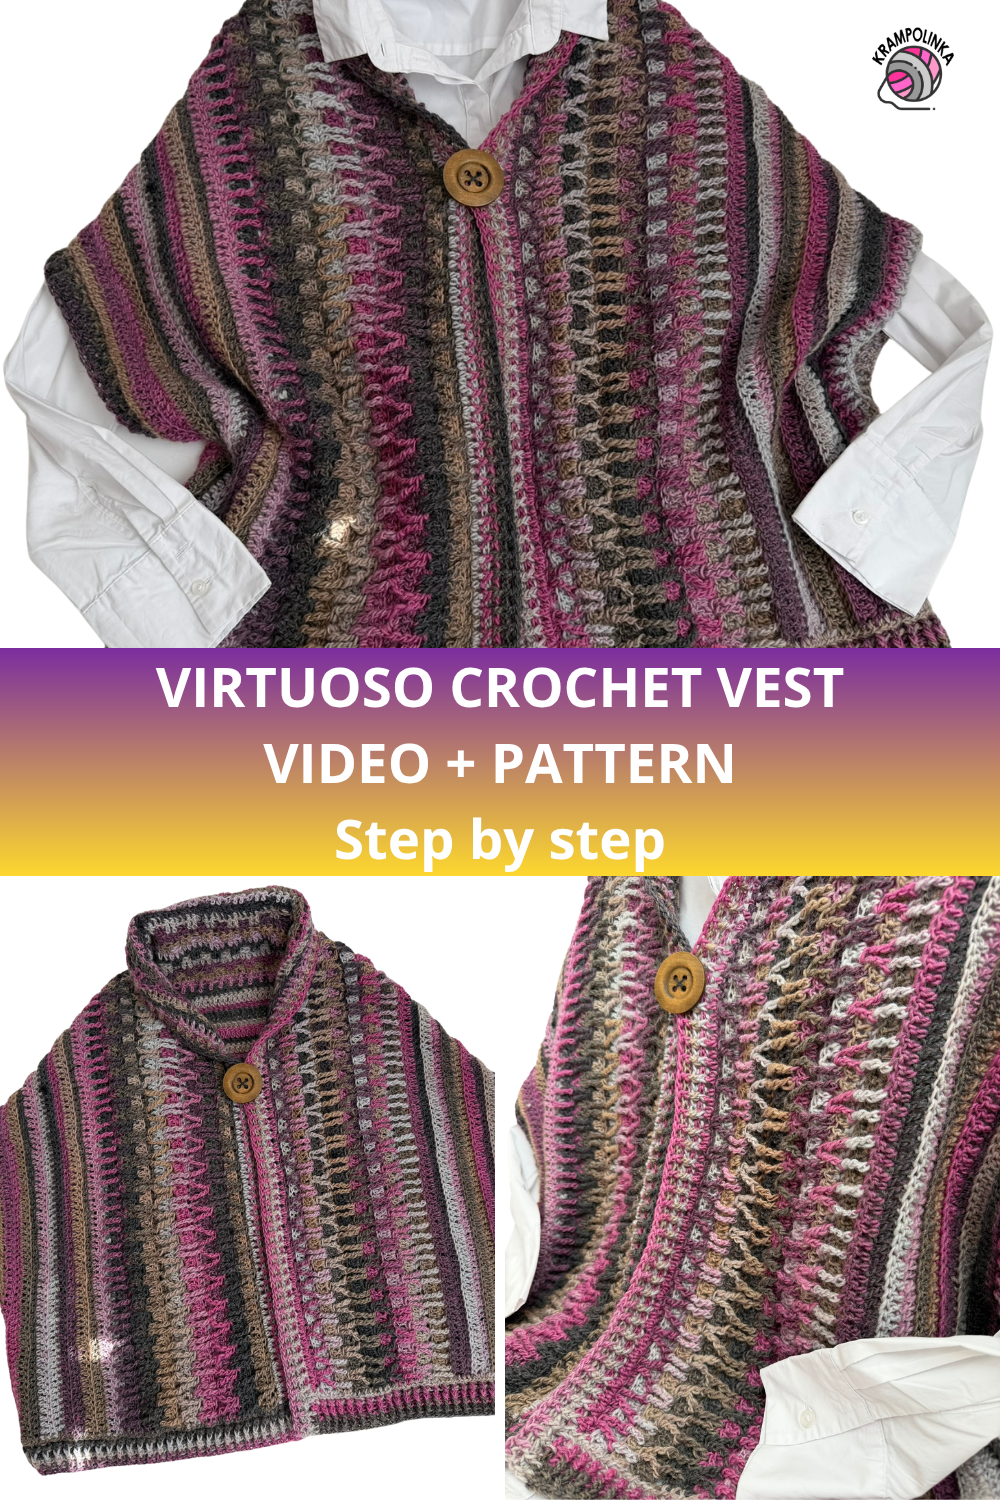
VIDEO TUTORIAL PREMIERE with automatically generated subtitles added. Did you know that you can slow down the video on YouTube and adjust it to your own crochet pace?
The cut of this vest is very simple, yet it requires some basic measuring so that the finished piece fits well and is comfortable to wear. The construction is based on one back panel, with the front panels then joined onto it, creating the typical “T” shape.
First, we crochet the back panel in rows, working back and forth. Its height should be approximately two thirds of the total front length of the vest. For example, if you are planning a front length of 60 cm, the back panel should measure about 40 cm in height. This ratio helps the vest sit nicely on the back without riding up or pulling.
The width of the back panel is just as important. It should be at least half of the hip circumference, plus approximately 10 cm extra for comfortable wear. For example, if the hip circumference is 112 cm, half of it is 56 cm, but the back panel should be crocheted to a width of at least 66 cm. This gives the vest a looser fit and makes it comfortable even when layered over other clothing.
Once the back panel is finished, fasten off the yarn and prepare the foundation for the front panels. At this stage, it is important to know your crochet gauge — that is, how many stitches correspond to 10 cm. Convert this number according to the height of the back panel, for example 40 cm, and crochet a foundation chain based on that measurement. The chain should correspond to this height. It is recommended to add approximately 5 extra stitches on each side so that the front panel has enough ease.
Then join the chain to the back panel. Start with a double crochet into the first stitch of the panel and continue working the stitch pattern across the entire back piece. At the end of the row, attach another chain of the same length as the one at the beginning. This creates the side sections that will form the front panels of the vest.
Continue crocheting in rows, working back and forth across the full width of the newly created shape. The newly added sections gradually extend the front panels. Crochet until you reach approximately half the width of the back panel, that is 66 : 2 = 33 cm. At this stage, the final “T” shape, which forms the basis of the whole construction, is already clearly visible.
As for the stitch pattern, the back panel and body of the vest are crocheted by alternating techniques: on the wrong side, work double crochets into the stitches, and on the right side, work double crochets into the back loop only. This creates a subtle texture and an interesting raised effect. The front section can also be enhanced with front post stitches, worked every other row. In combination with the variegated yarn, this creates a striking and visually attractive pattern. The vest borders are also made with post stitches, which give the edges firmness and a neat finish.
A great advantage of this cut is how easily it can be adjusted. To modify the size, simply work from your own measurements. Measure your hip circumference, divide it by two, and add approximately 10 cm — this gives you the width of the back panel. Then decide on the desired length of the vest and divide it into thirds. Crochet the back panel to two thirds of this length. To determine the correct chain length, it is essential to know your crochet gauge, meaning how many stitches fit into 10 cm.
This is the key to achieving accurate measurements so the vest fits exactly as intended.
I hope your Virtuoso Vest turns out beautifully and that you enjoy wearing your handmade piece. If you would like to inspire others or share your experience with crocheting or styling the vest, I would be very happy to see your photos. You can share your photos in the Krampolinka Facebook group. On Instagram, please use the hashtag #vestavirtuoso so others can easily find your projects. If you tag me in your creations made using my patterns, I can reshare them in my Instagram Stories to inspire others.
VIRTUOSO VEST
Yarn: Schachenmayr Virtuoso Color, shade 3077
Yarn usage: 4 balls
Hook: 5 mm and 6 mm
Measurements: width 66 cm; highest point of the front length, from neck to bottom hem, 73 cm; front length after folding the collar: approx. 65 cm
Size: 42–44; model height 168 cm; hip circumference 115 cm
Other materials: yarn needle with a large eye, decorative label, button 5 cm in diameter
Time needed: approx. 30 hours
Skill level: for adventurous beginners
ABBREVIATIONS
ch – chain stitch
dc – double crochet
sl st – slip stitch
dc blo – double crochet through the back loop only
trtr – triple treble crochet
FP trtr – front post triple treble crochet
Herringbone dc – herringbone double crochet: yarn over, insert the hook behind the middle strand of the previous stitch and behind the stitch of the next stitch, yarn over and pull through two loops, then yarn over and finish the double crochet. We use the herringbone dc as a covering stitch, creating an attractive seam effect.
FPdc – front post double crochet
BPdc – back post double crochet
-
- PIN A simple T-shape construction, textured details and minimal seaming.
BACK PANEL OF THE VEST, 5 mm hook
Row 1: Ch 94, turn.
Row 2: Ch 2 instead of the first dc, then dc into each stitch, turn. (95)
BACK PANEL OF THE VEST, 6 mm hook
Row 3: Ch 2 instead of the first dc, dc into dc on the wrong side. Count your stitches. Work the last dc into the top of the turning chain. Turn. (95)
Row 4: Ch 2 instead of the first dc, dc blo on the right side. Count your stitches. Work the last dc into the top of the turning chain. Turn. (95)
Note: I usually work the turning chain as a replacement for the first dc and then work a dc into the same stitch. At the end of the row, it may look as if one stitch has been skipped. If you count your stitches, you will know which stitch is the last one and where to work into the top of the turning chain.
Rows 5–32: Repeat Rows 3 and 4. At the end of the last row, fasten off the yarn.
Note: We have crocheted approx. 14 cm before moving on to the stitch pattern.
FRONT PANELS OF THE VEST, 6 mm hook
Row 33: Crochet a chain of 55 ch. Join the chain to the back panel by working a dc into the first top of the turning chain. Then continue across Row 33 with dc blo. At the end of the row, crochet a chain of 54 ch.
Row 34: Ch 2 instead of the first dc and insert the hook into the third chain from the hook. Continue working dc into the chains. Once you reach the back panel, continue working dc into dc. At the end of the back panel row, continue working dc into the chains. Count to make sure you have 55 dc on each newly added side section. (205) Turn.
Rows 35–44: Repeat Rows 3 and 4. At the end of each row, work the last dc into the top of the turning chain. Count your stitches. Turn.
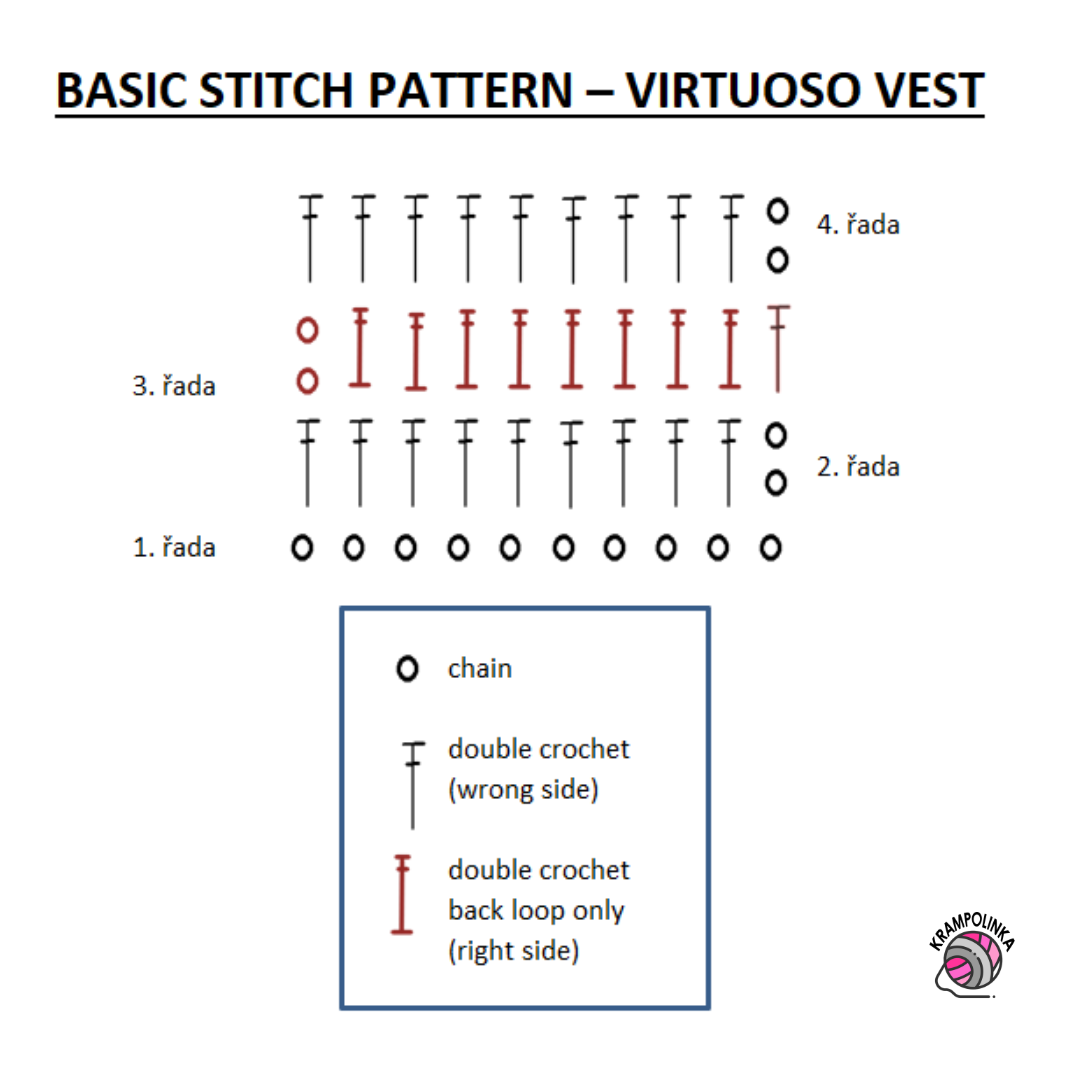
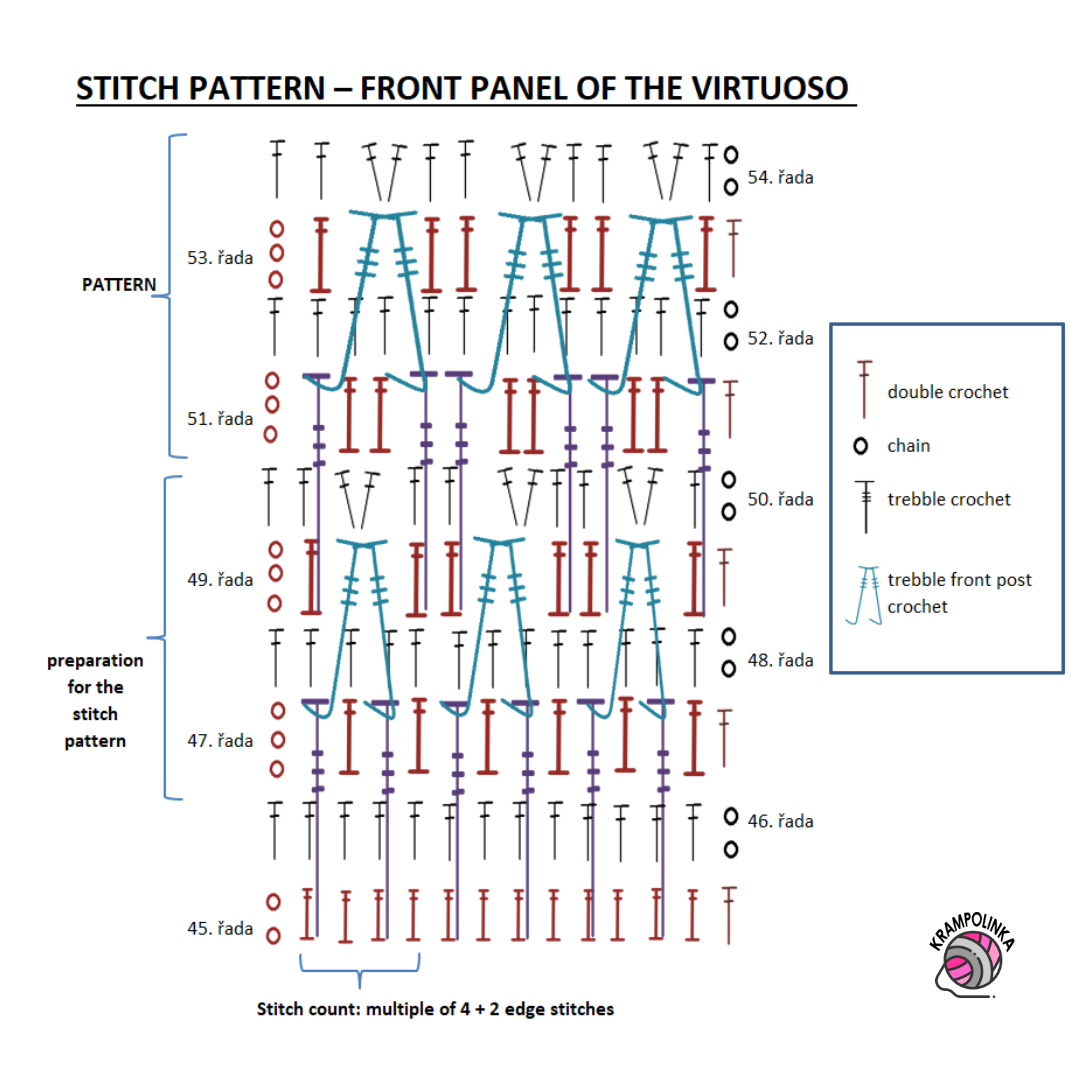
Rows 45–46: These two rows will be covered by the following stitch pattern. Work the pattern for Rows 3 and 4. In Row 45, increase to 206 stitches. In total, we need a stitch count divisible by 4, plus 2 edge stitches. (206) At the end of the row, work the last dc into the top of the turning chain. Count your stitches. Turn.
Note: We have crocheted approx. 14 cm.
FRONT PANEL STITCH PATTERN, 6 mm hook
The stitch pattern made with yarn-over and post stitches is optional. For beginners, I recommend continuing with the pattern from Rows 3 and 4 and crocheting until you reach the required measurements.
Row 47: In this row, we will work into the stitches of Row 46, placing the stitches around the front loop/strand of the stitches from Row 45. Ch 3–4 instead of the first stitch. Yarn over three times and insert the hook around the front strand of the stitch from Row 45, then work 1 trtr. Continue with dc blo into the next stitch from Row 46. Work 1 trtr around the front strand of the stitch from Row 45, working into every other stitch in this row. Work dc blo into a stitch from Row 46, also working into every other stitch in this row. At the end of the row, work 1 dc into the top of the turning chain. Turn.
Row 48: Ch 2–3 instead of the first dc. In this row, work dc into dc. Count your stitches. Turn.
Row 49: Ch 3–4 instead of the first stitch. Work dc blo into the first stitch. Crochet two FP trtr together, working them around two trtr stitches. If the work pulls in, crochet 1 ch as well. Skip two stitches on the wrong-side section and work dc blo into the next stitch. The pattern for this row is: dc blo, two FP trtr worked together around two trtr stitches, ch 1 optional, skip two stitches, dc blo into the next stitch. Repeat the pattern to the end of the row. At the end of the row, work 1 dc into the top of the turning chain. Turn.
Row 50: Ch 2–3 instead of the first dc. In this row, work 2 dc into the joined top of the post stitches, then dc into dc, dc into dc. Recount your stitches. (205) This is important in this row. Turn.
Row 51: Ch 3–4 instead of the first stitch. From this row onward, work the pattern over four stitches as follows: 1 trtr around the front strand of the stitch from Row 49, skip 1 stitch, dc blo and dc blo into the two dc that were worked into the joined top, 1 trtr around the front strand of the stitch from Row 49, skip 1 stitch. Repeat to the end of the row. End the row with 1 trtr and 1 dc into the top of the turning chain. Turn.
Row 52: Ch 2–3 instead of the first dc. In this row, work dc into dc. Count your stitches. Turn.
Row 53: Ch 3–4 instead of the first stitch. Work dc blo into the first stitch. Crochet two FP trtr together, working them around two trtr stitches. If the work pulls in, crochet 1 ch as well. Skip two stitches on the wrong-side section and work dc blo into the next stitch. The pattern for this row is: dc blo, two FP trtr worked together around two trtr stitches, ch 1 optional, skip two stitches, dc blo into the next stitch. Repeat the pattern to the end of the row. At the end of the row, work 1 dc into the top of the turning chain. Turn.
Row 54: Ch 2–3 instead of the first dc. In this row, work 2 dc into the joined top of the post stitches, then dc into dc, dc into dc. Recount your stitches. (205) This is important in this row. Turn.
Rows 55–62: Repeat Rows 51–54. Finish with a row of dc into dc, dc into dc, and 2 dc into the joined top. Fasten off the yarn.
Note: The width of the panel without the border is approx. 31 cm.
JOINING THE SIDES, 6 mm hook
Lay the “T”-shaped panel flat in front of you. Fold the extending sections over and shape the vest. Turn the work to the wrong side and join the side of the vest on the wrong side to a height of 22 stitches/rows.
Work two loose slip stitches into each horizontal row, inserting the hook into the edge stitch of the back panel and into the stitch of the front panel. Try the vest on. Do not fasten off the yarn; continue with the sleeve border.
Note: The joined section measures approx. 14 cm in height.
SLEEVE BORDER, 5–6 mm hook
Row 1: Turn the work to the right side. Ch 2 instead of the first dc. Work herringbone dc; see video. Work two herringbone dc into each horizontal row and one herringbone dc into each stitch. This type of stitch creates a “camouflaged” seam. Close the row with a sl st.
Rows 2–4: Ch 2 instead of the first dc. Then alternate FPdc and BPdc. Close the row with a sl st. Work on the right side only. In the last row, fasten off the yarn. Repeat the side joining and sleeve border on the opposite side.
BOTTOM BORDER, 6 mm hook
Row 1: Join the yarn in the bottom corner of the front panel. Work on the right side. Ch 2 instead of the first dc. Work herringbone dc; see video. Work two herringbone dc into each horizontal row. If the work starts to pull in, you can use the sequence 2 herringbone dc – 3 herringbone dc. At the end of the row, turn and work back.
Row 2: Ch 2 instead of the first dc, then alternate FPdc and BPdc. End the row with 1 dc into the top of the turning chain. Turn.
Rows 3–5: Ch 2 instead of the first dc, then work FPdc and BPdc as the stitches appear. End the row with 1 dc into the top of the turning chain. Turn. In the last row, do not fasten off the yarn; use it to continue crocheting the front border.
NECKLINE BORDER, 6 mm hook
Row 1: Work on the right side. Ch 2 instead of the first dc. At the beginning, work 2 dc into each horizontal row of the bottom border. Once you reach the row of double crochets, start alternating FPdc and BPdc. At the end of the row, switch back to working 2 dc into each horizontal row of the bottom border. Finish with 1 dc into a stitch. Turn.
Row 2: Ch 2 instead of the first dc, then work FPdc and BPdc as the stitches appear. If you want to make a buttonhole, skip two post stitches on the left side of the panel, either in the lower or upper part of the panel, and replace them with 3–4 chain stitches. Then continue working FPdc and BPdc. End the row with 1 dc into the top of the turning chain. Turn.
Row 3: Ch 2 instead of the first dc, then work FPdc and BPdc as the stitches appear. At the buttonhole, replace the skipped post stitches with double crochets. End the row with 1 dc into the top of the turning chain. Fasten off the yarn.
FINISHING
Weave in all loose ends. Sew on a decorative button or use a decorative clasp. Add a label for decoration.
Copyright Notice
This pattern is for personal use only. For commercial use, please contact me directly. Always include the source credit: www.krampolinka.com. The pattern is designed specifically for this yarn, hook size, and my personal tension. If you use a different yarn, hook, or tension, your final product may vary in size or shape.
Enjoy this free pattern and you can follow my latest projects, tutorials, ideas, reviews, video podcasts, tips, and tricks:
- Krampolinka YouTube videos (subtitled since 2024)
- Krampolinka Instagram
- Krampolinka FB group
-
- Sleeve border with textured ribbing

-

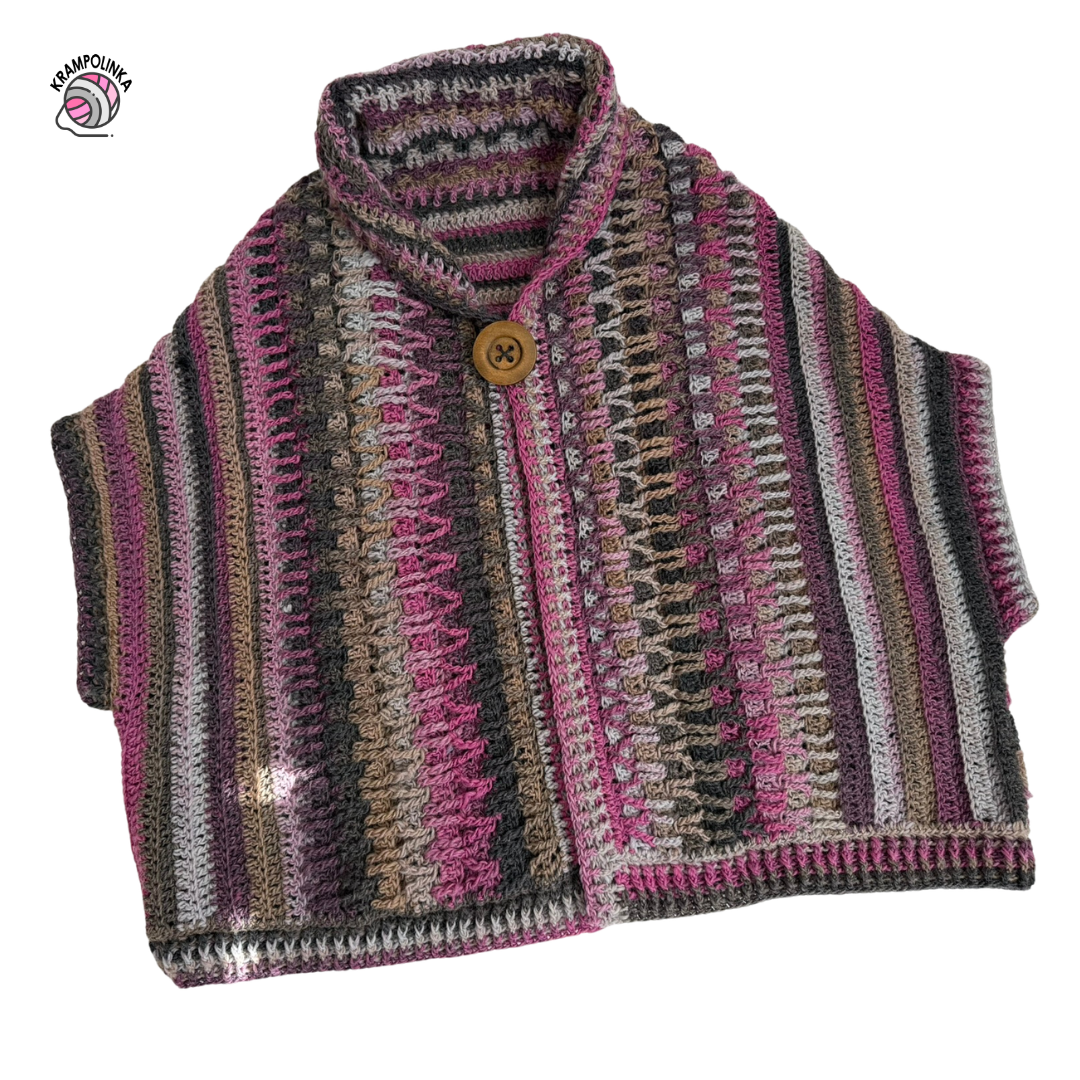
- Finished vest with decorative button
-

- Back panel and T-shape construction

-
- Front view of the Virtuoso Vest
-

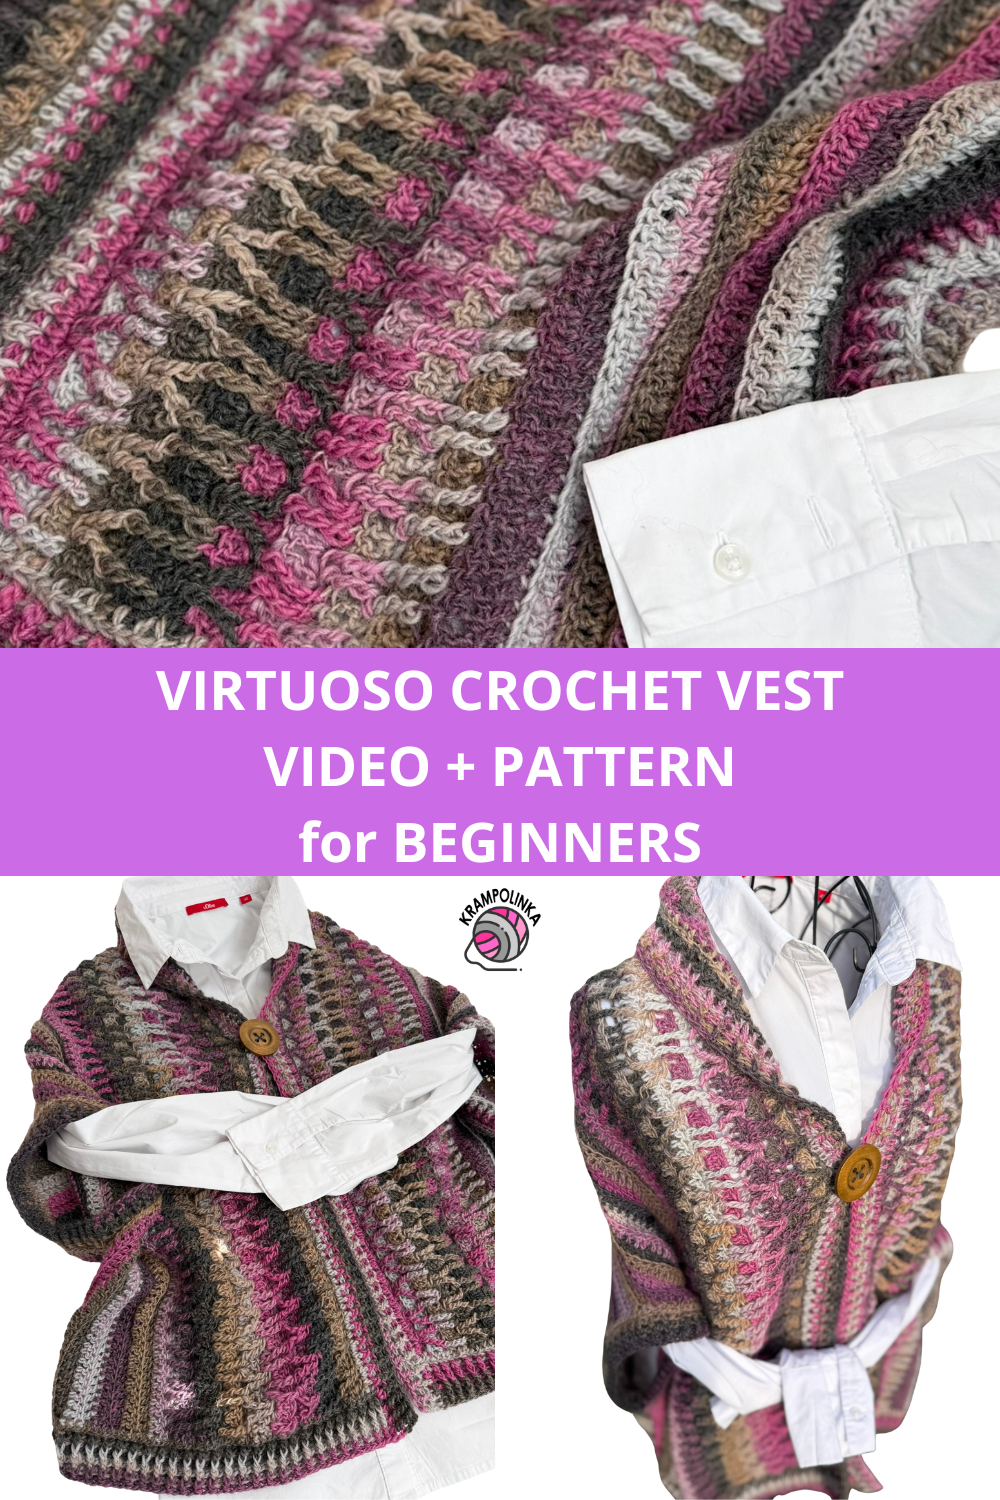
- Front panel stitch pattern detail

-
- Neckline and front border

-
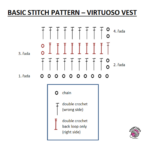
- Basic crochet pattern diagram
-
- Textured crochet pattern diagram
https://youtu.be/-7guy2bII6k?si=T4qfs7dNI5jEC7Xy
No Comments