

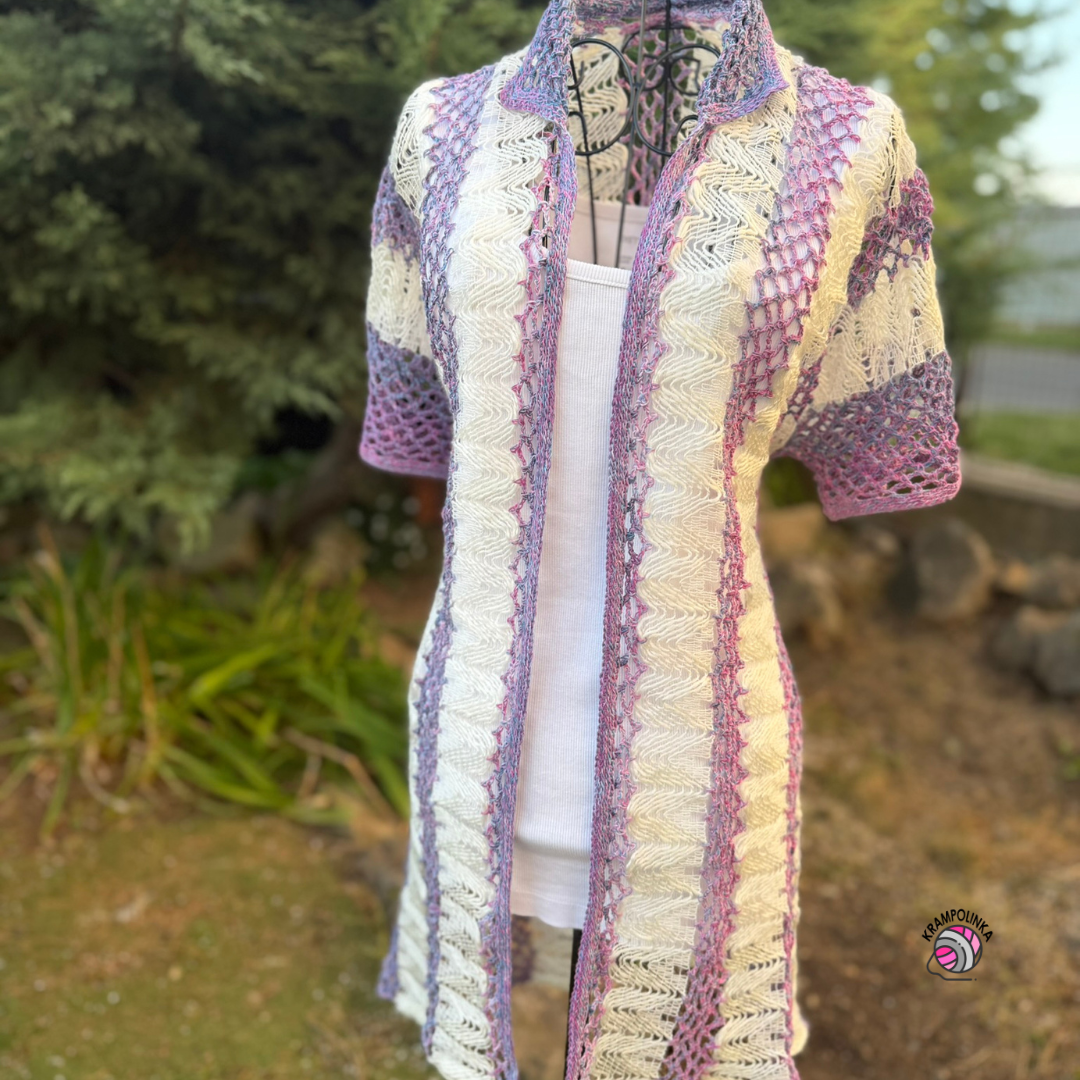
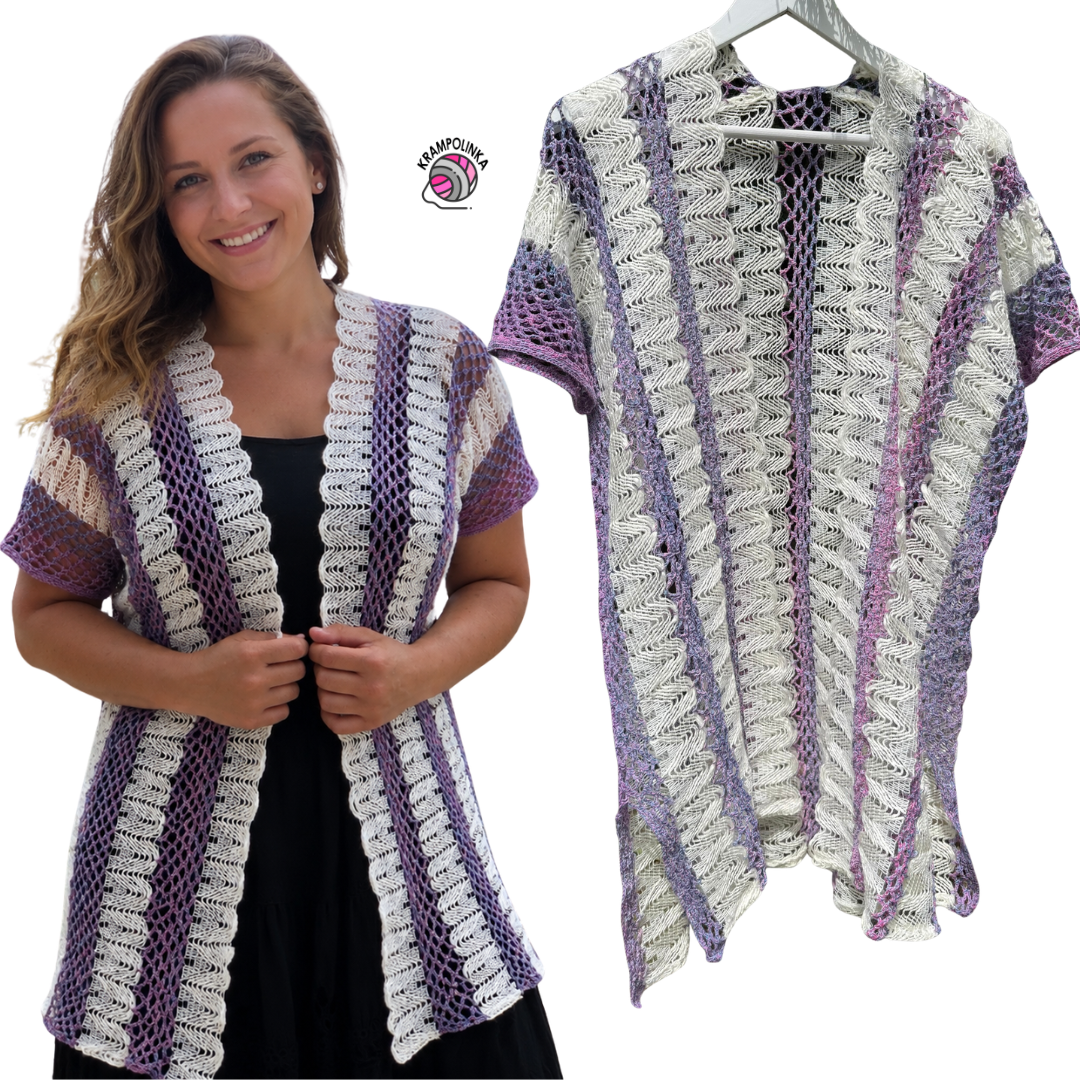
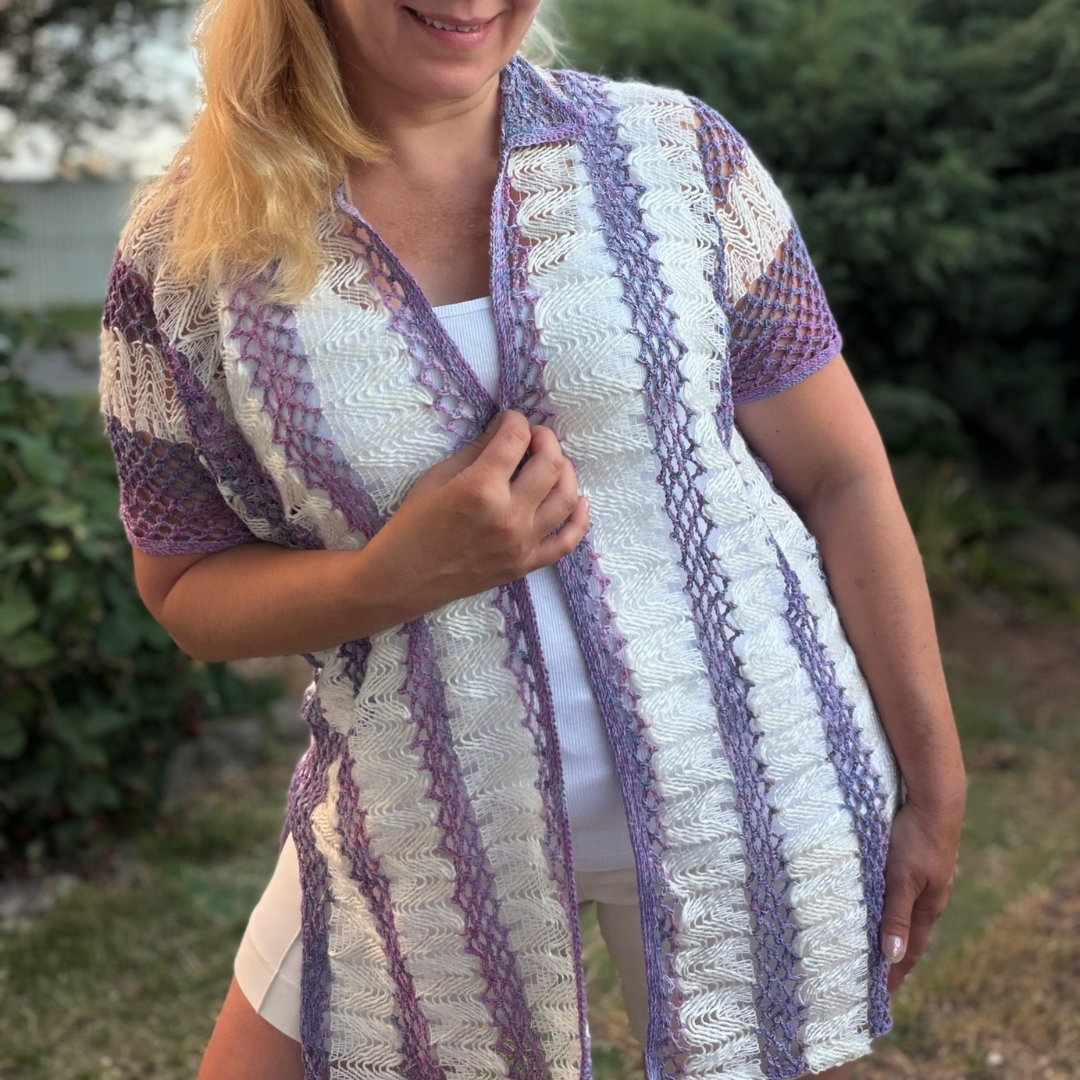
Some patterns come together through long hours of planning, testing, and several rounds of unraveling. Others are born completely spontaneously – and that is exactly how this crochet shirt made from Vlnika Megan and Christie yarns came to life.
One day, I was walking past a cupboard where I had two balls of yarn stored, each from a completely different world. One was bold and richly textured, while the other was delicate and lightweight. At first glance, no one might think of combining them, but it was precisely this contrast that caught my attention. I decided to see what would happen if I used them together in one project.
Vlnika Megan is a ruffle yarn. One ball weighs 100 g and contains 100 metres of yarn. Its composition is 46% acrylic, 40% wool and 14% polyester. It can be used as a decorative trim, or the straight edge of Megan can be crocheted together to create a ruffled scarf. I used Megan as wings for the Twisted Fairy – video tutorial here. I used slightly less than one ball for the shirt. The yarn is currently on clearance and comes in a variety of bright colours, so you might still be able to find one.
-
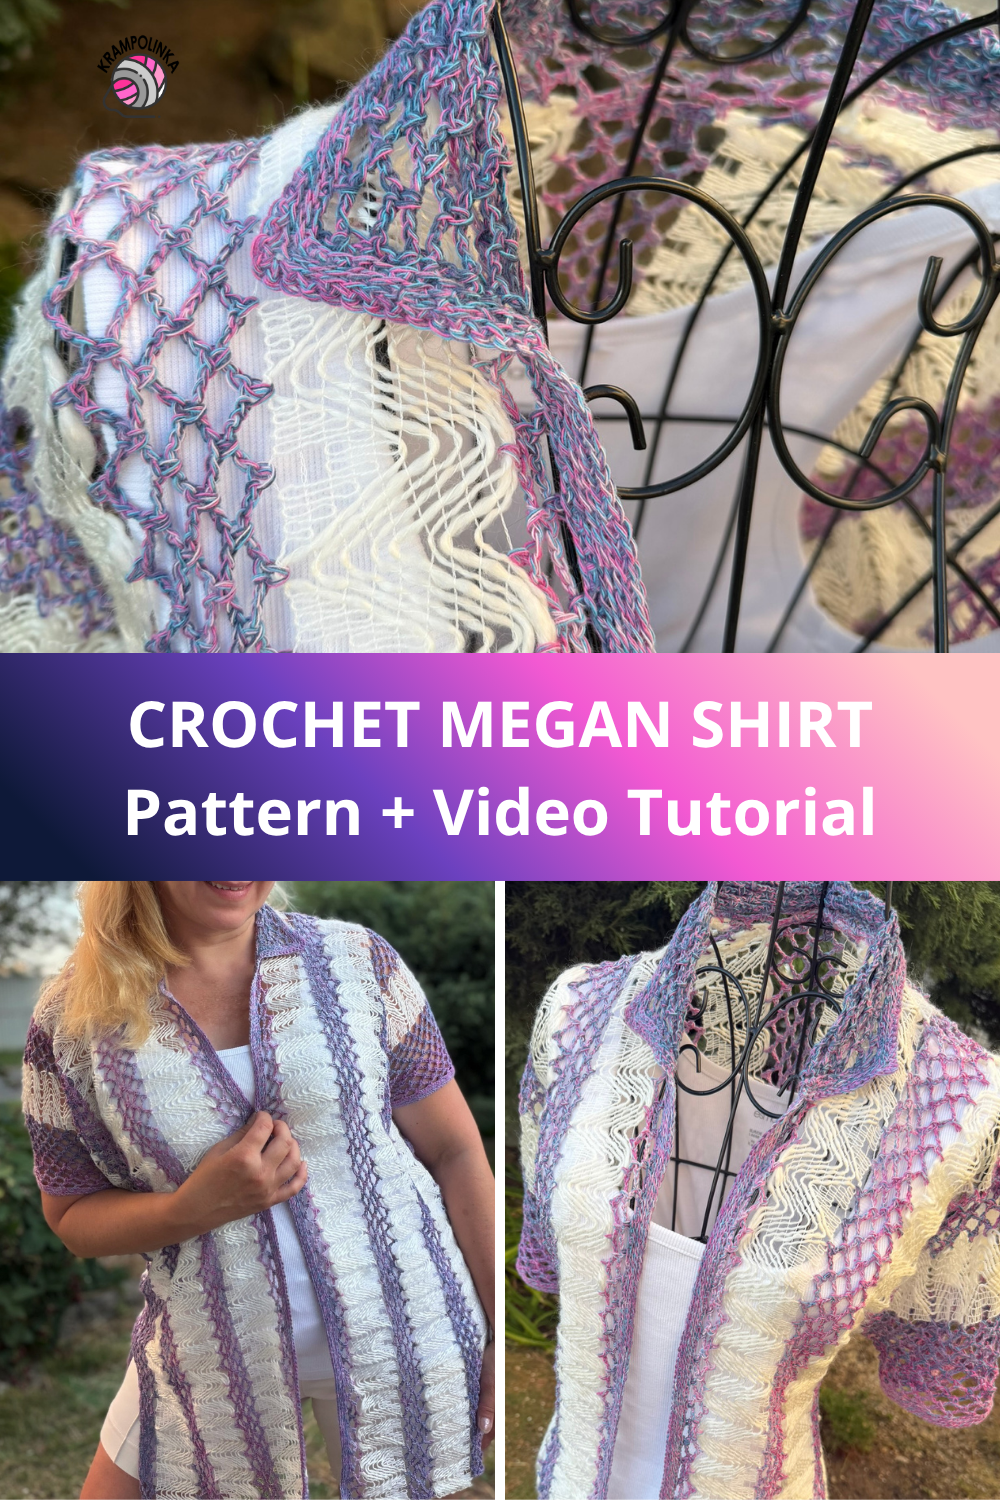
- SAVE the PIN – Crochet Megan Shirt
The second yarn is Vlnika Christie, a four-ply yarn made from 95% cotton and 5% polyester. One ball weighs 150 g and contains 630 metres of yarn. This yarn is no longer manufactured, but I recommend replacing Christie with a three- or four-ply gradient yarn, for example YarnArt Flowers UniColor, made from 55% cotton and 45% polyacrylic, 50 g/200 m.
VIDEO TUTORIAL PREMIERE – PART I – Includes instructions for joining the strips and making the front and back panels. You can slow down the video directly on YouTube and turn on subtitles.
VIDEO TUTORIAL PREMIERE – PART II – Includes instructions for joining the panels, making the sleeves, collar and edging. You can slow down the video directly on YouTube and turn on subtitles.
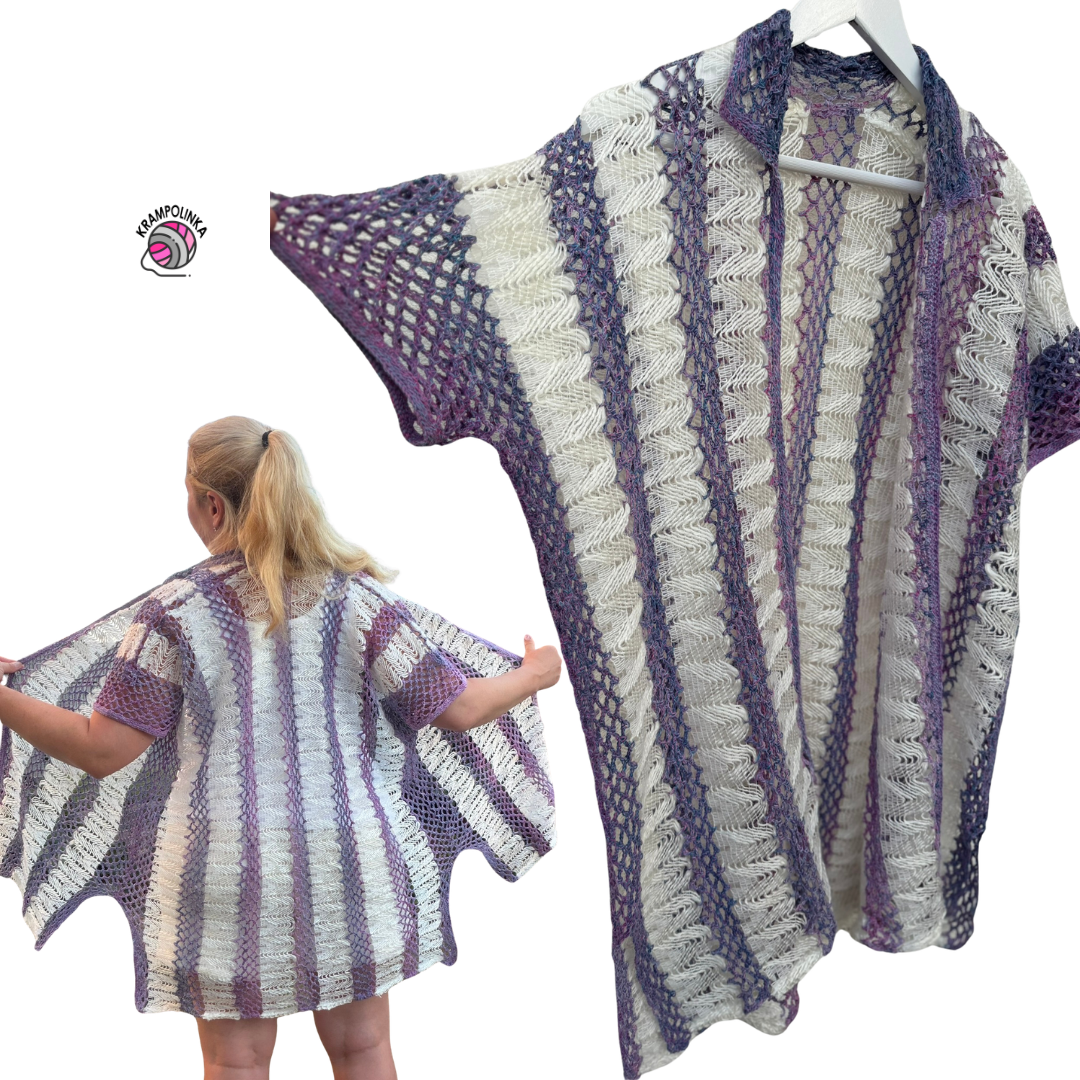
As for the shirt, it consists of two front panels and one back panel. Cut equal-length strips of Megan yarn and join them with a mesh stitch pattern. Three strips form one half of the front, another three strips form the second half of the front, and six strips form the back panel. Skip the first and last loop of the Megan yarn, as these will be secured later to prevent the strips from unravelling. The shoulder sections can either be joined with the mesh stitch pattern or sewn together (I recommend sewing). I position the wavy edges of the front panels towards the neckline.
Join the side seams using the mesh stitch pattern. The shirt/tunic has a high side slit at the bottom. Leave enough space for the armholes so that the sleeves remain wide and airy. Finally, crochet around the neckline and, if you are making the shirt version, add a collar.
A major advantage of this design is its versatility. You can easily adjust the size by changing the number of strips, their length, and the number of mesh stitch rows between them. This allows you to create a shorter shirt, a longer beach tunic, or a looser summer top for everyday wear. The shirt/tunic is also surprisingly quick to crochet. The Megan yarn strips are quite wide and the mesh stitch worked with Christie yarn grows quickly. So if you are looking for an original last-minute summer outfit, this project could be a great choice.
I hope you enjoy making your Megan shirt or tunic. If you would like to inspire others or share your experience with crocheting or styling the shirt/tunic, I would be very happy to see your photos. You can share your photos in the Krampolinka Facebook group. On Instagram, please use the hashtag #kosilemegan so others can easily find your projects. If you tag me in your creations made using my patterns, I can reshare them in my Instagram Stories to inspire others.
MEGAN SHIRT
Yarn: Vlnika Megan, Vlnika Christie / YarnArt Flowers Unicolor
Yarn consumption: 1 ball of Megan, 1 ball of Christie or 3 balls of YarnArt Flowers Unicolor
Hook: 3 mm
Measurements: 63 cm wide, 81 cm long
Other supplies: Large-eye yarn needle, sewing needle and thread matching the Megan yarn, decorative label
Estimated time: 12 hours
Skill level: Beginner
Abbreviations:
CH – chain
SC – single crochet
DC – double crochet
HSC – herringbone single crochet
-
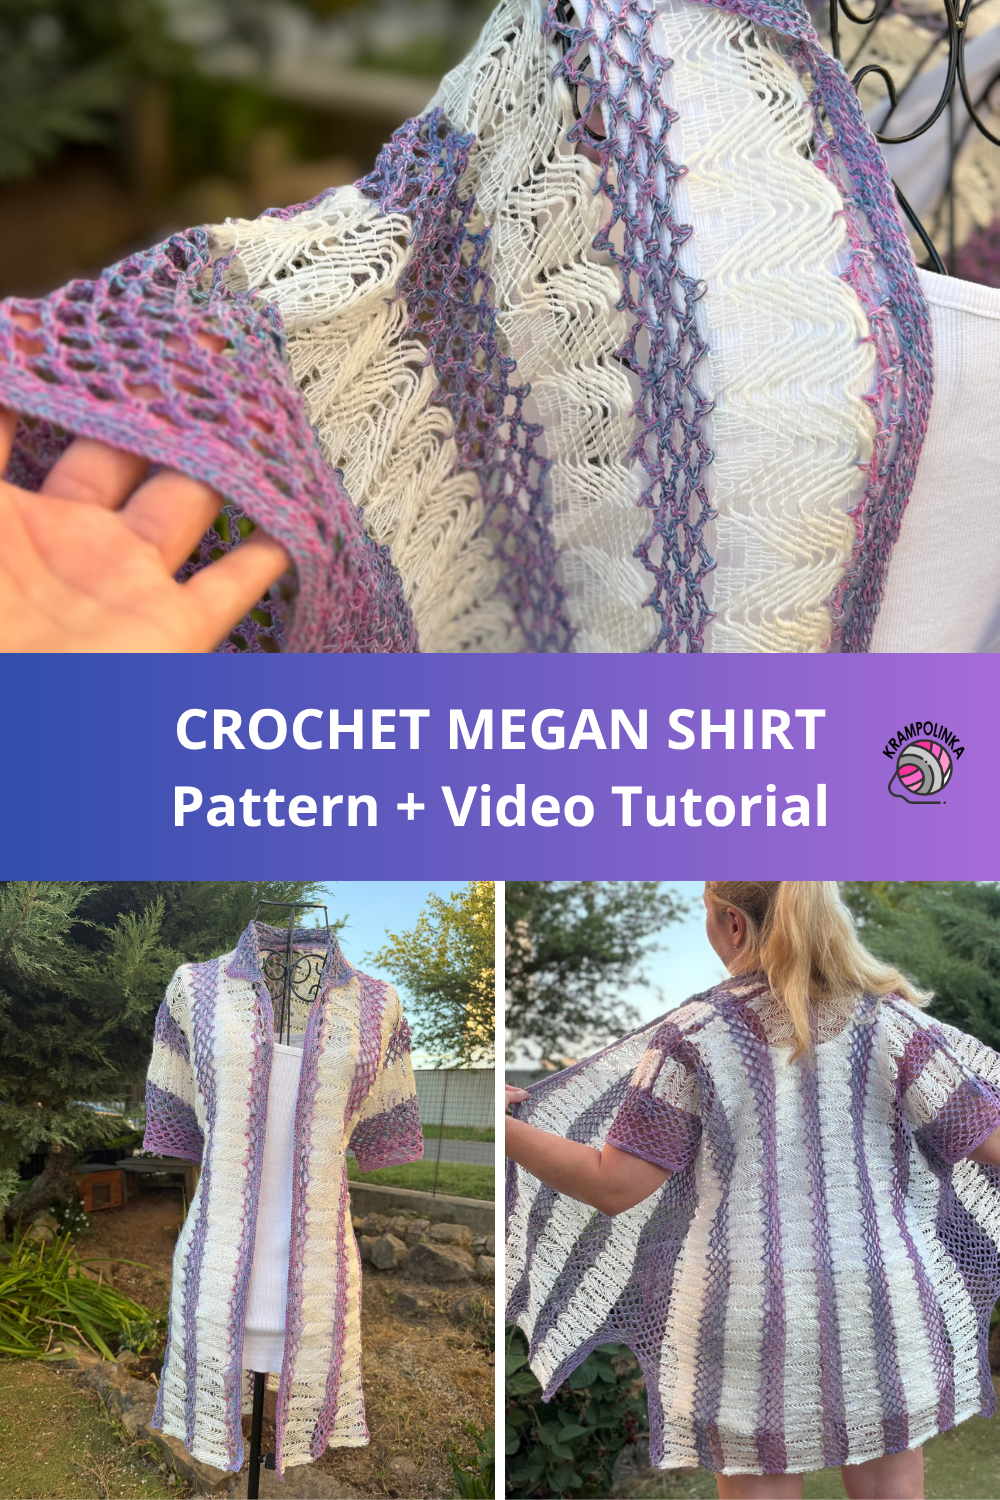
- SAVE the PIN – Crochet Megan Shirt
FRONT PANELS, 3 mm hook
Row 1: Cut 3 strips of Megan yarn, each with 23 arches (91 cm). Skip the first arch and work into the straight side of the strip. Ch 1 instead of sc into the arch and sc into the same place. Then ch 5, insert the hook into the opening and work 1 sc, ch 5. Continue in the pattern: sc around the arch and ch 5, sc into the opening of the strip, ch 5. At the end of the row, finish in the second-to-last arch and work 2 sc. Turn.
Row 2: Start the row with a shortened arch, i.e. ch 3 instead of the first dc, dc into sc, ch 3 and sc under the arch. Then ch 5 and sc under the arch. At the end of the row, work a shortened arch, i.e. ch 3 and dc into sc, dc into the turning chain. Turn.
Row 3: Ch 1 instead of sc, sc into the first dc, sc into the second dc. Ch 5 and sc under the arch. Finish the row with sc into dc and sc into dc. Turn.
Row 4: Start the row with a shortened arch, i.e. ch 3 instead of the first dc, dc into sc, ch 3 and sc under the arch. Then ch 5 and sc under the arch. At the end of the row, work a shortened arch, i.e. ch 3 and dc into sc, dc into the turning chain. Turn. Take the second Megan strip with 23 arches and join it in Row 5.
Row 5: Ch 1 and sc into dc, ch 1, take the strip and work into the arched side in a zigzag manner. Skip the first arch of the new strip and insert the hook around the strand. Work 1 sc and another sc into the same place. Ch 3 and return to the mesh pattern; insert the hook under the complete 5-ch arch and work 1 sc. Ch 3, insert the hook around the third strand at the tip of the arch (use the third strand to make the join stronger) and work 1 sc.
Then ch 3 and sc under the 5-ch arch, ch 3 and sc around the strand of the new strip, ch 3 and sc under the 5-ch arch, ch 3 and sc around the third strand at the tip of the arch.
Repeat to the end of the row. At the end of the row, work sc into dc, ch 3 and sc around the strand of the second-to-last arch of the new strip, ch 3 and sc into the turning chain, then finish with dc around the strand of the second-to-last arch of the new strip.
Note: Join 3 strips together; you will have 2 mesh sections.
Row 1: Work the final mesh section onto the straight side of the strip. Skip the first arch and work into the straight side of the strip. Ch 1 instead of sc into the arch and sc into the same place. Then ch 5, insert the hook into the opening and work 1 sc, ch 5. Continue in the pattern: sc around the arch and ch 5, sc into the opening of the strip, ch 5. At the end of the row, finish in the second-to-last arch and work 2 sc. Turn.
Rows 2–4: Same as Rows 2–4 above.
Row 5: Same as Row 3. Fasten off.
Note: Arrange the front panels so that the arched edge faces the neckline. Then secure the unused edge arches of the Megan yarn. Make sure that the seams are on the wrong side.
BACK PANEL, 3 mm hook
Row 1: Cut 6 strips of Megan yarn, each with 23 arches (91 cm). Skip the first arch and work into the straight side of the strip. Ch 1 instead of sc into the arch and sc into the same place. Then ch 5, insert the hook into the opening and work 1 sc, ch 5. Continue in the pattern: sc around the arch and ch 5, sc into the opening of the strip, ch 5. At the end of the row, finish in the second-to-last arch and work 2 sc. Turn.
Row 2: Start the row with a shortened arch, i.e. ch 3 instead of the first dc, dc into sc, ch 3 and sc under the arch. Then ch 5 and sc under the arch. At the end of the row, work a shortened arch, i.e. ch 3 and dc into sc, dc into the turning chain. Turn.
Row 3: Ch 1 instead of sc, sc into the first dc, sc into the second dc. Ch 5 and sc under the arch. Finish the row with sc into dc and sc into dc. Turn.
Row 4: Start the row with a shortened arch, i.e. ch 3 instead of the first dc, dc into sc, ch 3 and sc under the arch. Then ch 5 and sc under the arch. At the end of the row, work a shortened arch, i.e. ch 3 and dc into sc, dc into the turning chain. Turn. Take the second Megan strip with 23 arches and join it in Row 5.
Row 5: Ch 1 and sc into dc, ch 1, take the strip and work into the arched side in a zigzag manner. Skip the first arch of the new strip and insert the hook around the strand. Work 1 sc and another sc into the same place. Ch 3 and return to the mesh pattern; insert the hook under the complete 5-ch arch and work 1 sc. Ch 3, insert the hook around the third strand at the tip of the arch (use the third strand to make the join stronger) and work 1 sc.
Then ch 3 and sc under the 5-ch arch, ch 3 and sc around the strand of the new strip, ch 3 and sc under the 5-ch arch, ch 3 and sc around the third strand at the tip of the arch.
Repeat to the end of the row. At the end of the row, work sc into dc, ch 3 and sc around the strand of the second-to-last arch of the new strip, ch 3 and sc into the turning chain, then finish with dc around the strand of the second-to-last arch of the new strip.
Note: Join 6 strips together; you will have 6 mesh sections.
Row 1: Work the final (seventh) mesh section onto the arched outer edge of the back panel. Ch 1 instead of sc and sc around the strand of the second arch. Ch 5 and sc around the third strand at the tip of the arch, ch 5 and sc around the strand. Finish with 2 sc around the strand of the second-to-last arch. Turn.
Rows 2–4: Same as Rows 2–4 above.
Row 5: Same as Row 3. Fasten off.
Note: On the back panel, weave in the ends and secure the last arches so that the Megan yarn does not unravel.
JOINING THE SHOULDERS, 3 mm hook
Arrange the garment into its final shape. The arched sections of the front panels should face the neckline. The unused edge arches of the Megan yarn should already be secured. At the shoulders, either sew the front and back panels together or crochet them together on the right side using a zigzag method. Start in the Megan yarn. Ch 1 instead of sc and sc into one panel. Ch 1, insert the hook into the opposite panel and work sc. Then ch 3 and sc into one panel, ch 3 and sc into the other panel. In the mesh section, use the edge double crochets. Repeat on the other side.
JOINING THE SIDES, 3 mm hook
Join the side panels on the right side from the lower edge towards the armhole. For the armhole, count 10 arches down from the shoulder seam and mark the point with a stitch marker. For the slit, count 10 arches up from the lower edge. Join the yarn in the eleventh arch and work ch 1 instead of sc and sc. Ch 1 and sc under the ch of the opposite panel. Work ch 2 and sc under the arch on one panel, ch 2 and sc under the arch on the other panel. Continue joining in a zigzag manner up to the stitch marker.
Finish with dc under the last arch. Do not fasten off; continue directly with the sleeve.
SLEEVE, 3 mm hook
Row 1: Ch 1 instead of sc and sc, then continue with a shortened arch of ch 4 and sc under the arch. The sleeve pattern then consists of ch 5 and sc under the arch. Move into the next row as part of the pattern by working an arch of ch 3, placing sc under the first ch-4 arch.
Rows 2–7: Work arches of ch 5 and sc under the ch-space. In the final row, make the last arch with ch 2 and finish with sl st into sc. This completes the work in the round.
SLEEVE EDGING, 3 mm hook
Row 1: Ch 1 instead of sc, insert the hook around the strand and under the arch, pull through two loops and, with a yarn over, complete the sc. Continue working herringbone single crochet, HSC (see the video). Work 4 HSC under the arch and the fifth HSC into sc. Finish the row with sl st.
Rows 2–3: Ch 1 instead of sc. Work HSC through the back loop only. Finish the row with sl st.
FRONT EDGING, 3 mm hook
Row 1: Crochet around the front neckline from the lower edge towards the neck and down the other side. Join the yarn at the lower edge on the right side. Ch 1 instead of sc, sc into the same place. Then ch 5 and sc around the third strand at the tip of the arch, ch 5 and sc around the strand. Repeat. At the opposite lower corner, finish with 2 sc. Turn.
Row 2: Ch 2 loosely instead of dc, dc into sc. The shortened arch consists of ch 3 and sc under the ch-space. Then continue with the pattern: ch 5 and sc under the arch. At the end of the row, work a shortened arch and then dc into sc and the final dc into the turning chain. Turn.
Row 3: Ch 1 instead of sc, sc into dc, sc into dc. Then work arches of ch 5 and sc under the ch-space. At the end of the row, work sc into dc and sc into the turning chain. Fasten off.
COLLAR, 3 mm hook
Row 1: Above the mesh strip in the centre back, there are two mesh arches at the back of the neck. From each of them, count 9 arches (I recommend 13) to the left and 9 arches (I recommend 13) to the right. Mark them with stitch markers. Join the yarn in this arch and work ch 1 instead of sc, sc under the same arch. Then continue with the pattern: ch 5 and sc under the ch-space. At the end of the row, work 2 sc under the arch with the stitch marker. Turn.
Row 2: Ch 2 loosely instead of dc, dc into sc. The shortened arch consists of ch 3 and sc under the ch-space. Then continue with the pattern: ch 5 and sc under the arch. At the end of the row, work a shortened arch and then dc into sc and the final dc into the turning chain. Turn.
Rows 3–7: Repeat Rows 1 and 2. Fasten off.
COLLAR EDGING, 3 mm hook
Row 1: Join the yarn in the sc where you started crocheting the collar. Work along the right side of the collar. Ch 1 instead of sc, then continue with HSC. Into a row ending with dc, work 2 HSC. Into a row ending with sc, work 1 HSC. At the collar corner, work 2–3 HSC. Then, along the regular mesh rows of the collar, work the following sequence: 4 HSC under the arch and HSC into sc, 3 HSC under the arch and HSC into sc. Finish the row with sl st. Fasten off at the end of the row.
Note: If the collar is pulling in, work 4 HSC under every arch.
Row 2: Join the yarn where you started crocheting the collar. Work the second row on the right side of the collar as well. Ch 1 instead of sc, then work HSC through the back loop only. Finish the row with sl st. Fasten off at the end of the row.
DECORATIVE EDGING, 3 mm hook
Row 1: Work the edging on one front panel from the lower edge towards the collar. Work the second edging from the collar downwards. Join the yarn in the correct place on the right side. Ch 1 instead of sc. Then work HSC in the following sequence: 4 HSC under the arch, HSC into sc, 3 HSC under the arch, HSC into sc. Finish the row with sl st. Fasten off.
Row 2: Join the yarn into an HSC on the right side, either at the collar or at the lower edge. Work the second row of HSC through the back loop only. Fasten off.
Row 3: Join the yarn at the lower part of the shirt on the right side. Ch 1 instead of sc, then continue with HSC through the back loop only. At the collar corner, work 2 HSC. Fasten off.
FINISHING
Weave in all loose ends. Sew a decorative label onto the lower edging.
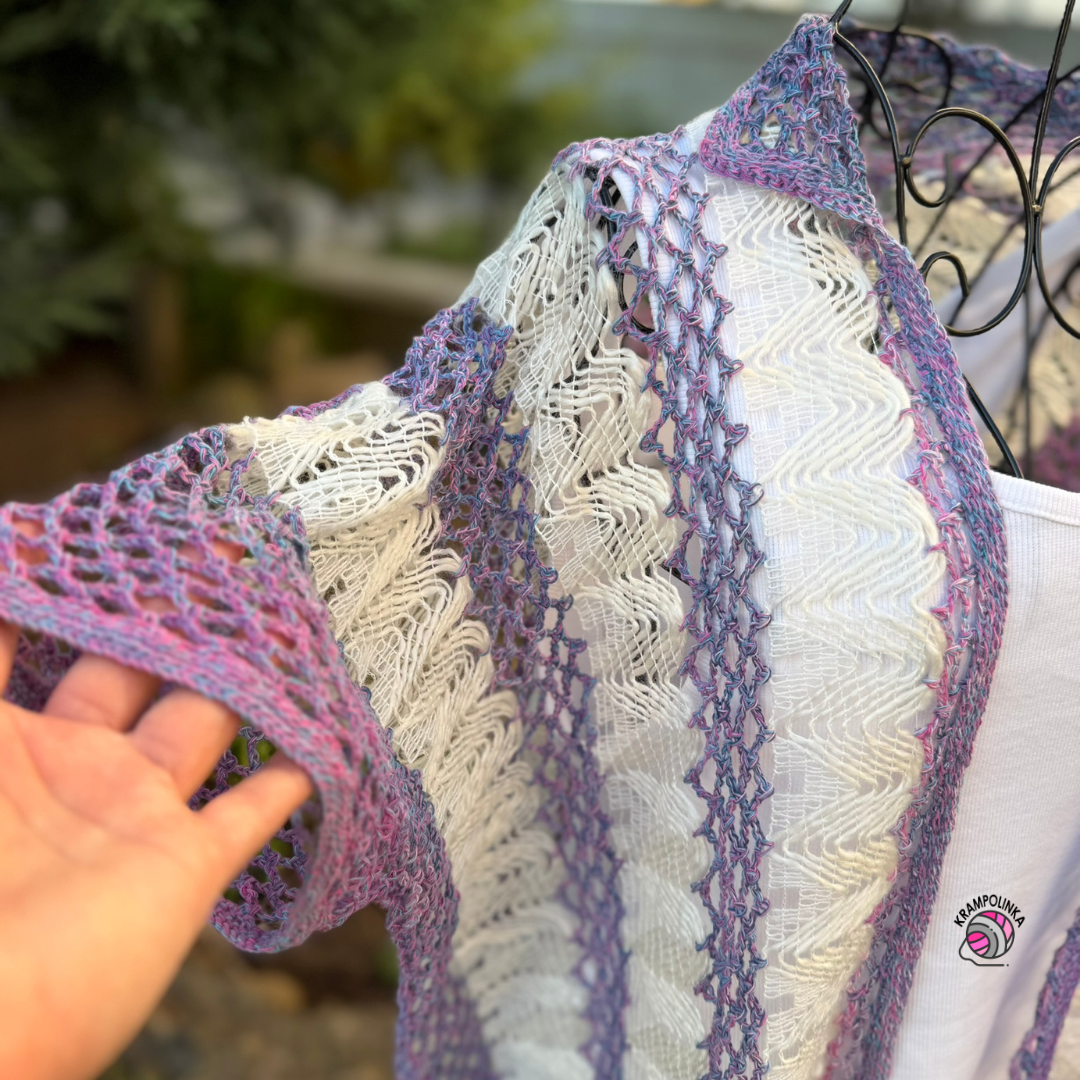
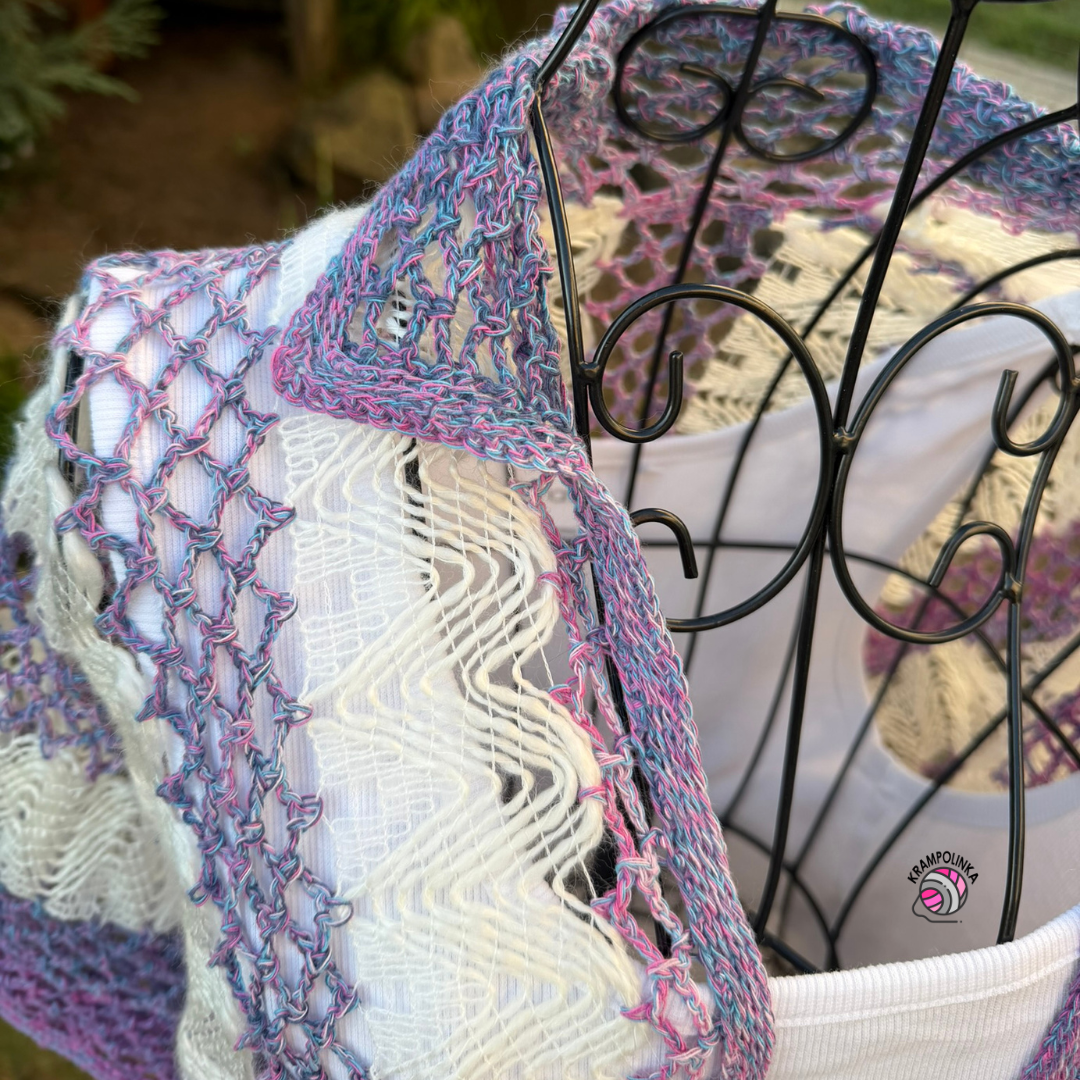
VIDEO TUTORIAL PREMIERE – PART II – Includes instructions for joining the panels, making the sleeves, collar and edging. You can slow down the video directly on YouTube and turn on subtitles.


No Comments