
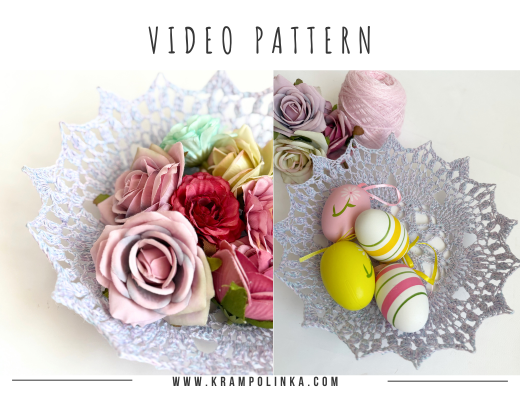
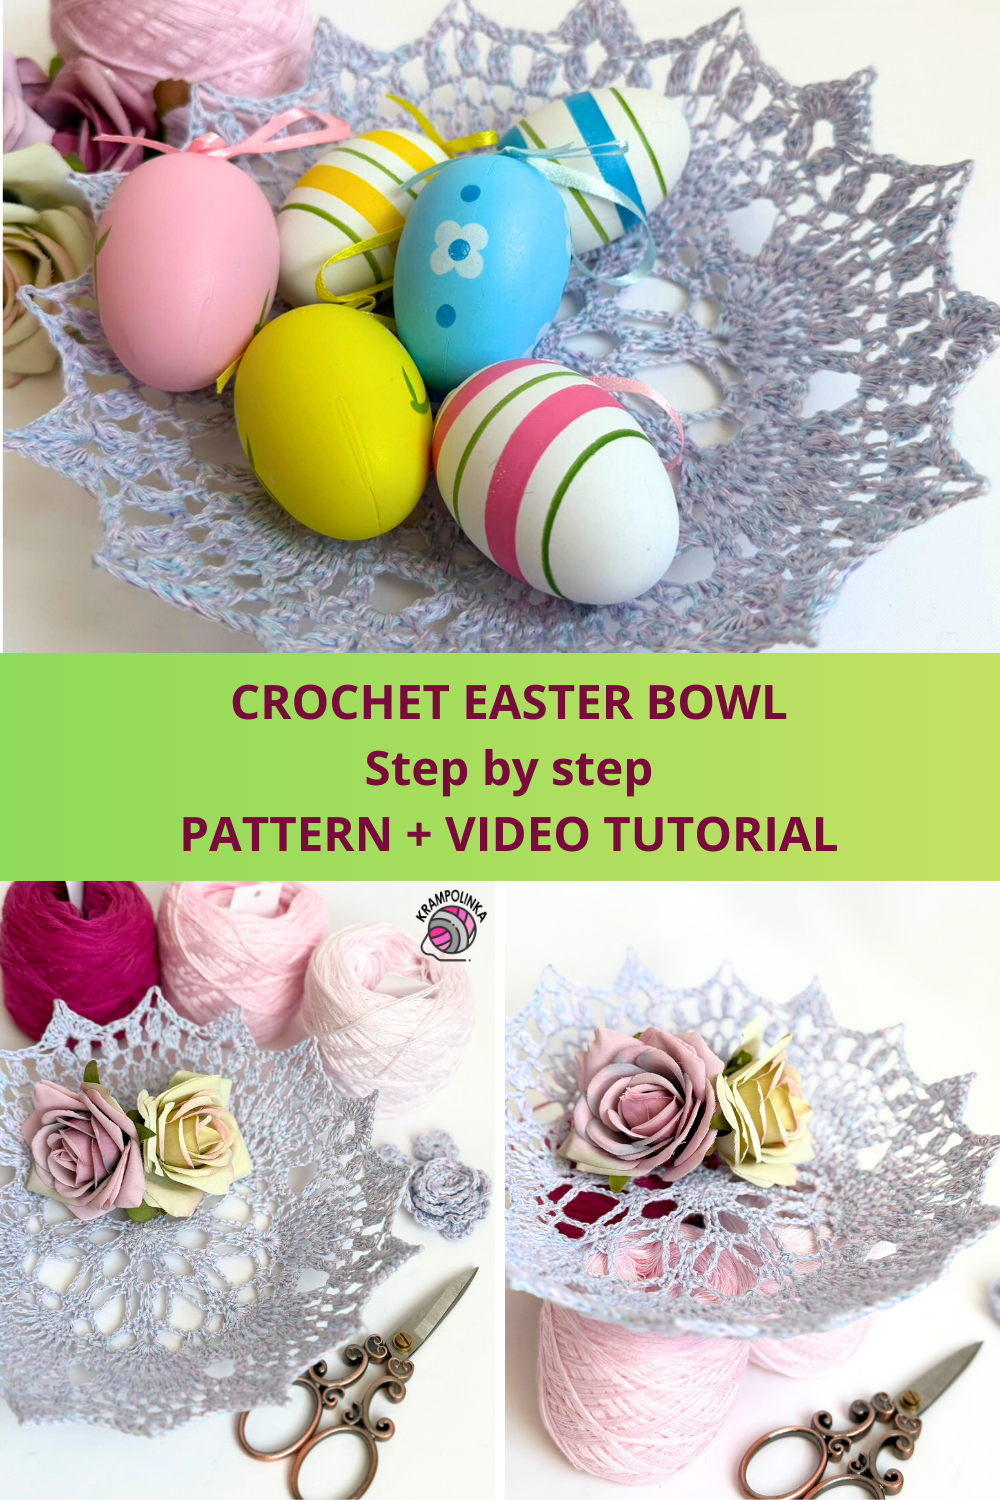
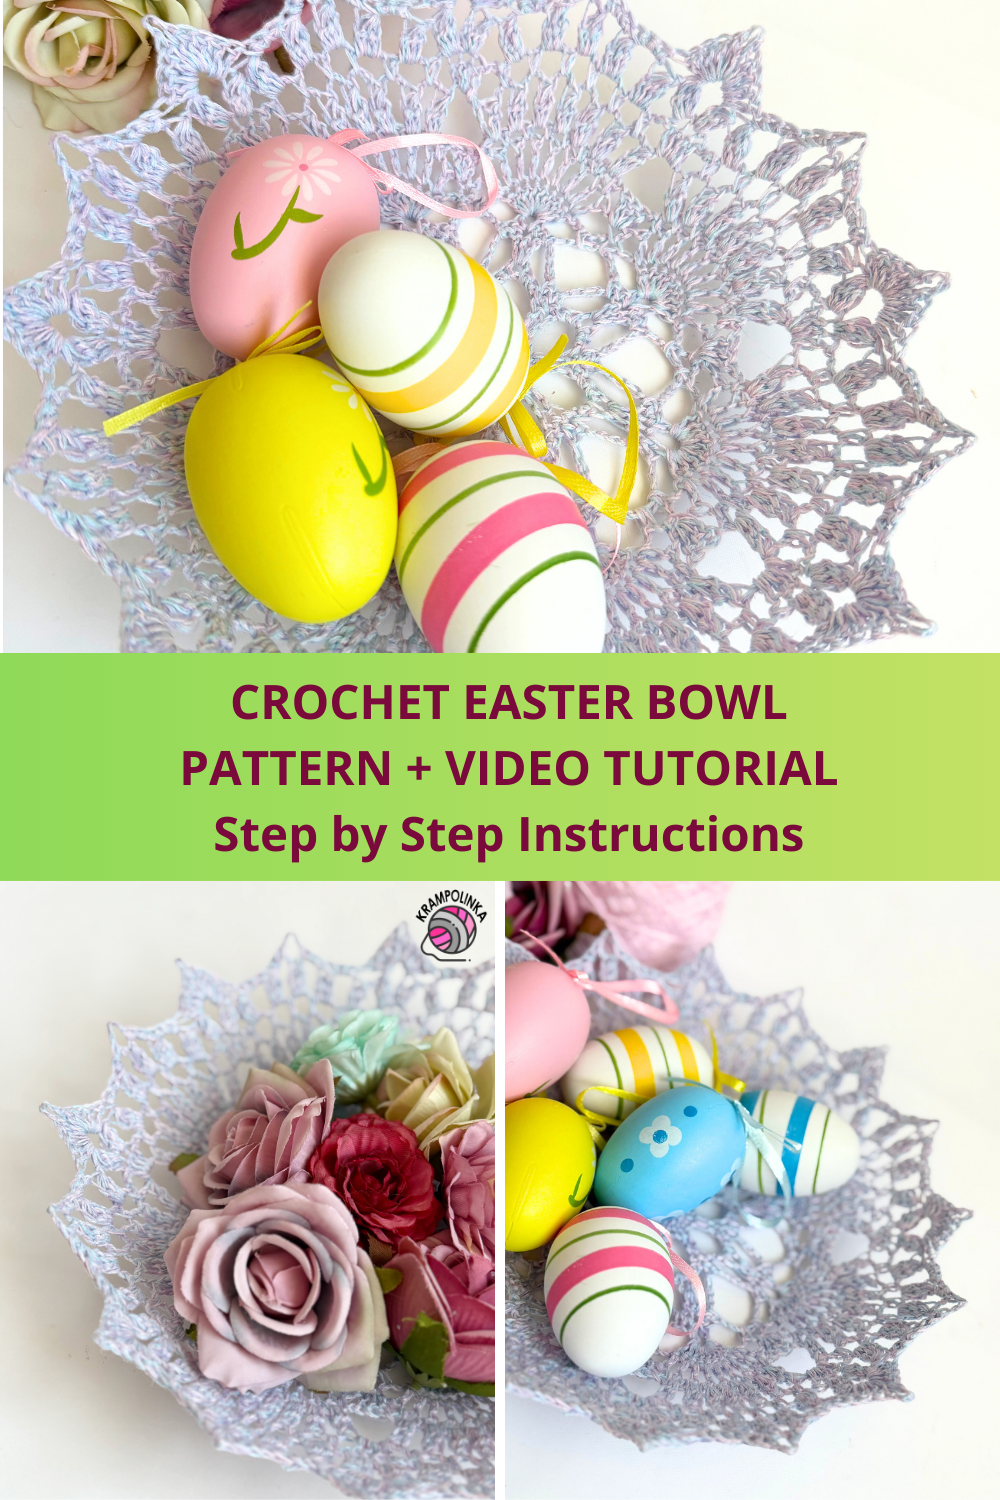
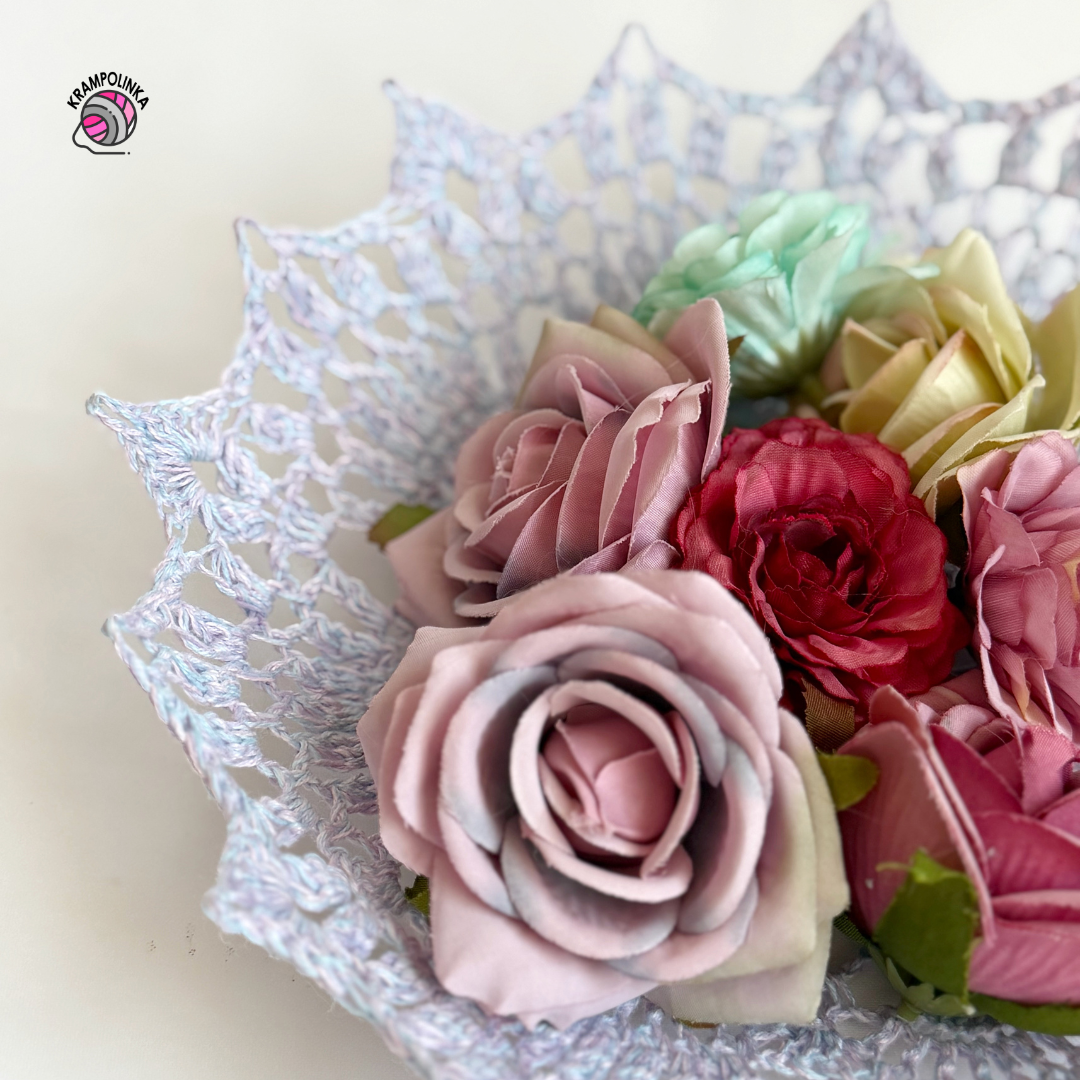
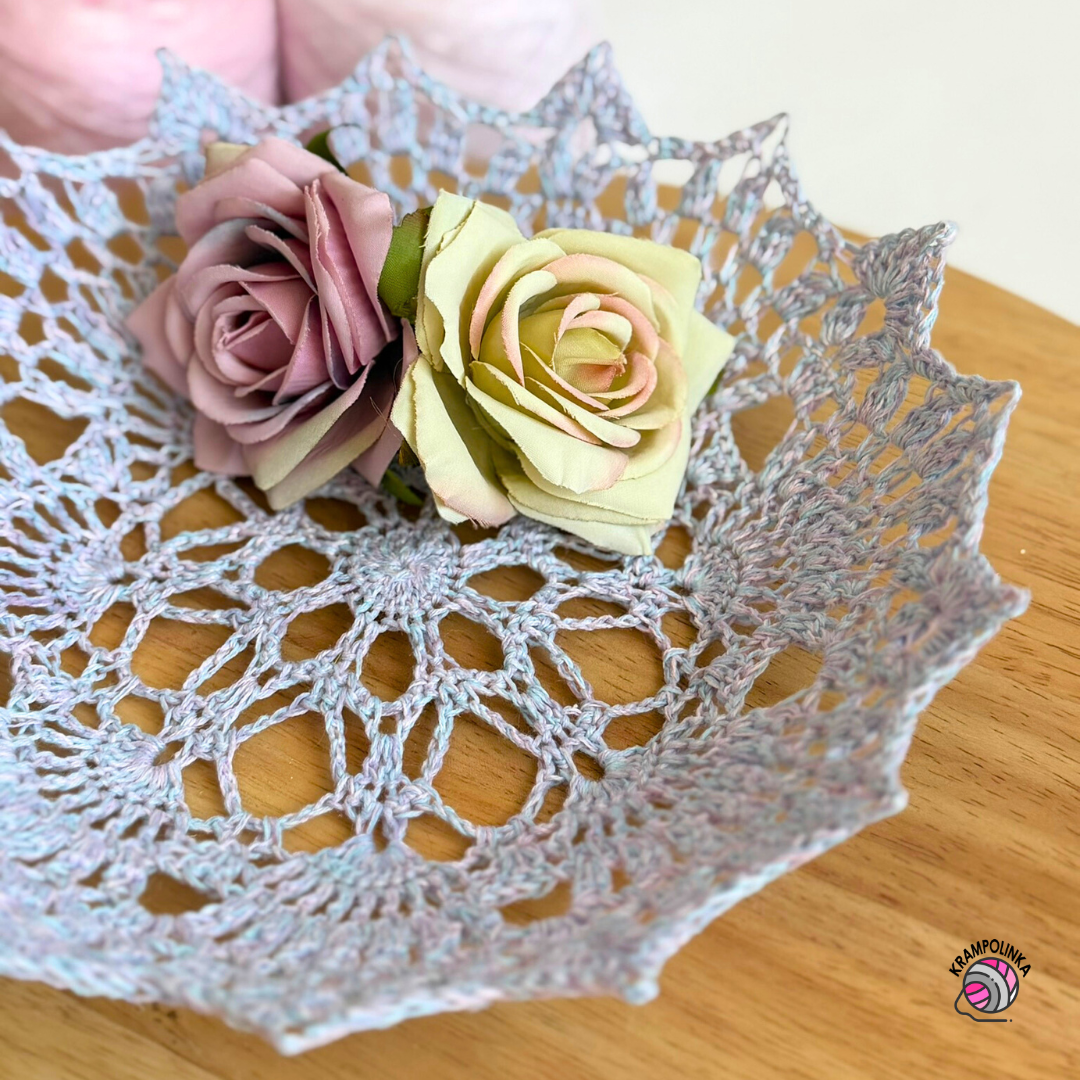
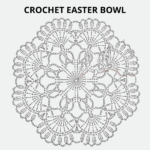
Today we will crochet an Easter bowl together. The base of the bowl is an Easter mandala made from a gradient yarn cake. Once the mandala is finished, we will shape and stiffen it to create a decorative bowl suitable for Easter decorations or small items.
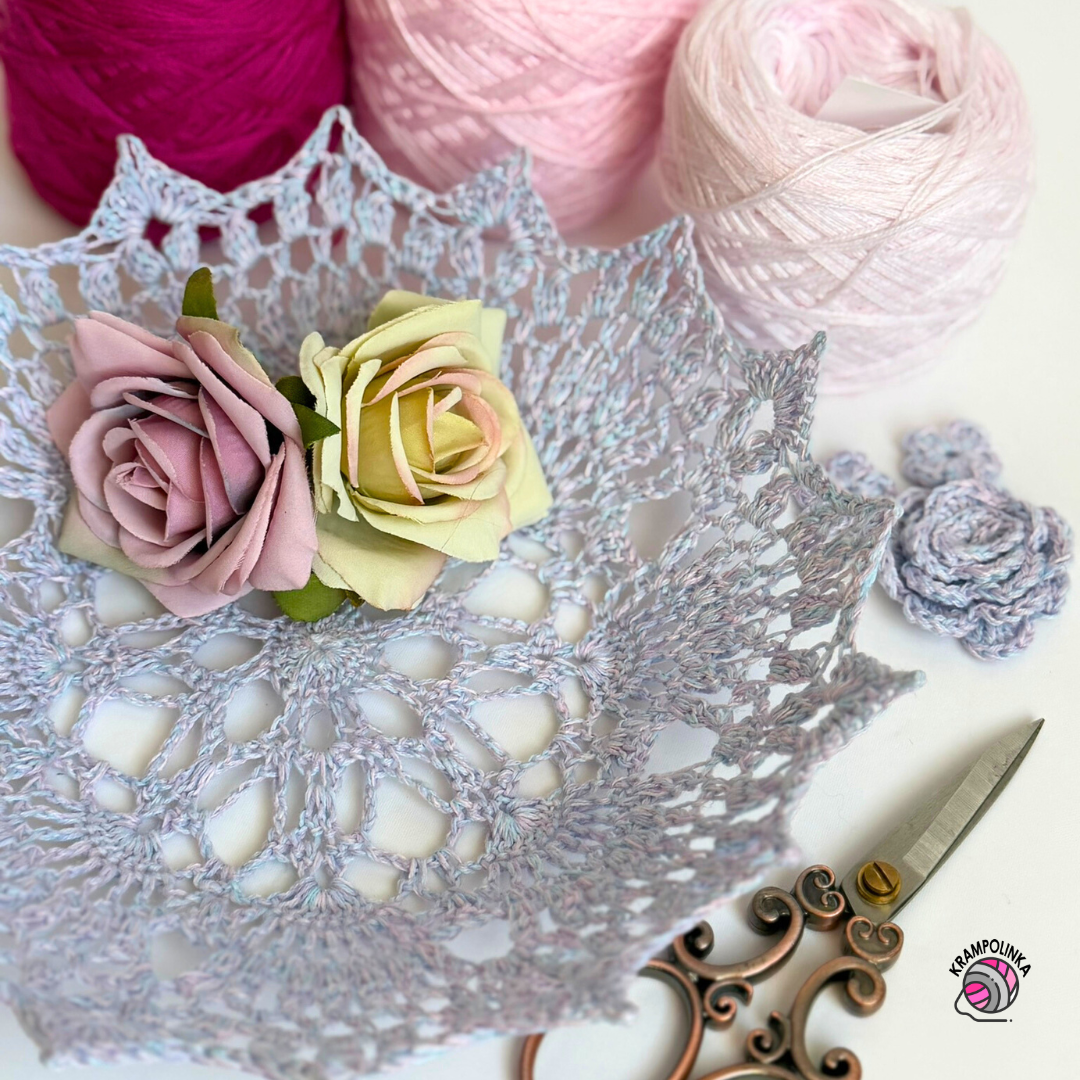
We will be crocheting with a gradient yarn cake from Hravá klubka. It is a 3-ply yarn composed of 50% cotton and 50% acrylic, 100 g / 500 m. The yarn creates a soft spring gradient that stands out beautifully in lace patterns. However, you can use any leftover gradient yarn cake for this project. The important thing is that it consists of three strands. From leftover gradient yarn, you can crochet an Easter mandala, a lace doily, or this Easter bowl.
-
- PIN for PInterest – free Pattern Easter Bowl
VIDEO TUTORIAL PREMIERE: March 24, 2026 at 7:00 PM.
The video tutorial includes subtitles. Did you know you can easily slow down YouTube videos and adjust them to your own pace?
For crocheting the mandala, I used a Tulip hook size 2.5 mm. If you tend to crochet loosely, I recommend using a 2 mm hook. The mandala for the bowl is worked from a magic ring, continuously in one direction. Each round is finished with a slip stitch or an appropriate stitch so that we end approximately in the middle of an arch.
The base of the mandala is inspired by the foreign book Motif and Doily, which I purchased on AliExpress. However, I modified the original chart and extended it by several rounds to achieve a diameter of approximately 23–25 cm.
During crocheting, the mandala may slightly ripple. This is normal and will even out after shaping. I therefore recommend using the specified material – a gradient yarn made of three strands. Once the base (the mandala) is finished, you can choose whether to shape it into a bowl or block it as a doily or table mat.
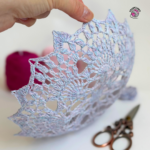
For starching, you will need a polystyrene board covered with plastic wrap, stainless pins (they do not rust), and Alba Efekt starch. To shape the bowl, you can use a smooth soup plate or another smooth bowl as a mold.
With a smooth mold, it is not necessary to use plastic wrap. If the surface is rough, I recommend covering it with plastic wrap to prevent the piece from sticking. The ideal size of the mold is such that, after stretching the edges of the mandala, the edges can be pinned to the board. Leave the starched bowl to dry freely for approximately 24 hours.
I hope your Easter bowl turns out beautifully. Would you like to inspire others or share your experience with crocheting or styling the bowl? You can share your photos in the Krampolinka Facebook group. On Instagram, please use the hashtag #velikonocnimiska so others can easily find your projects. If you tag me in your creations made using my patterns, I can reshare them in my Instagram Stories to inspire others.
EASTER BOWL
Yarn: 3-ply gradient yarn from Hravá klubka
Yarn usage: 1 yarn cake, gradient
Hook: 2.5 mm or 2 mm Tulip (depending on your tension)
Dimensions: mandala diameter 23–25 cm
Tools: yarn needle (large eye), Alba Efekt starch, stainless pins, blocking board and a mold for shaping the bowl
Time required: approx. 2 hours + drying time
Level: beginner-friendly
Stitches used:
ch – chain
sc – single crochet
dc – double crochet
bobble – three double crochets worked together into one stitch
sl st – slip stitch
MR – magic ring
-
- PIN it for later! Free Crochet Pattern Easter Bowl
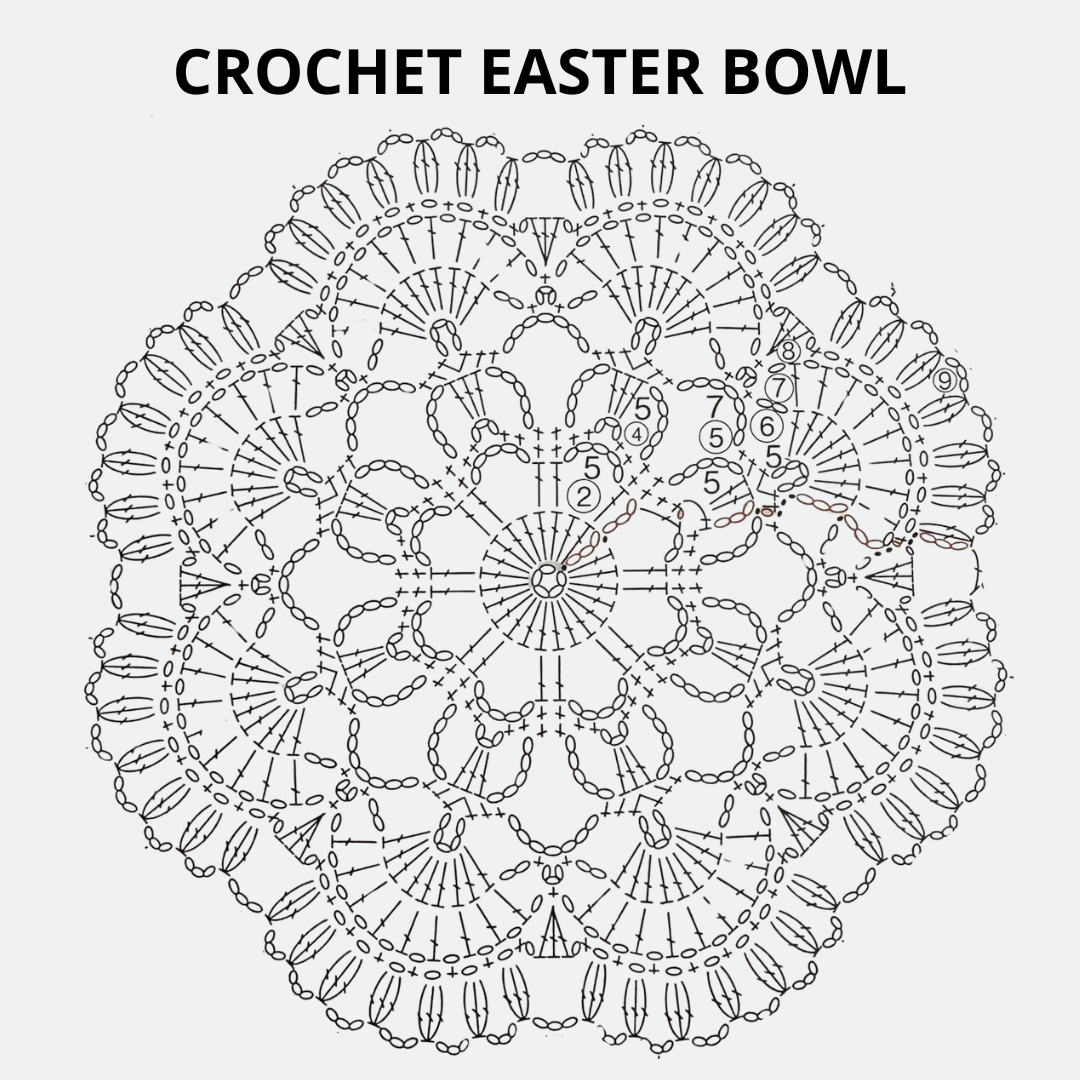
Mandala, hook 2.5 mm – see chart 1
Round 1: Into a magic ring, crochet 3 ch as a replacement for the first dc, then 23 dc. Join with a slip stitch. Total 24 stitches including the starting chain.
Round 2: 3 ch as a replacement for the first dc, dc into the next stitch, 5 ch and skip one stitch. The pattern is dc into dc, dc into dc, 5 ch and skip one stitch. Finish the round with 2 ch and a dc into the top of the starting chain. End in the middle of the arch. There are 8 repeats in this round.
Round 3: 1 ch, two sc under the arch, sc into dc, sc into dc, two sc under the arch and 3 ch. The pattern is two sc under the arch, sc into dc, sc into dc, two sc under the arch and 3 ch. Finish the round with a dc into the top of the starting chain. End in the middle of the arch.
Round 4: 3 ch as dc, two dc under the arch, 5 ch, sc into the third sc and sc into the fourth sc. The pattern is 5 ch, three dc under the arch, 5 ch, sc into the third sc and sc into the fourth sc. Finish with a slip stitch.
Round 5: 1 ch and sc into the same stitch. Sc–5 ch–sc into the middle dc, sc into dc, sc under the arch, 7 ch. The pattern is sc under ch, sc into dc, sc–5 ch–sc into the middle dc, sc into dc, sc under the arch and 7 ch. Finish with sc under the arch and a slip stitch.
Round 6: Move with slip stitches under the 5 ch arch. 3 ch as dc, 8 dc under the arch, 2 ch, sc–3 ch–sc under the arch, 2 ch. The pattern is 9 dc under the arch, 2 ch, sc–3 ch–sc under the arch, 2 ch. Finish with 2 ch and a slip stitch.
Round 7: 3 ch as dc and 1 ch into the pattern. Dc into dc and ch throughout the whole fan, sc under the ch. The pattern is ch, dc into dc and ch (9 times), sc under the ch. Finish with a slip stitch.
Round 8: 1 ch as sc and sc under the ch. Ch above dc, sc under the ch (only 8 times), ch – 3 dc into sc – ch. The pattern is sc between the first two dc, ch above dc (8 times), ch–3 dc into sc–ch. Finish with a slip stitch into the starting stitch.
Round 9: 3 ch as dc and crochet 2 dc together into one stitch, 3 ch. Crochet a bobble (three dc worked together) under the ch and 3 ch (7 times), and 3 ch above the three dc from the previous round. Finish with ch and a dc into the top of the starting chain. End in the middle of the arch.
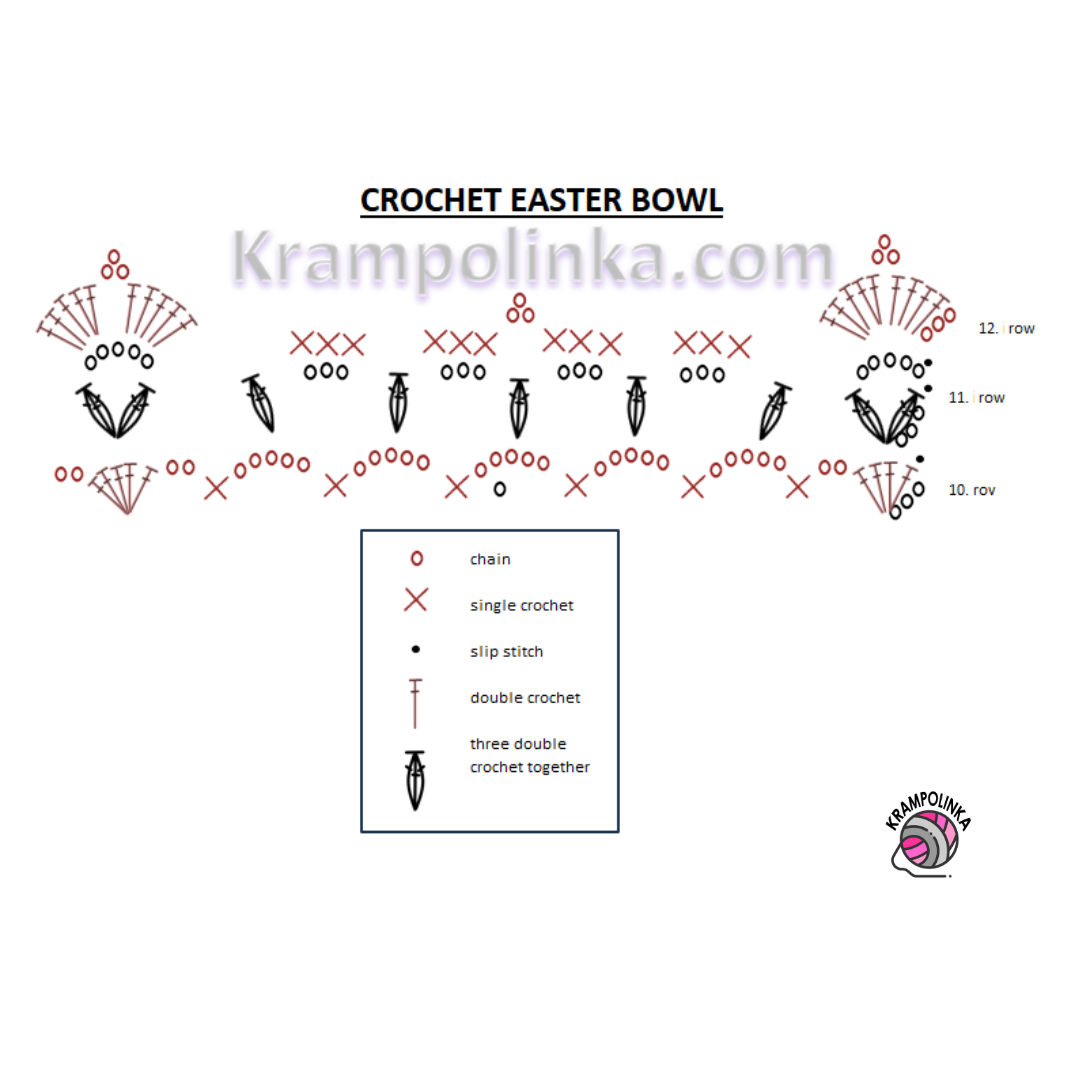
From this point the mandala chart changes – see chart 2
Round 10: 3 ch as dc, 4 dc under the arch, 2 ch, sc between two bobbles, 5 ch (5 times), sc between two bobbles, 2 ch and 5 dc under the arch. Repeat the pattern. Finish with 2 ch and a slip stitch.
Round 11: Move with two slip stitches into the middle of the fan. Crochet 3 ch and 2 dc into the same space and join them into a bobble, 5 ch and another bobble into the same space. Then crochet a bobble under the arch and 3 ch (3 times). Crochet a bobble under the last arch and into the center of the fan crochet bobble – 5 ch – bobble. Finish with a slip stitch and move under the arch with a slip stitch.
Round 12: 3 ch as dc, 4 dc under the arch – 3 ch – 5 dc under the same arch. Then crochet 3 sc under the first arch, 3 sc under the second arch – 3 ch – 3 sc under the third arch and 3 sc under the fourth arch. Between the bobbles crochet 5 dc – 3 ch – 5 dc. Finish with a slip stitch into the starting stitch. Cut the yarn with a sufficient tail and weave in the ends.
Finishing the bowl
Soak the mandala in starch and squeeze out the excess. Block it on a board over a prepared mold. I used a deep plate. Let it dry for about 24 hours.
-

- A delicate crocheted Easter bowl made from a colorful gradient yarn, shaped from a lace mandala and perfect for spring decoration.
-

- Light and airy crochet design turned into a decorative bowl, ideal for holding Easter eggs or small treasures.
-
- Handmade crochet Easter bowl with a soft pastel gradient, beautifully stiffened to create an elegant lace structure.
-
- Crocheted mandala transformed into a stylish bowl, combining fine lace texture with fresh spring colors.

-
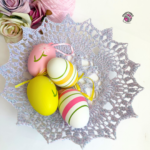
- Unique crochet Easter decoration made from gradient yarn, shaped into a bowl that adds charm to any festive table.

-
- Crochet diagram Part I
-

- Crochet diagram Part II
No Comments