
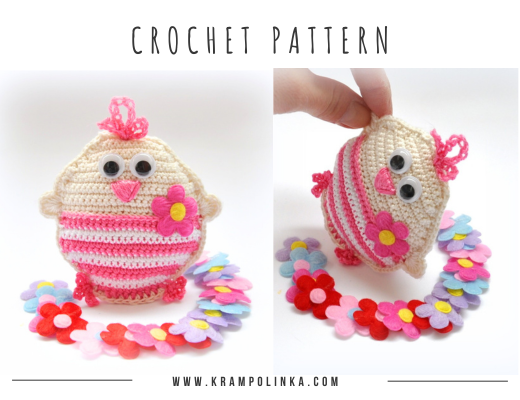
Mom, can you please make me a little chick?” And that’s how this simple crochet pattern for an Easter chick was created – a perfect quick spring project made from cotton yarn.
I don’t usually crochet toys, but this time I made an exception. This small crochet chick took me about four hours to finish. As usual, the finishing touches take the most time. However, if you’re looking for a quick crochet project for Easter or the upcoming spring season, this is a great choice. This time, it’s a written pattern without a video tutorial.
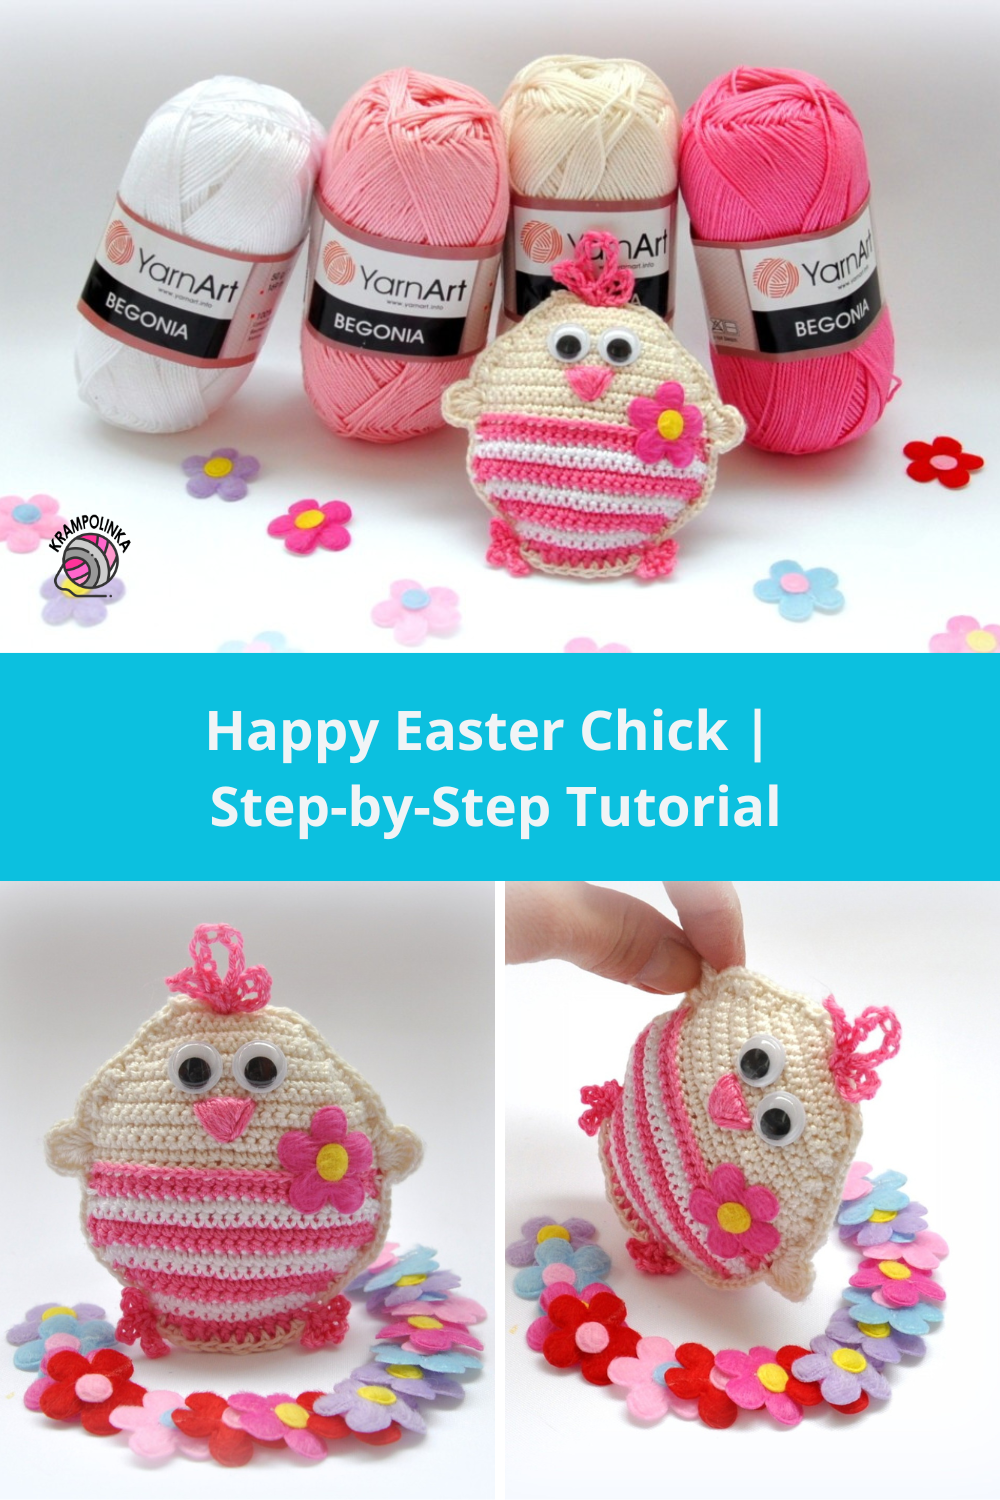
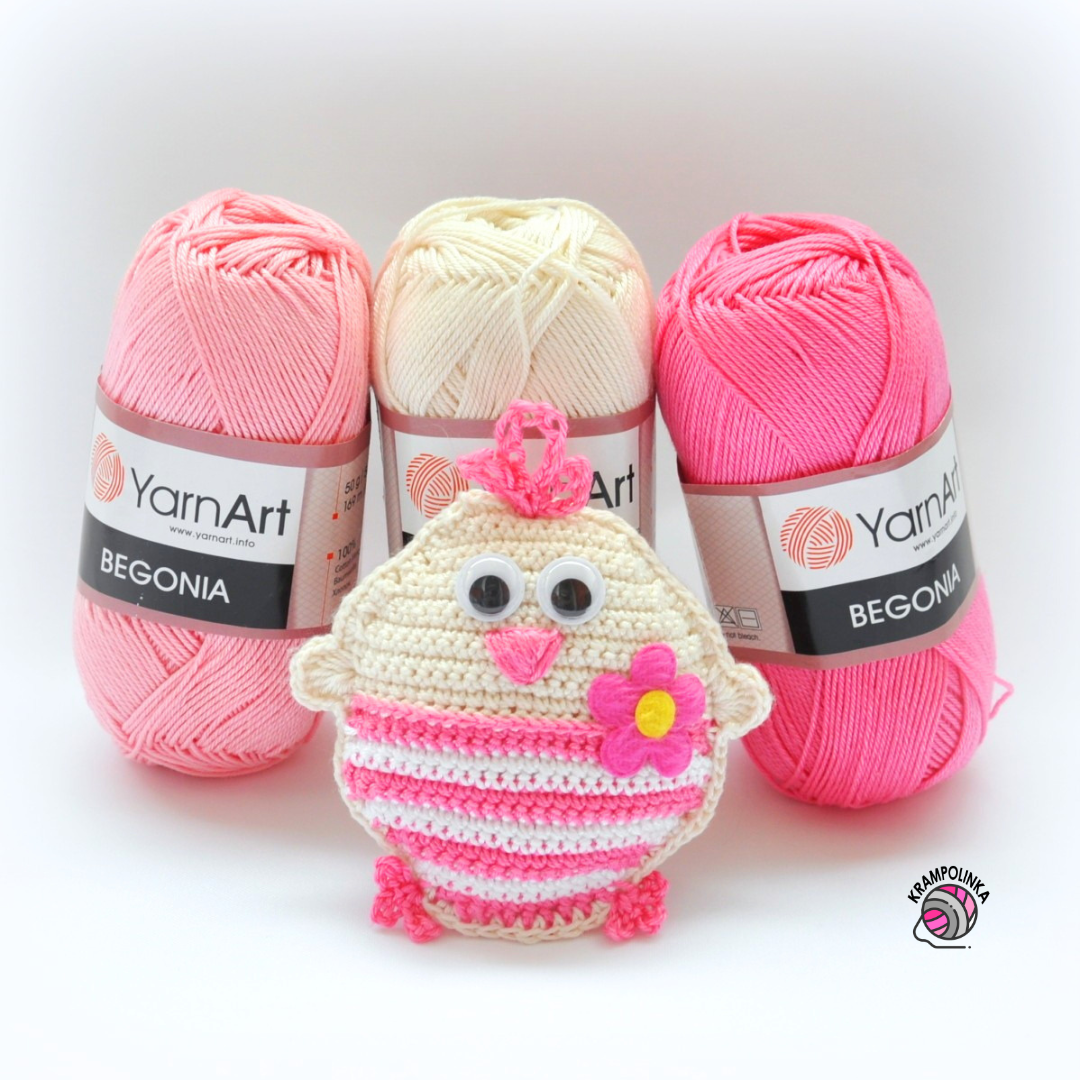
I used YarnArt Begonia yarn – 100% mercerized cotton, 50 g / 169 m, certified safe for children under three years (Czech certification). Thanks to mercerization, this cotton yarn is stronger, more resistant to wear, and has a subtle sheen. It’s suitable not only for crochet toys for children, but also for spring and summer projects such as blankets, decorations, or lightweight garments. Together with YarnArt Summer, it is one of my favorite cotton yarns.
-
- PIN Pattern for crochet Begonia Chick
The crochet Easter chick pattern is very simple. The chick is made from two crocheted pieces that are then joined together. It is worked in rows back and forth, so you can easily play with colors, use up leftover yarn, and create cheerful striped variations. Each chick can be completely unique. This is an easy crochet pattern suitable for beginners.
TIP: If you attach a skewer to the chick, it becomes a great plant decoration or a lovely small gift—for example, at the end of the school year.
I hope your Begonia Chick turns out beautifully. If you feel like inspiring others or sharing your crochet results or styling ideas, I would be happy to see your photos. You can share your photos in the Krampolinka Facebook group. On Instagram, please use the hashtag #kuratkobegonia so others can easily find your projects. If you tag me in your creations made using my patterns, I can reshare them in my Instagram Stories to inspire others.
Begonia Chick
Yarn: YarnArt Begonia – cream 3000, bright pink 5001, and white 1000. Only a small amount of each color is needed.
Available at: www.pletemesi.cz and www.pletiemesi.sk
Hook: 2 mm
Size: height 8 cm, width 7 cm
You will also need: small flower applique for decoration, safety eyes, optionally a flat rattle insert (if intended for a baby), stuffing (polyfill), tapestry needle, thread, and optionally a skewer (for a plant decoration).
Time: approx. 4 hours including finishing
Skill level: beginner
Abbreviations:
ch – chain
sl st – slip stitch
sc – single crochet
hdc – half double crochet
dc – double crochet
fp sc – front post single crochet
Work in rows. Each row begins with a turning chain (“N”), exceptionally 2 ch instead of the first sc.
-

- PIN it for later Pattern for chrochet Chick
Pink Begonia, hook 2 mm
Row 1: Chain 11, turn.
Row 2: Insert hook into the 3rd chain from hook, make sc, then sc across. Including the turning chain, you have 9 sc. Turn.
Row 3: Turning chain for sc, work 1 sc into the same stitch, then sc across. In the last stitch (work into the turning chain from previous row), make 2 sc. Total 11 stitches. Turn.
White Begonia, hook 2 mm
Row 4: Turning chain, 1 sc into same stitch, sc across, 2 sc into last stitch. Total 13 stitches. Turn.
Row 5: Same as previous row. Total 15 stitches. Turn.
Pink Begonia, hook 2 mm
Row 6: Same pattern. Total 17 stitches. Turn.
Row 7: Same pattern. Total 19 stitches. Turn.
White Begonia, hook 2 mm
Row 8: Same pattern. Total 21 stitches. Turn.
Row 9: Same pattern. Total 23 stitches. Turn.
Pink Begonia, hook 2 mm
Row 10: Same pattern. Total 25 stitches. Turn.
Row 11: Turning chain, sc across. Total 25 stitches. Turn.
White Begonia, hook 2 mm
Rows 12–13: Turning chain, sc across. Total 25 stitches. Turn.
Pink Begonia, hook 2 mm
Rows 14–15: Turning chain, sc across. Total 25 stitches. Turn.
Cream Begonia, hook 2 mm
Row 16: Turning chain, fp sc across (creates a raised edge like little pants). Total 25 stitches. Turn.
Rows 17–21: Turning chain, sc across. Turn.
Row 22: Skip the first stitch, turning chain, sc across, last sc worked one stitch before the end. Total 23 stitches. Turn.
Row 23: Same method. Total 21 stitches. Turn.
Row 24: Same method. Total 19 stitches. Turn.
Row 25: Same method. Total 17 stitches. Turn.
Row 26: Same method. Total 15 stitches. Turn.
Row 27: Same method. Total 13 stitches. Turn.
Row 28: Same method. Total 11 stitches. Turn.
Row 29: Turning chain, sc across (11 sc). Fasten off (for the first piece). For the second piece, do not fasten off – you will use the yarn to join both pieces.
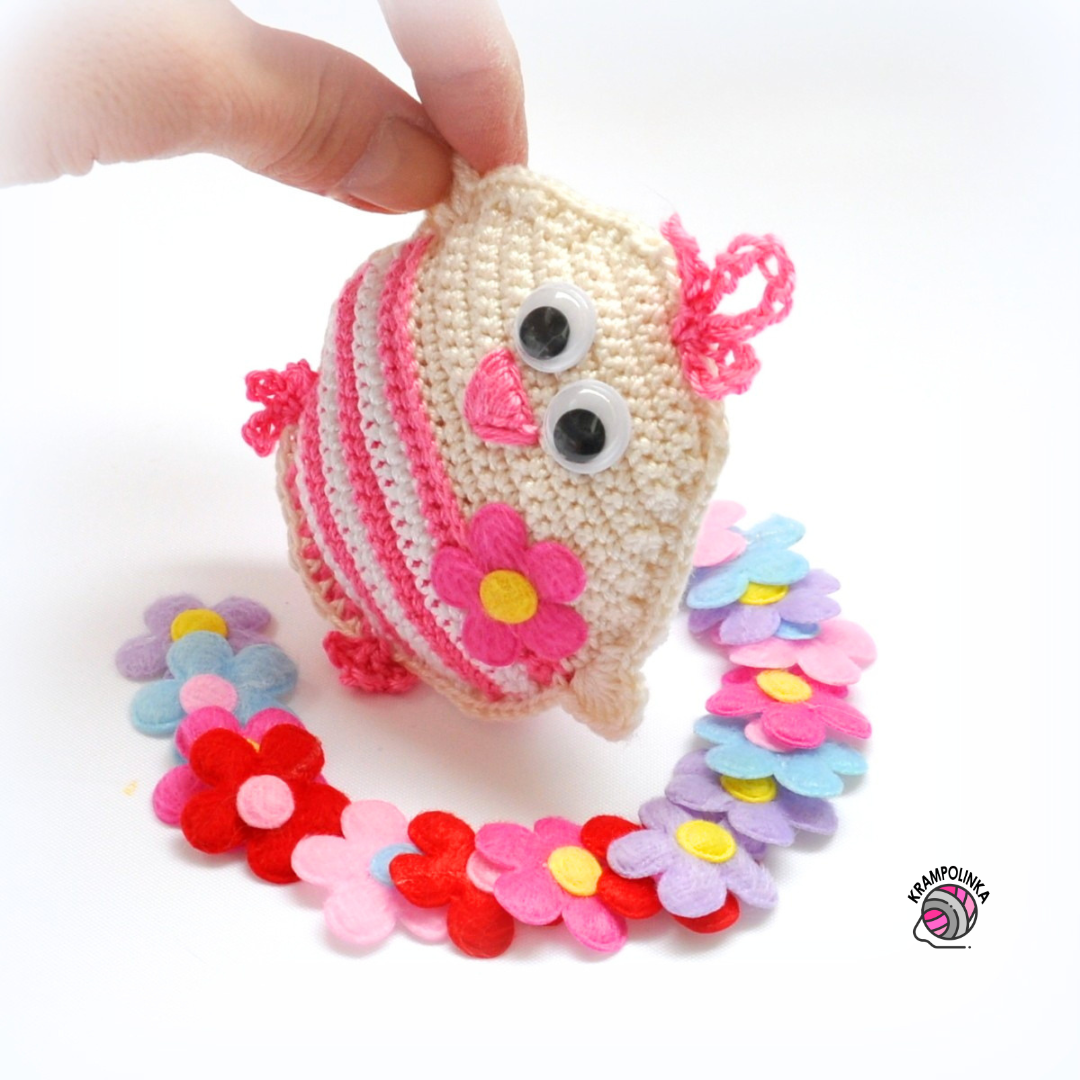
Make a second identical piece. In the last row, place both pieces together and start joining them with sc. When you reach the “pants” area, create the wing. Before closing, stuff with polyfill.
WING
Fan stitch: sc, 2 hdc, 3 dc, 2 hdc, sc – all into the same stitch. Continue joining. Repeat on the opposite side.
HAIR
Attach pink yarn at the top center. In the same stitch:
chain 6, sl st into same stitch,
chain 8, sl st into same stitch,
chain 6, sl st into same stitch.
Weave in ends.
LEGS
Attach pink yarn at approximately the “5 o’clock” position. In the same stitch:
chain 6, sl st into same stitch (repeat 3 times).
Weave in ends. Repeat at the “7 o’clock” position.
BEAK
Embroider a small triangle with pink yarn and fill it using a satin stitch.
Finish the chick with glued eyes and a small flower. I also tried crocheted or embroidered eyes, but I didn’t like the result as much.


No Comments