
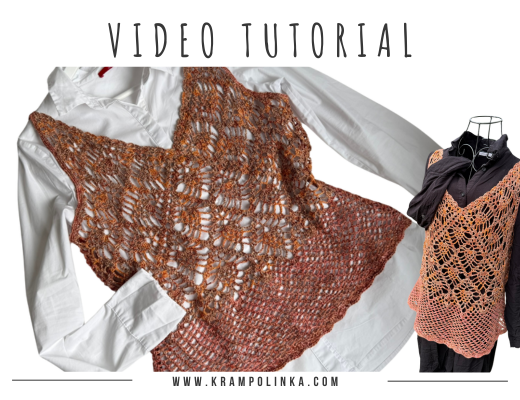
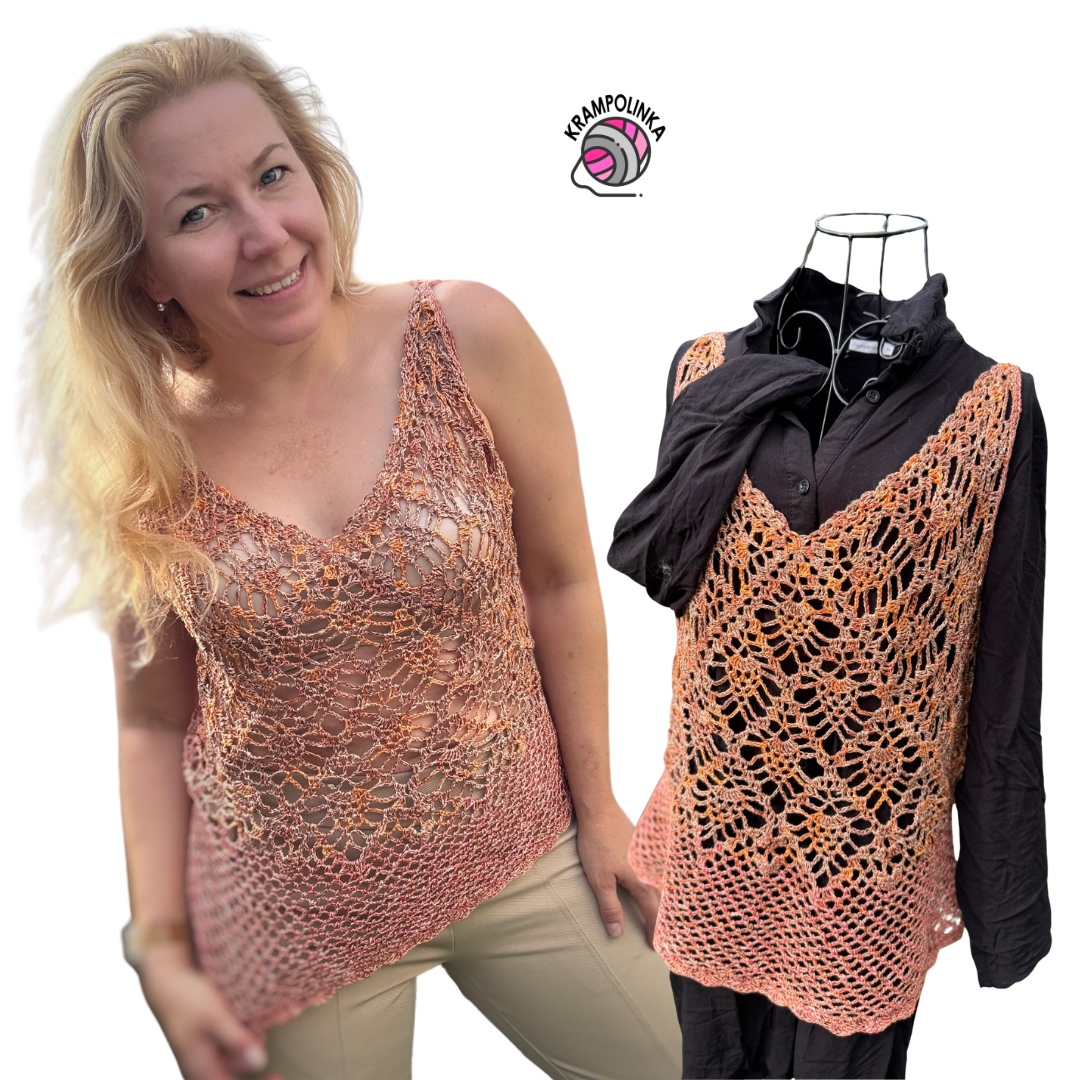
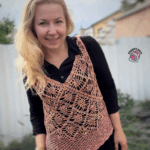
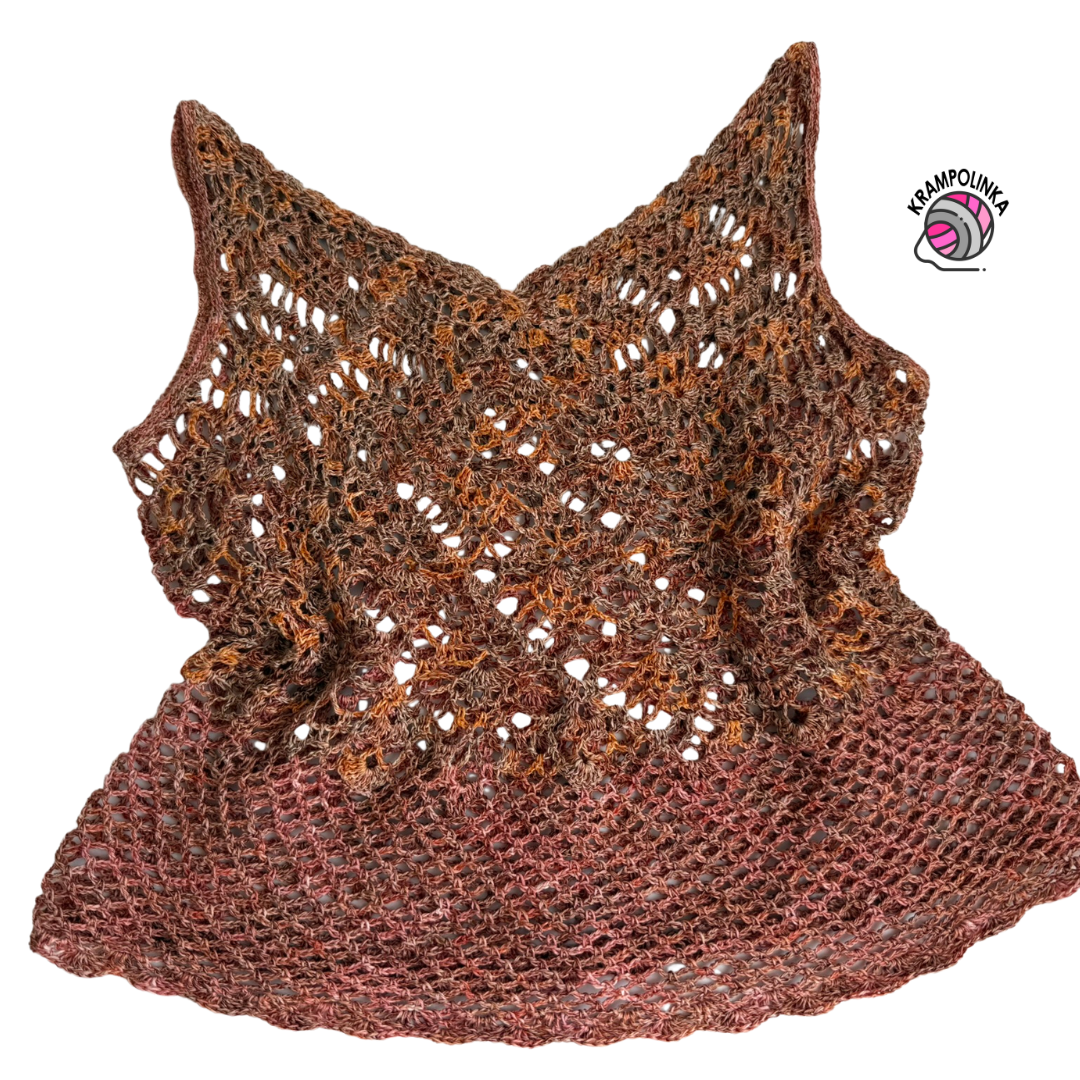
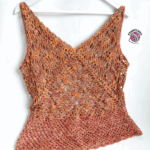
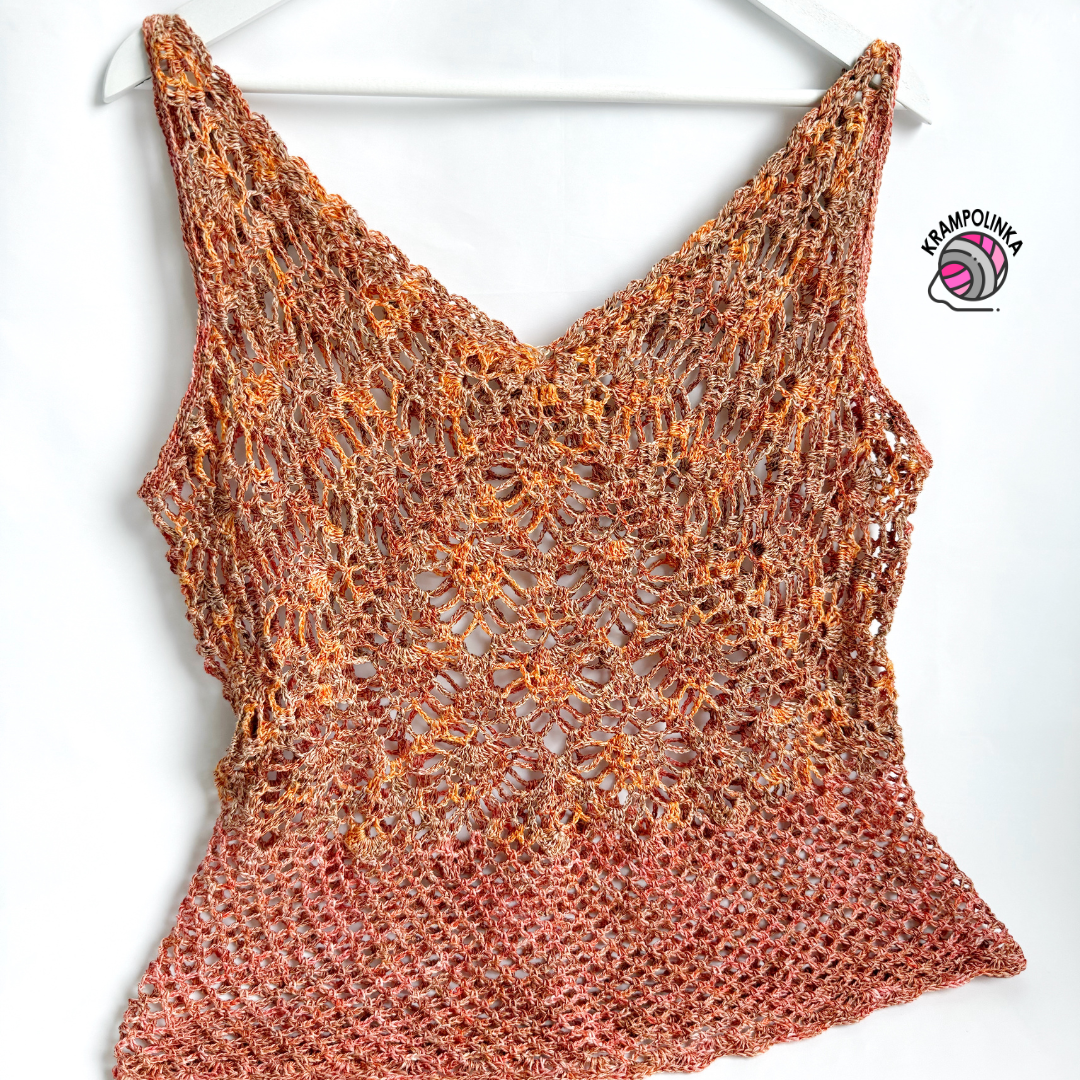
From three luxurious, hand-dyed skeins, I created a lightweight summer top or an autumn vest, which I named Amber.
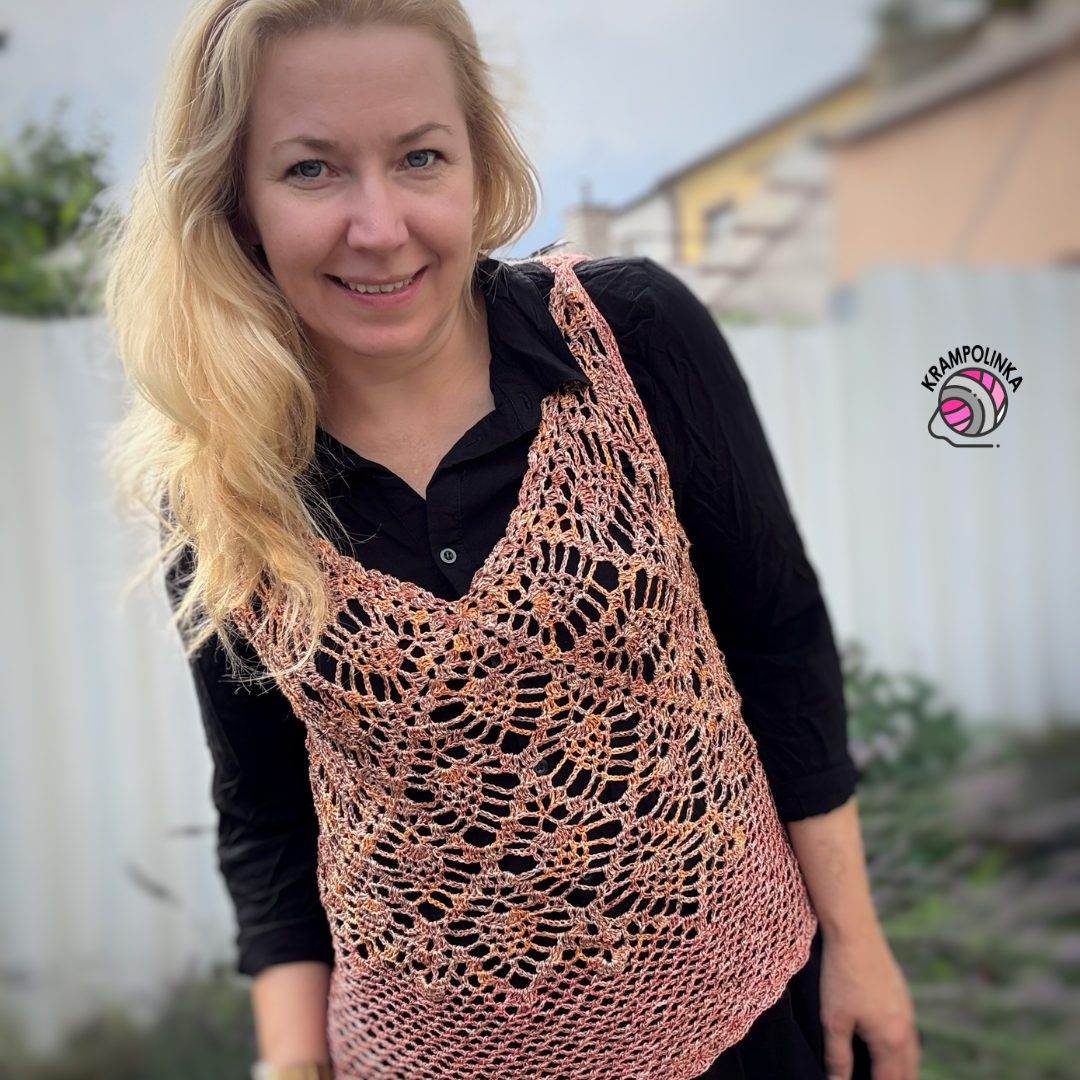
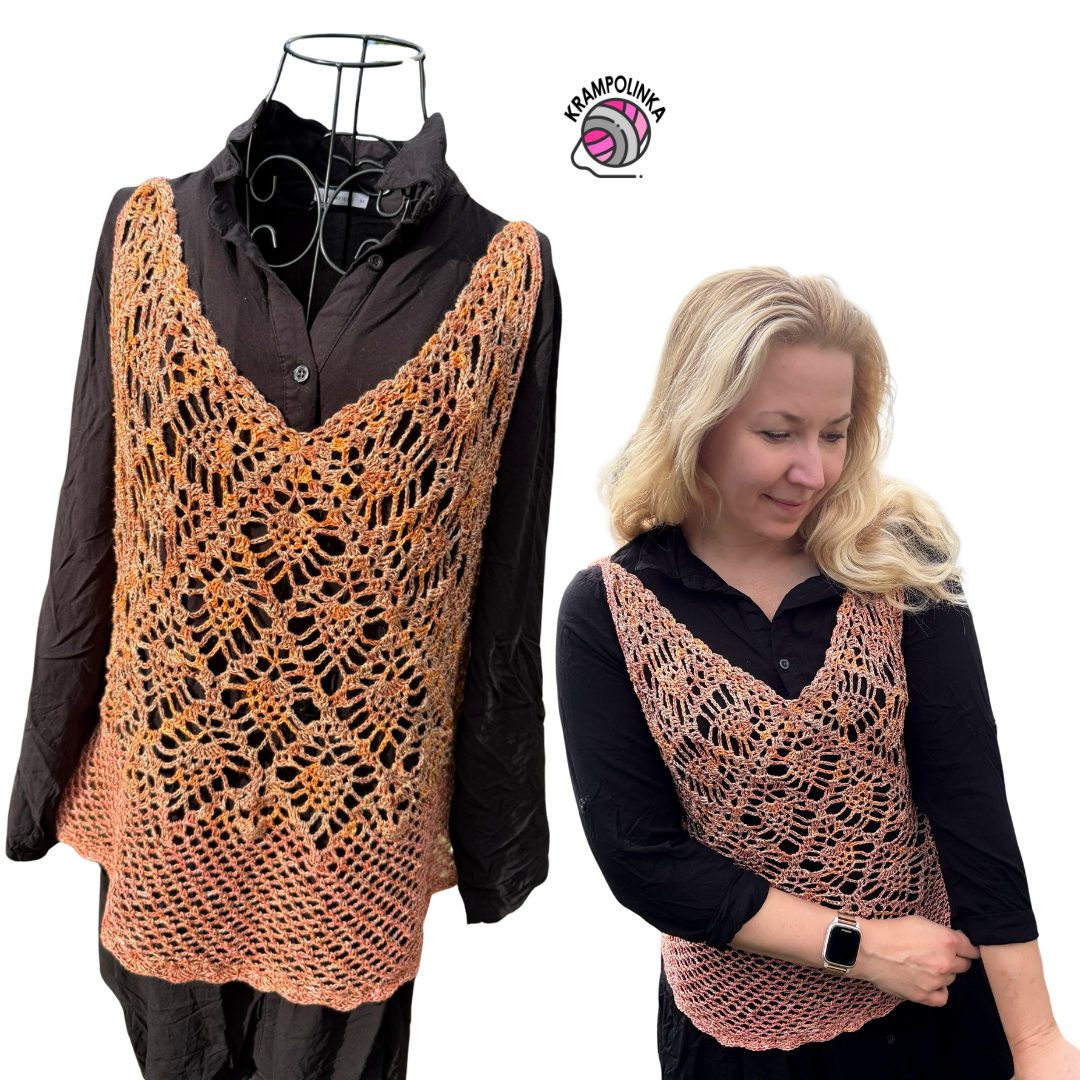
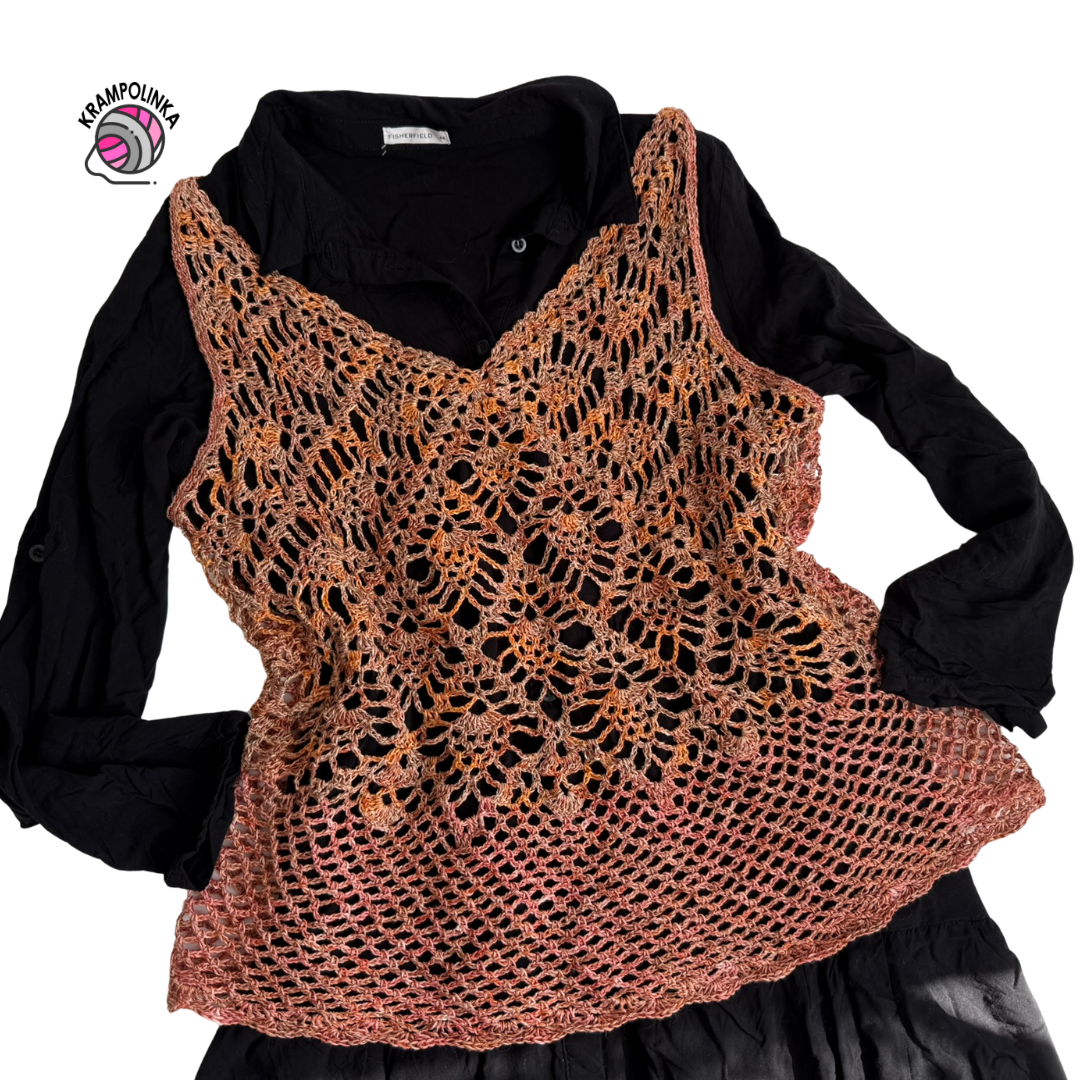
Ivanka from the e-shop Hravá klubka has expanded the range of gradient yarn cakes by Design Yarn and started dyeing skeins in various fiber blends. I had the chance to try a mix of linen and silk, from which I crocheted a delicate strappy top, or alternatively an elegant vest that looks perfect over a shirt, dress, or turtleneck.
If you can’t get the original yarn, you can try other hand-dyed skeins (100 g / 400 m), or use a three-ply gradient yarn cake. In that case, I recommend using two identical ones.
You can find the full selection of skeins at HravaKlubka.cz.
VIDEO TUTORIAL PREMIERE – Sunday, October 5, 2025, at 10:00 AM with ENGLISH SUBTITLES
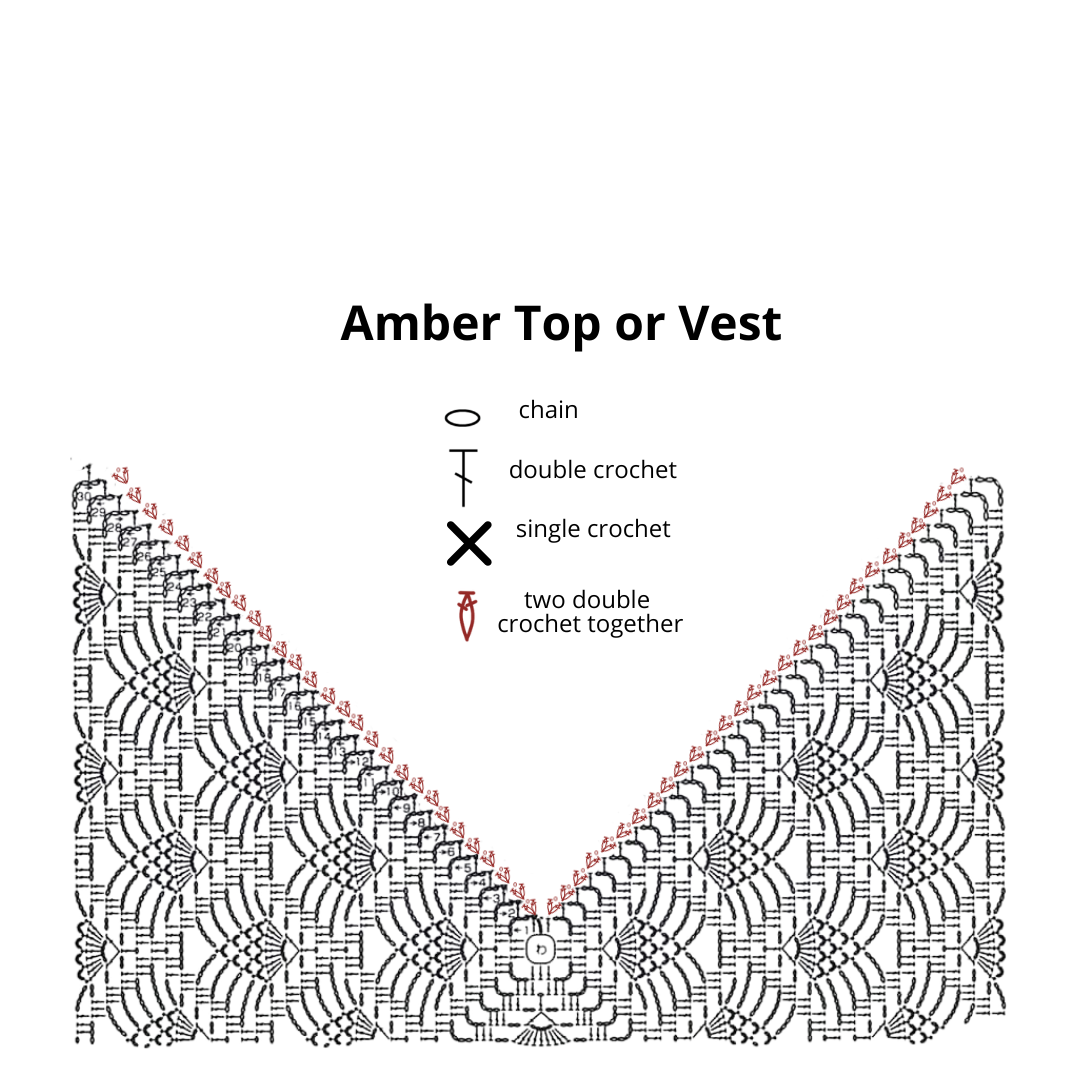
We crochet the Amber top or vest from two identical panels. After joining them together, we adjust the desired length and continue adding as many rows as needed to reach the top or vest length we want. Each panel is worked from the center, crocheting back and forth on three sides. The fourth side of the square, which remains unworked, creates the neckline. Once we reach the required armhole height, we continue working only on the width of the top, gradually adding stitches under the arms.
Adapted into a square motif, the pineapple stitch pattern allows flexibility. The number of chains may vary depending on your tension and yarn choice, so the counts in the video and the diagram might differ. The crochet grows quickly, and I believe even a confident beginner can complete this project. A big advantage is its versatility throughout the year – it can be worn as a top, a longer tunic over swimwear, a vest, or even as a light dress.
💡 TIP: I recommend ticking off each finished row on the chart. For shaping, I added increases in three places across the back and once on the front panel. If I were making a dress, I would increase on both the front and the back.
I hope your Amber top or vest turns out beautifully and brings you joy when wearing it. Would you like to inspire others or share your experience with crocheting or styling the Amber design? Feel free to post your photos in the Krampolinka Facebook group. On Instagram, please use the hashtag #topamber or #vestamber for easy searching. If you tag me in your projects made with my patterns, I may reshare them in my InstaStories to inspire others.
AMBER TOP or VEST
- Yarn: two skeins of hand-dyed yarn (100 g / 400 m) from Hravá klubka, or any two gradient yarn cakes (3-ply, 2 × 500 m)
- Yardage: 800–1000 m (depending on body height and desired length of the top)
- Hook sizes: 2.75 mm and 2.0 mm
- Measurements: front length 62 cm, width 55 cm
- Size: designed for EU size 42 (bust circumference 96 cm)
- Notions: yarn needle with a large eye, decorative label, stitch markers
- Time estimate: approx. 50 hours
- Skill level: Intermediate
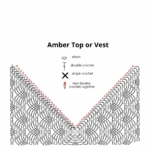
Abbreviations (US terms):
- ch – chain
- sl st – slip stitch
- dc – double crochet
- sc – single crochet
- crab st – crab stitch (reverse single crochet)
Amber Top – Front and Back Panel (Hook 2.75 mm)
Row 1: Into a magic ring work ch3 (counts as first dc), dc, dc, ch4, 3 dc, ch4, 3 dc, ch4, 3 dc, ch4. Join with sl st to the 3rd chain of beginning ch3. Turn.
Row 2: The edge pattern is ch3, then into the sl st of the previous row work dc, ch1, 2 dc together. For the first corner crochet dc, (2 dc, ch4, 2 dc) into the chain space, then dc into the first dc. Continue with the pattern of ch1, skip 1 st. For the second corner work dc in dc, (2 dc, ch4, 2 dc) into the chain space, and dc into the next dc, then continue the pattern ch1, skip 1 st. For the third corner work dc in dc, (2 dc, ch4, 2 dc) into the chain space, and dc into the next dc, continuing the pattern ch1, skip 1 st. For the fourth corner work dc in dc, (2 dc, ch4, dc) into the chain space. Finish with the edge pattern: 2 dc together, ch1, 2 dc together in the dc. Turn.
Row 3: Make a sl st into the next stitch, ch1 into the chain space, then work the edge pattern: ch3, dc, ch1, 2 dc together. For the first corner crochet dc, (2 dc, ch3, 2 dc) into the chain space, and dc into the first dc. Continue with the pattern of ch2, skip 2 dc, dc under ch-1, ch2, skip 2 dc. For the second corner work dc in dc, (2 dc, ch3, 2 dc), and dc in the next dc, then repeat the pattern ch2, skip 2 dc, dc under ch-1, ch2, skip 2 dc. The third corner is worked the same way. In the fourth corner crochet dc in dc, (2 dc, ch4, dc) into the chain space. Finish with the edge pattern: 2 dc together, ch1, 2 dc together in the dc. Turn.
Row 4: Make a sl st and ch1 into the chain space. Work the edge pattern and the first corner as in Row 3. For this row the pattern is ch2, skip 2 dc, dc–ch5–dc into the next dc, ch2, skip 2 dc. Repeat to the end of the row and turn.
Row 5: Make a sl st and ch1 into the chain space. Work the edge pattern and the first corner as in Row 3. For this row the pattern is ch2, skip 2 dc, 9 dc into the chain space, ch2, skip 2 dc. Repeat to the end of the row and turn.
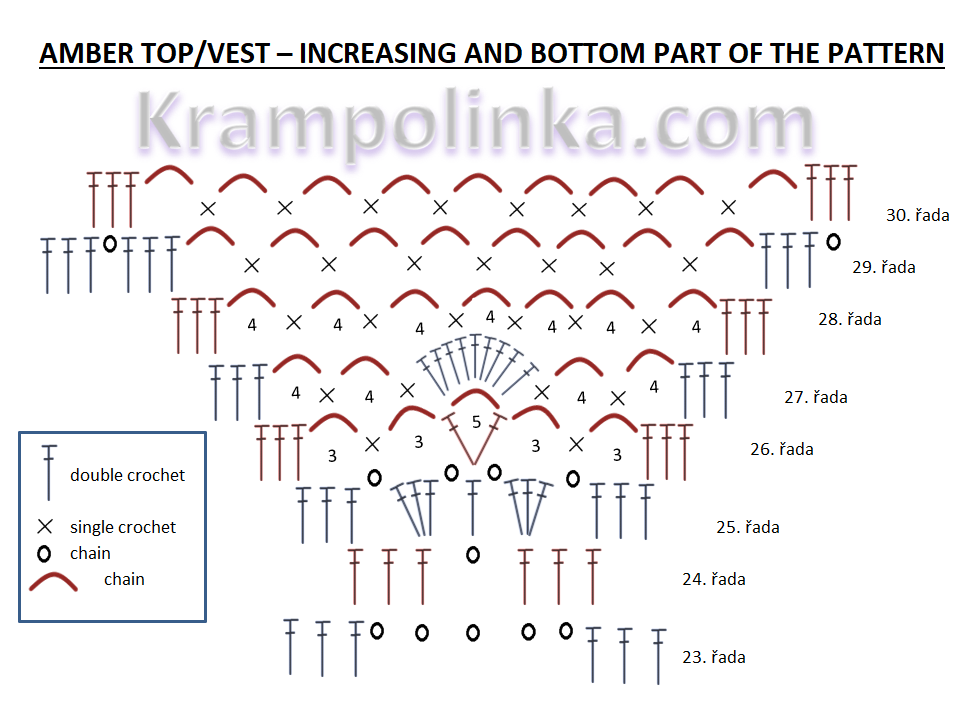
Row 6: Make a sl st and ch1 into the chain space. Work the edge pattern and the first corner as in Row 3. For this row the pattern is ch3 or ch4 (depending on your tension), sc in the first dc, ch3, skip 1 dc, sc in the 3rd dc, ch3, skip 1 dc, sc in the 5th dc, ch3, skip 1 dc, sc in the 7th dc, ch3, skip 1 dc, sc in the 9th dc, then ch3 or ch4 (depending on your tension). Continue with the corners as in Row 3, work the same row pattern, and finish with the edge pattern. Turn.
Row 7: Make a sl st and ch1 into the chain space. Work the edge pattern and the first corner as in Row 3. For this row the pattern is ch6 or ch7 (depending on your tension), sc under the first chain space, ch3, sc under the second chain space, ch3, sc under the third chain space, ch3, sc under the fourth chain space, then ch6 or ch7 (depending on your tension). Continue with the corners as in Row 3, work the same row pattern, and finish with the edge pattern. Turn.
Row 8: Make a sl st and ch1 into the chain space. Work the edge pattern and the first corner as in Row 3. In this row you start creating new columns of the pattern at the beginning and end of each section of the square. The row pattern is ch1, skip 1 dc, dc in next dc, 2 dc into the chain space, ch6, sc into the first chain space, ch3, sc into the second chain space, ch3, sc into the third chain space, ch6, 2 dc into the chain space, dc in dc, skip 1 dc, ch1. Continue with the corners as in Row 3, work the same row pattern, and finish with the edge pattern. Turn.
Row 9: Make a sl st and ch1 into the chain space. Work the edge pattern and the first corner as in Row 3. The row pattern is ch2, skip 2 dc, dc into the chain space, ch2, skip 2 dc, dc into dc, 2 dc into the chain space, ch6, sc into the first chain space, ch3, sc into the second chain space, ch6, 2 dc into the chain space, dc into dc, ch2, skip 2 dc, dc into the chain space, ch2, skip 2 dc. Continue with the corners as in Row 3, repeat the row pattern, and finish with the edge pattern. Turn.
Row 10: Make a sl st and ch1 into the chain space. Work the edge pattern and the first corner as in Row 3. The row pattern is ch2, skip 2 dc, (dc, ch5, dc) into dc, ch2, skip 2 dc, dc into dc, 2 dc into the chain space, ch5, sc into the first chain space, ch5, 2 dc into the chain space, dc into dc, ch2, skip 2 dc, (dc, ch5, dc) into dc, ch2, skip 2 dc. Continue with the corners as in Row 3, repeat the row pattern, and finish with the edge pattern. Turn.
Row 11: Make a sl st and ch1 into the chain space. Work the edge pattern and the first corner as in Row 3. The row pattern is ch2, skip 2 dc, 9 dc into the chain space, ch2, skip 2 dc, dc into dc, 2 dc into the chain space, ch5, 2 dc into the chain space, dc into dc, ch2, skip 2 dc, 9 dc into the chain space, ch2, skip 2 dc. Continue with the corners as in Row 3, repeat the row pattern, and finish with the edge pattern. Turn.
Row 12: Make a sl st and ch1 into the chain space. Work the edge pattern and the first corner as in Row 3. The row pattern is ch3 or ch4 (depending on your tension), sc in the first dc, ch3, skip 1 dc, sc in the 3rd dc, ch3, skip 1 dc, sc in the 5th dc, ch3, skip 1 dc, sc in the 7th dc, ch3, skip 1 dc, sc in the 9th dc, then ch3 or ch4 (depending on your tension). Then continue with dc into dc, 2 dc into chain space, ch1, 2 dc into chain space, dc into dc. Again crochet ch3 or ch4 (depending on tension), sc in the 1st dc, ch3, skip 1 dc, sc in the 3rd dc, ch3, skip 1 dc, sc in the 5th dc, ch3, skip 1 dc, sc in the 7th dc, ch3, skip 1 dc, sc in the 9th dc, then ch3 or ch4 (depending on tension). Continue with the corners as in Row 3, repeat the row pattern, and finish with the edge pattern. Turn.
Row 13: Make a sl st and ch1 into the chain space. Work the edge pattern and the first corner as in Row 3. In this row a new column of the pattern begins in the center of each section of the square, as in Row 8. Otherwise, this row is worked the same way as Row 2.
Rows 14–20: Work the same sequence as Rows 3–9. Finish with the row where the pineapple motif has two chain arches with sc. Fasten off the yarn at the end of this row.
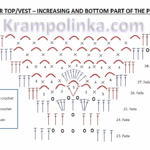
Shaping the armhole (hook 2.75 mm)
Row 21: Join the yarn at the end of the first motif on the side of the square, into the 3rd dc, and continue crocheting the pattern as in Row 9: work 2 dc into the chain space, ch5 or ch6, sc under the first chain arch, ch3, sc under the second chain arch to form the tip of the pineapple motif, then continue to the end of the row. Finish on the opposite side at the beginning of the last motif by placing 2 dc into the chain space and 1 dc into the first dc. Turn.
Rows 22–24: Begin the row with ch1, sl st into the middle dc and sl st into the last dc. Start the row pattern with ch3, 2 dc into the chain space, and continue with the motif pattern as in Rows 10–12. Finish on the opposite side by placing 2 dc into the chain space and 1 dc into the first dc. Turn.
Expansion in the pattern – second section (hook 2.75 mm)
Row 25: Begin with ch1 and two sl st. Continue as in Row 13. The expansion is worked on the lower part of the square – the second section. The increase can be placed either in the first and third pattern repeat, or in the center of the panel. If a wider expansion is needed, work three increases. Once you reach the first tip of the motif, crochet 3 dc into the third dc, ch1, dc into the chain space, ch1, and 3 dc into the first dc. Then continue with the pattern as in Row 13. End the row on the opposite side with 2 dc into the chain space and 1 dc into the first dc. Turn.
Row 26: Begin with ch1 and two sl st. Continue as in Row 14. At the place of the expansion, switch to crocheting arches. After the last dc, crochet ch3, skip 2 dc, sc under the chain space, ch3 above the increase, (dc, ch5, dc) into dc, then ch3, sc under the chain space, ch3, skip 2 dc, and continue with dc into dc and 2 dc into the chain space. Then continue with the pattern as in Row 14. End the row on the opposite side with 2 dc into the chain space and 1 dc into the first dc. Turn.
Row 27: Begin with ch1 and two sl st. Continue as in Row 15. At the place of the expansion, switch to crocheting arches. After the last dc, crochet ch3, skip 2 dc, sc under the chain space, ch3, sc under the chain space, then 9 dc into the arch of ch5, sc into the arch of ch3, ch3, sc under the chain space, ch3, skip 2 dc, and then continue with dc into dc and 2 dc into the chain space. Continue with the pattern as in Row 15. End the row on the opposite side with 2 dc into the chain space and 1 dc into the first dc. Turn.
Joining the panels at the sides (hook 2.75 mm)
Place both panels together with the wrong sides facing each other. The side seams are joined on the right side using single crochets and chains, starting from the armhole and working downwards to the bottom edge. After finishing the first seam, fasten off the yarn. On the second seam, you may continue crocheting directly into the bottom part of the top or vest.
For the armhole, join the two panels together with chains. Work ch2, insert the hook into the middle dc of the first panel and make 1 sc. Work ch2 again and sc into the middle dc of the opposite panel. Continue in a zig-zag manner, alternating ch3, sc into the chain space of one panel and ch3, sc into the chain space of the other panel. Repeat along the entire side, alternating ch3 with sc into the chain spaces or dc. Finish the joining in the corners of the panels.
Continue working on the right side. Where the pineapple motif ends, complete the pattern using double crochets. Where increases were made, work arches of ch4 with sc.
Bottom part of the pattern (hook 2.75 mm)
Row 28: Begin on the side seam with ch1 and sc in the same place. On the right side crochet ch4, sc into the corner of the yoke, ch4, sc into the middle dc, ch4, and sc into the chain space. At the point where the motif is completed (“the frame of the pineapple pattern”), work dc into the 3rd dc, 2 dc into the chain space, ch5, 2 dc into the chain space, and dc into the next dc. Continue with ch4 and sc into the chain space, ch4 and sc into the next chain space, then into the fan crochet sc into the 3rd dc, ch4, sc into the 6th dc of the fan, ch4, sc into the chain space, ch4, skip 2 dc, dc into the next dc, 2 dc into the chain space, and continue with the same pattern as at the beginning of the row. Finish the row with ch1 and dc into sc, which places you in the middle of the chain arch.
Row 29: Begin with ch1 and sc into the chain space. Crochet ch4 and sc into the next chain space. At the point where the motif is completed (“the frame of the pineapple pattern”), work dc into the 3rd dc, 2 dc into the chain space, ch1, 2 dc into the chain space, and dc into the 1st dc. Continue with ch4 and sc into the chain space. Finish the row with ch1 and dc into sc, ending in the middle of the chain arch.
Row 30: Begin with ch1 and sc into the chain space. Crochet ch4 and sc into the next chain space. At the point where the motif is completed (“the frame of the pineapple pattern”), work dc into the 3rd dc, dc into the chain space, and dc into the 1st dc. Continue with ch4 and sc into the chain space. Finish the row with ch1 and dc into sc, ending in the middle of the chain arch.
Rows 31–48: Begin with ch1 and sc into the chain space. Crochet ch4 and sc into the next chain space. Finish each row with ch1 and dc into sc, ending in the middle of the chain arch.
Bottom edging (hook 2.75 mm)
Row 49: Ch1 and sc into the chain space. Into the next chain space crochet a shell of 5 dc, then sc into the following chain space. Repeat this pattern of shells and sc to the end of the row. If the edging pulls too tightly, add 1 dc to each shell. Finish with sl st.
Row 50: Ch3 in place of the first dc, then 5 dc into the same sc. Work sc into the middle dc of the next shell. Alternate between 5–6 dc into sc, and sc into the middle dc of the shell. Finish with sl st.
Armhole edging (hook 2.75 mm)
Row 1: Join the yarn at the underarm. Ch1 in place of sc. Insert the hook into the loop, yarn over, insert the hook under the chain space, pull the yarn through two loops, and only then finish the sc. Insert the hook into the next sc, yarn over, insert under the chain space, pull through two loops, and then complete the sc. Under each chain arch, crochet one less sc than the number of chains. Into each dc, crochet one crab stitch (reverse sc). Where working into a row that ended with dc, crochet 2 crab stitches. At the shoulders, join the front and back panels. If the depth of the armhole is not sufficient, you can add the needed number of chains across the shoulder. Continue the edging in crab stitch in mirrored fashion. Finish the row with sl st.
Row 2: Ch1 in place of sc. Work crab stitches (reverse sc) into the back loop only. Finish with sl st. Adjust the number of rows as desired.
Finishing
Weave in all loose ends.
Usage and Permissions
This pattern is intended for personal use only. If you would like to use it for commercial purposes, please contact me first. Always include the source link: www.krampolinka.cz when sharing your projects online. The pattern is specifically written for the yarn, hook size, and tension used in this sample. If you use a different yarn or hook, your final bag size and shape may vary.
Enjoy this free pattern and you can follow my latest projects, tutorials, ideas, reviews, video podcasts, tips, and tricks:
- Krampolinka YouTube videos (subtitled since 2024)
- Krampolinka Instagram
- Krampolinka FB group
-

- Top or vest Amber
-
- Crochet stylish vest
-
- Perfect all year long
-
- Elegant vest Amber

-
- Pineapple pattern on the top amber
-

- Trendy vest Amber
-
- Made of hand dyied yarn
-
- „V“ neck Top Amber
-
- Full crochet diagram

-
- Lower part of top

No Comments