
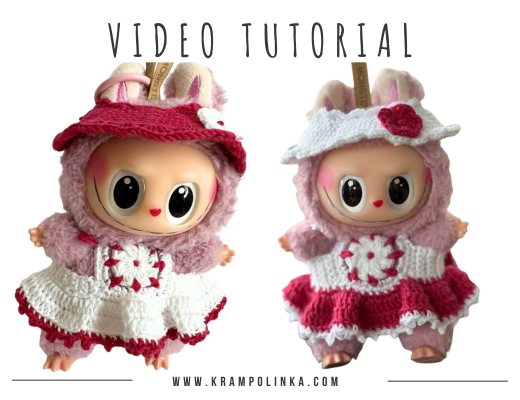
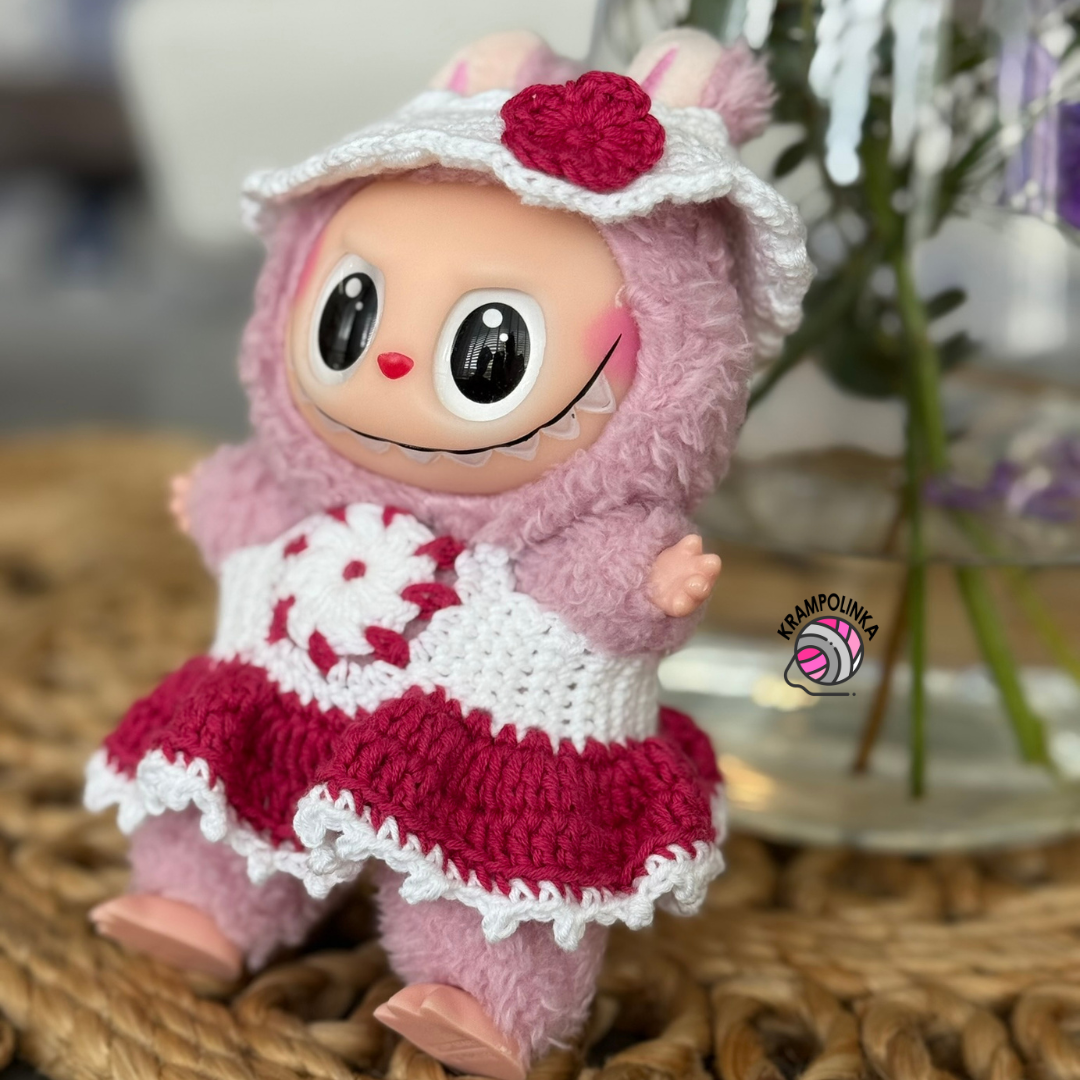
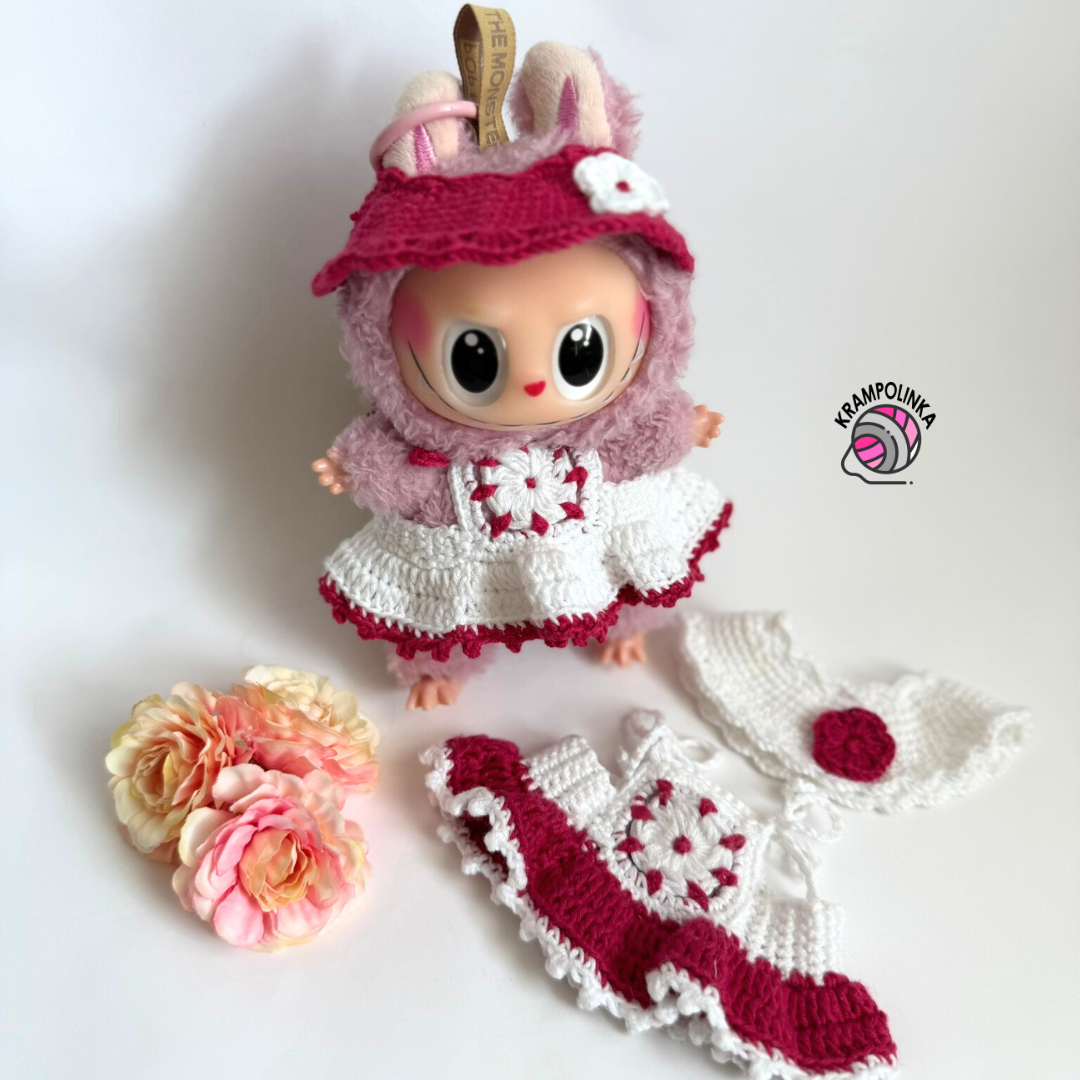
The adorably ugly Labubu is the hit of the season – let’s style it with a crocheted summer outfit!
Labubu is a small, cute-but-mischievous collectible character created by Hong Kong illustrator Kasing Lung. It became famous in the The Monsters series and, thanks to a collaboration with Pop Mart, turned into a true phenomenon. You can recognize it by its wide smile showing nine sharp teeth, big ears, and a playfully mischievous expression. It even bears a striking resemblance to the vintage Monchhichi toys. Since 2019, Labubu has been sold mainly in blind boxes, where buyers don’t know which version they’ll get until they open it. In recent years, it has captured the hearts of not only collectors but also celebrities all over the world. You’ll see Labubu in children’s hands as a beloved toy, and as a stylish accessory clipped to handbags.
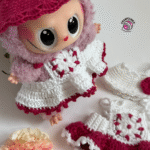
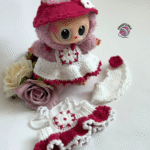
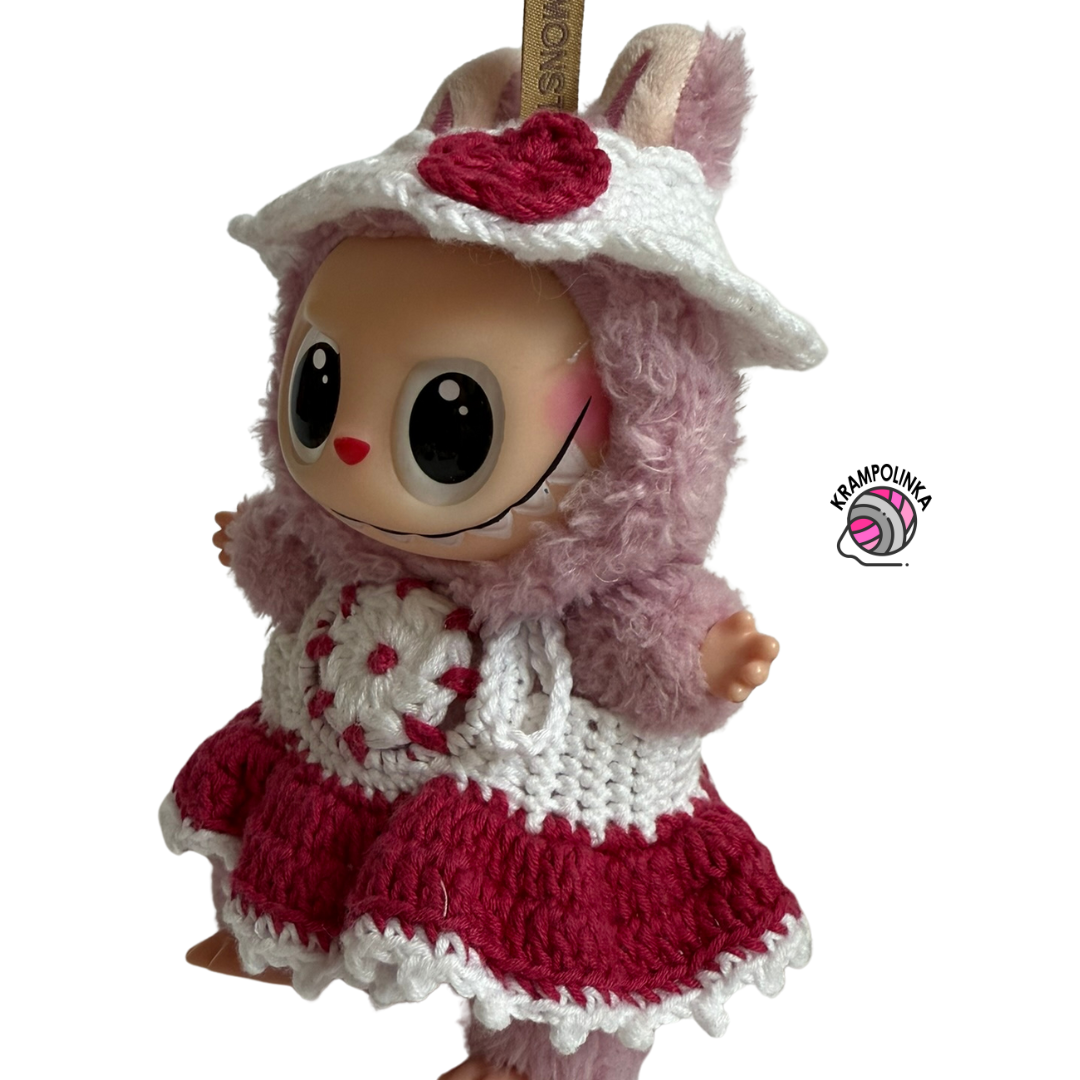
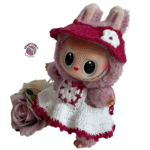
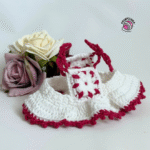
My daughter wished for her very own Labubu as a school-year reward – and along with her first figure came the idea to make crochet outfits. Today, I’m bringing you the first summer set: an adorable crocheted dress and a little hat with a flower.
I used Schachenmayr Baby Smiles Cotton Bamboo – a 50 g ball with a length of 156 m, composed of 52% cotton and 48% viscose. With the OEKO-TEX® Standard 100 certificate, it’s suitable even for children under three years old. The yarn is beautifully soft and pleasant to the touch. It’s perfect not only for baby blankets and clothes but also for year-round tops, blouses, and cardigans for adults. And a little teaser – I’m already working on a lacy crochet cardigan from this yarn, so stay tuned!
VIDEO TUTORIAL PREMIERE – Wednesday, August 20, 2025 at 7:00 PM
The crochet dress for Labubu is made in three simple steps. First, create two small squares that will form the top part of the outfit. Then join them with a narrow strip to hold the shape. Finally, crochet a wide skirt to give the dress lightness and volume. For easy dressing, add straps that tie on the doll’s shoulders.
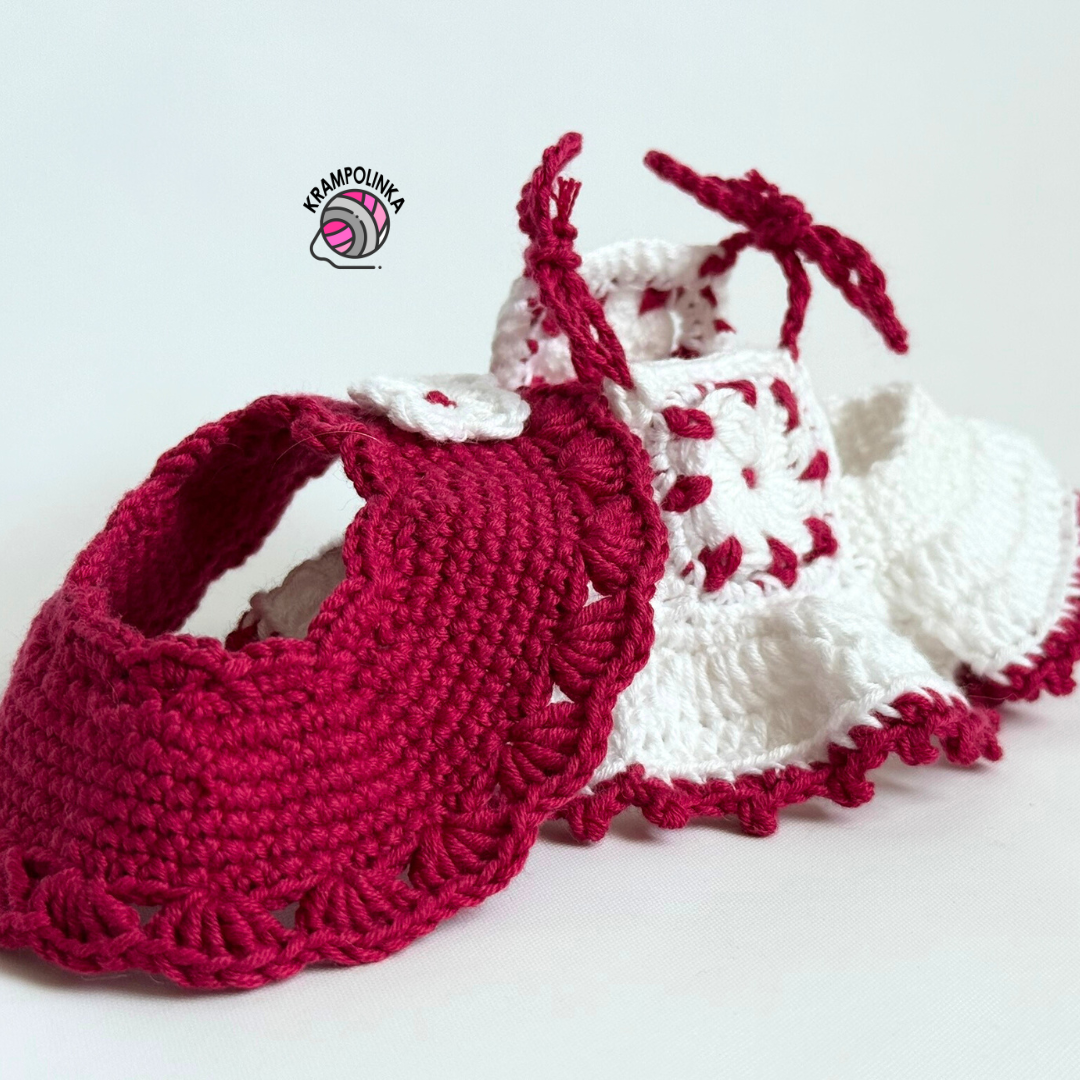
The hat for Labubu has an unusual shape because the character has bunny-like ears and often a hanging loop on top. For this reason, start by crocheting a chain long enough to go around the ears. Join the chain and then crochet the hat, finishing it with a scalloped edge. Lastly, make a small flower and sew it onto the hat as a cute embellishment.
I hope your summer outfit for Labubu turns out beautifully and that your little character is perfectly styled!
Would you like to inspire others or share your experience crocheting an outfit for Labubu? You can post your photos in the Krampolinka Facebook group. On Instagram, please use the tags #satylabubu and #klobouceklabubu for easy searching. If you tag me in your creations made from my patterns, I can share them in my Instagram Stories to inspire others.
LABUBU DRESS & LABUBU HAT
Yarn: Schachenmayr Baby Smiles Cotton Bamboo – White (01001) and Raspberry (01136)
Yardage: One ball of each color is enough for three dresses and three hats
Hook: 2 mm for the hat; 2 mm and 2.5–3 mm for the dress
Size: Outfit is designed for a standing Labubu (height: … cm/inches – specify if known)
Notions: Yarn needle with a large eye
Time Estimate: approx. 120 minutes
Skill Level: Absolute beginner
Abbreviations (US terms):
- CH – chain stitch
- SL ST – slip stitch
- DC – double crochet
- SC – single crochet
- BLO SC – single crochet in back loop only
- Picot – CH 2, SL ST into the first CH
Labubu Dress – White, Hook 2 mm
Row 1: Into a magic ring, CH 3 and work 2 DC together, CH 1. Then 3 DC together, CH 1 seven times. Join with a SL ST.
Labubu Dress – Raspberry, Hook 2 mm
Row 2: CH 1 instead of SC, SC into the CH 1 space, CH 3. The stitch pattern for this row is SC into CH 1 space, CH 3. End the row with a SL ST. Fasten off, leaving a long tail to use for the center.
Labubu Dress – White, Hook 2 mm
Row 3: SL ST into the chain space. CH 1 instead of SC, work 3 SC into the CH 1 space. The stitch pattern for this row is 4 SC into CH 1 space. End the row with a SL ST.
Row 4: SL ST into the first SC, CH 1 instead of SC, SC into each SC. Above the SC from the contrasting color row, crochet a corner: SC – CH 2 – SC. Then work 7 SC into SC. Shape the piece into a square. End the row with a SL ST. Fasten off. Make a second identical square, but do not fasten off, as you will continue with the joining strip. Try the square on to check the size — if your square is bigger, either your yarn is different, or you crochet more loosely than I do.
Joining the Squares, hook 2 mm
Row 1: With 2 SL ST, move forward by two stitches. CH 1 instead of SC, then 3 SC. Work the last SC into the corner of the square. Turn.
Rows 2–23: CH 1 instead of SC, then SC into SC, SC into SC, and SC into the top of the turning chain. Turn.
Row 24: On the wrong side, join the other square. Fasten off. Repeat the same joining method, row count, and slip stitch connection. Do not fasten off the yarn.
Dress Skirt, hook 2–2.5 mm
Row 1: CH 1 instead of SC, SC into the same stitch. In the square section, work the repeat 2 SC in one stitch, SC in next stitch. In the strip section, work the repeat 2 SC, SC, SC, SC. End the row with a SL ST.
Dress Skirt, hook 3 mm
Row 2: CH 2 instead of DC. Follow the repeat from the previous row: in the square section, work 2 DC, DC; in the strip section, work 2 DC, DC, DC, DC. End the row with a SL ST.
Row 3: CH 2 instead of DC, then DC into each DC. End the row with a SL ST.
Skirt Edging, raspberry color, hook 2 mm
Row 4: CH 1 instead of SC, BLO SC, picot (CH 2, SL ST into first CH). The repeat for this row is BLO SC, BLO SC, BLO SC, picot. End the row with a SL ST.
Straps, hook 2 mm
Attach yarn in the corner of the square, leaving a long tail for sewing in. Crochet a chain of 25–30 stitches. Fasten off with a knot. Attach a strap to each corner of the square – 4 in total.
Labubu Hat, raspberry, hook 2 mm
Row 1: Crochet a chain of 35–38 stitches (depending on your tension). Join with a SL ST. Check that the chain fits around the ears.
Row 2: CH 1 instead of SC. Work the repeat 2 SC in one stitch, SC in next stitch. Move to the next round in pattern.
Row 3: Work the repeat 2 SC in one stitch, SC, SC.
Rows 4–7: SC in each SC. In the last round, finish with a SL ST.
Row 8: CH 3 instead of DC, then 4 DC in the same stitch. Skip 3 stitches. Work the repeat 5 DC in one stitch, skip 3 stitches. End the round with a SL ST. Fasten off, leaving a long tail to sew on the flower.
Hat Inner Edging, raspberry, hook 2 mm
Attach yarn in the first stitch. Work 5 SC into every second stitch. Fasten off.
Flower for Hat, white, hook 2 mm
Into a magic ring, make 5 petals, each made of SC and 3 DC. Finish with a SL ST and tighten the magic ring. Sew the flower onto the hat using the yarn tail.
Finishing
Weave in all loose ends.
Usage and Permissions
This pattern is intended for personal use only. If you would like to use it for commercial purposes, please contact me first. Always include the source link: www.krampolinka.cz when sharing your projects online. The pattern is specifically written for the yarn, hook size, and tension used in this sample. If you use a different yarn or hook, your final bag size and shape may vary.
Enjoy this free pattern and you can follow my latest projects, tutorials, ideas, reviews, video podcasts, tips, and tricks:
- Krampolinka YouTube videos (subtitled since 2024)
- Krampolinka Instagram
- Krampolinka FB group
-
- Crochet Labubu outfit

-
- Crochet set for Labubu

-

- Crochet with me! Labubu outfit Free Pattern
-

- Hat for Labubu
-
- Dress for Labubu

-
- Easy follow instruction and video tutorial for Labubu outfit
-
- Beautiful crochet Labubu´s Dress

-

- Free Pattern for Labubu clothes

No Comments