
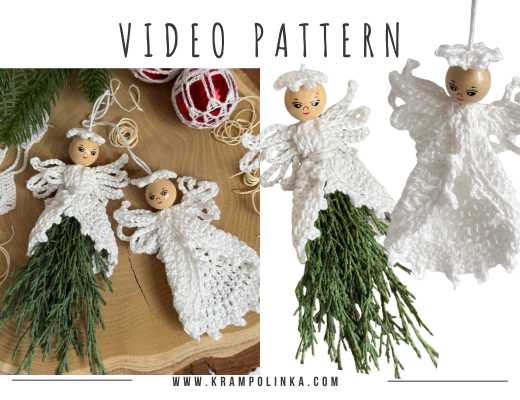
The idea for this little angel came completely unexpectedly. A short moment with pleasant Christmas music in the car was enough, and I immediately knew I had to try it – and film a tutorial for you.
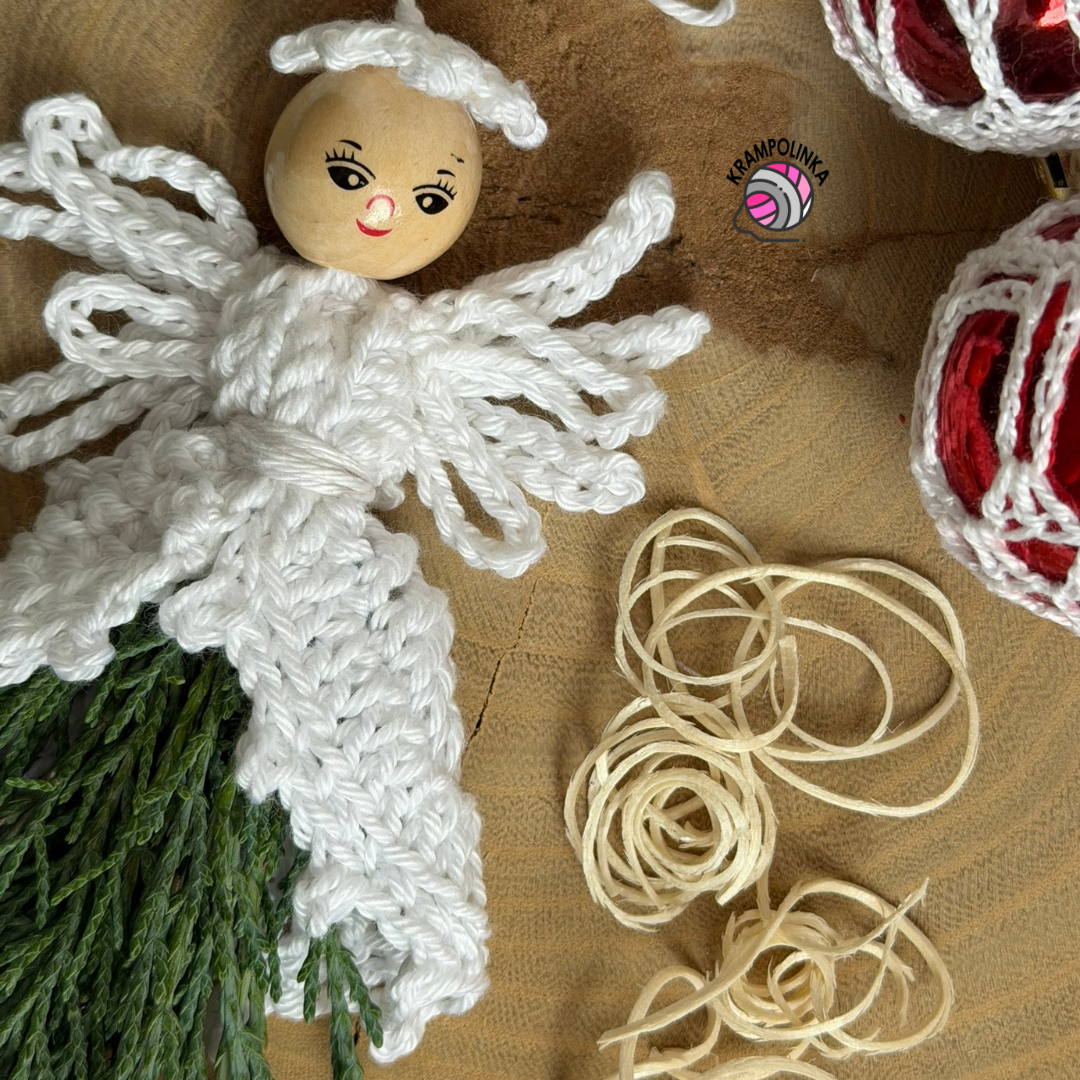
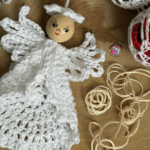
That’s how the Evergreen Angel was born – a small, light, and wonderfully fragrant Christmas decoration that combines crochet with a touch of nature. The Evergreen Angel is crocheted using Vlna Hep Camilla or Schachenmayr Catania yarn (50 g / 125 m, 100% cotton). If you manage to find cotton yarn with a delicate lurex thread, your angel will look even more festive and will beautifully sparkle in the Christmas lights.
VIDEO TUTORIAL (English subtitles)
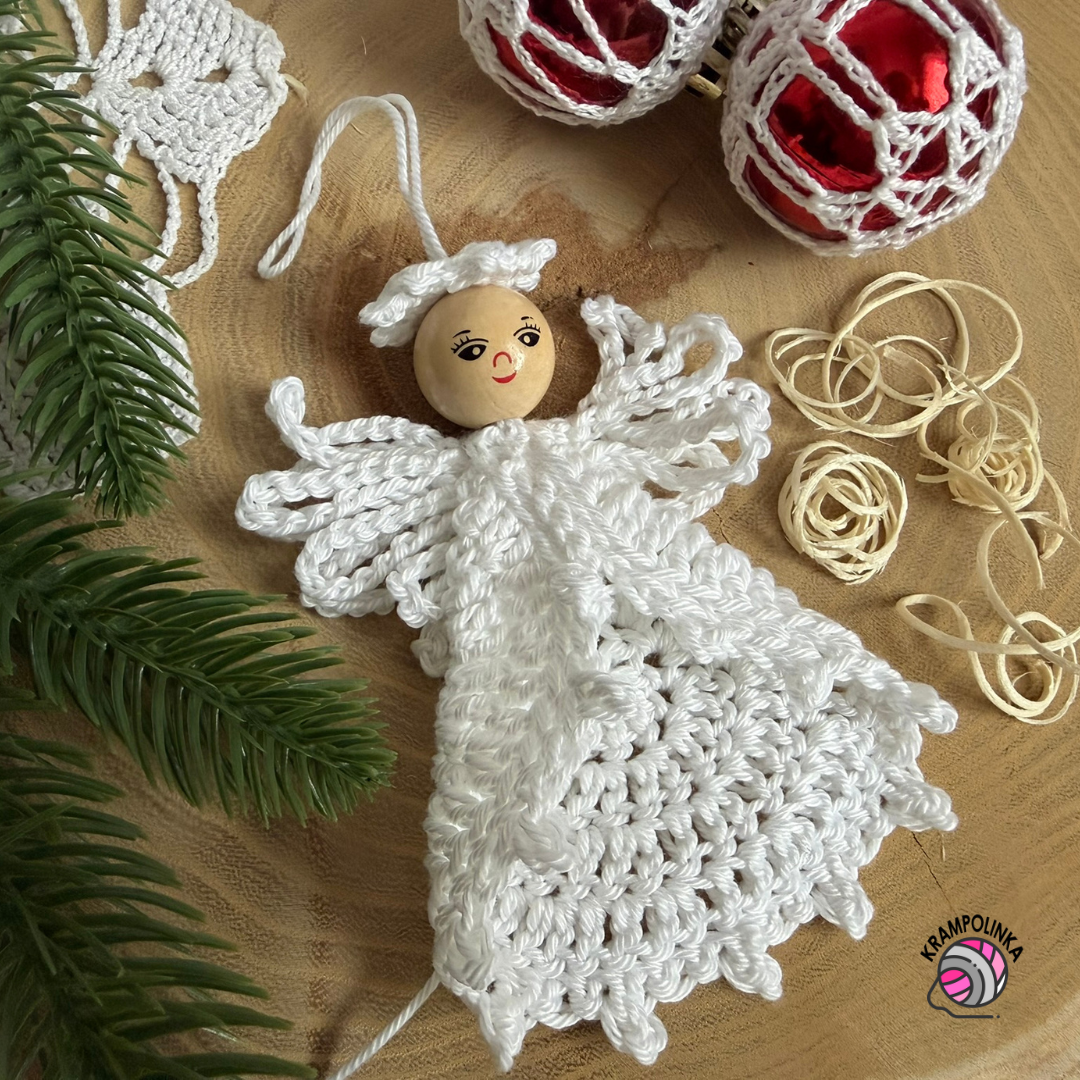
The angel is crocheted in three simple steps. First, we make the dress – a round made of double crochet stitches finished with a delicate picot edging. Next, we crochet the wings as a round made of chain stitches, and finally a small star, which replaces the hair.
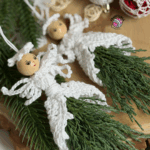
All parts are sewn together using the yarn tail from the dress. We insert a small sprig of greenery (such as juniper, yew, cypress, or fir) into the skirt of the dress and tightly wrap it with the same yarn tail. This beautifully shapes the little angel’s body – and it’s done.
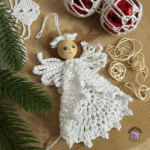
💡 TIP: The Evergreen Angel makes a lovely gift for a colleague, a small item for a Christmas market, or a fragrant Christmas decoration for your home. The angel is beautiful even without the greenery.
Would you like to inspire others with your styling or share your crochet experience? Please share your pictures in KRAMPOLINKA Facebook Group. On Instagram, please use the hashtag #andilekjehlicka for easy sharing and searching. If you tag me in your finished angels, I’ll be happy to share your photos in my Instastories to inspire others.
EVERGREEN ANGEL
Yarn: white – Vlna Hep Camilla, Schachenmayr Catania
Yarn usage: 1 ball = approx. 5 angels
Hook sizes: 3 mm and 2 / 1.8 mm
Additional supplies:
Large wooden bead with a face (diameter 1.8 cm), a small sprig of a coniferous tree, yarn needle
Time estimate: approx. 1 hour
Skill level: Beginner friendly
Abbreviations
CH – chain
SL ST – slip stitch
DC – double crochet
Picot – CH2 + SL ST
MR – magic ring
T – turning chain / beginning chain used as stitch height
Dress – hook 3 mm
Round 1: Work into MR. T-CH 3, 11 DC, SL ST. (12 stitches)
Round 2: T-CH 3, DC in the same stitch, then 2 DC in each stitch around. Repeat. End the round with a SL ST. (24 DC)
Round 3: T-CH 3, DC in the same stitch, DC in the next stitch. Pattern for this round: 2 DC in one stitch, 1 DC in the next stitch. Repeat. End with a SL ST. (36 DC)
Round 4: T-CH 3, DC in the same stitch, DC in the next stitch, DC in the next stitch. Pattern: 2 DC – DC – DC. Repeat. End with a SL ST. (48 DC)
Round 5 – dress edging
CH1 instead of SC, SL ST in the same stitch. Then work 6 SL ST in the back loops only.
SC in BLO, SC in BLO + picot.
The pattern is: SC (BLO) – SC (BLO) – SC (BLO) with picot.
Continue this sequence until 6 stitches remain to the end of the round.
Fold the edge of the circle together and crochet the last six stitches to close the dress.
Work SL ST into the back loop of one side and the front loop of the opposite side (6 times).
Finish off, leaving a long tail for sewing the wings, attaching the head, and wrapping the greenery during assembly.
Wings – hook 1.8 / 2 mm
Round 1: Work into MR: T-CH 3, 11 DC, SL ST. (12 stitches)
Round 2: CH1 instead of SC and SC in the same stitch. Now crochet chain loops: CH15, SC in next stitch; CH15, SC in next stitch.
You will have 12 loops (sometimes 13). End the round with a SL ST.
Tie the loose ends.
Fold the circle in half and sew to the back/top of the dress.
Star (Hair) – hook 1.8 / 2 mm
Round 1: Work into MR. T-CH 3, DC + picot. DC, DC + picot. Repeat this a total of 12 times.
Finish with a DC into MR and SL ST.
Tie off and secure the ends.
Assembly
Sew in the center tail from the dress.
Thread the long tail from the dress through the wooden head bead, then slide the star on top (wrong side facing the head).
Measure a loop for hanging. Pass the yarn tail through the star, the bead, and sew it to the top of the dress.
Tie the loop so the star stays firmly on the head.
Cut small sprigs of greenery. Smooth, flexible branches work best: juniper, cypress, Himalayan pine, or fir.
Gather a small bunch and secure the ends with a tiny elastic band. Insert the greenery into the dress and wrap tightly about 10 times with the long tail. This creates the angel’s “body.”
Sew the tail back and forth to secure, then finish off.
Copyright Notice
This pattern is for personal use only. For commercial use, please contact me directly. Always include the source credit: www.krampolinka.com. The pattern is designed specifically for this yarn, hook size, and my personal tension. If you use a different yarn, hook, or tension, your final product may vary in size or shape.
Enjoy this free pattern and you can follow my latest projects, tutorials, ideas, reviews, video podcasts, tips, and tricks:
- Krampolinka YouTube videos (subtitled since 2024)
- Krampolinka Instagram
- Krampolinka FB group
-

- A touch of nature and crochet 🌲

-
- Little handmade Christmas angel 👼
-
- Natural Christmas charm 🤍

-

- Tiny angel, big holiday feeling 💫
-
- Winter magic in yarn ✨

-
- Soft, simple, beautiful 🎄

No Comments