
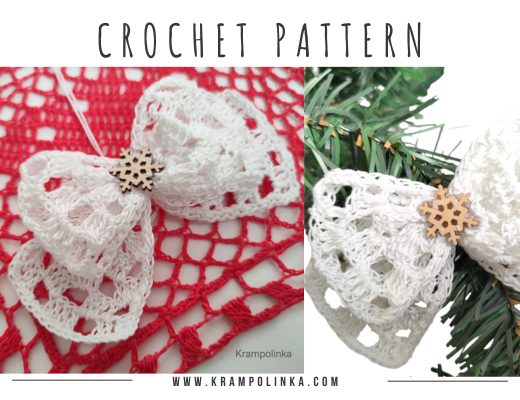
In today’s video tutorial, we’ll crochet a delicate bow using Vlna Hep Moonlight yarn.
Vlna Hep Moonlight comes in 100 g / 550 m balls and is made from 100% mercerized cotton. The yarn has a subtle sheen, a beautiful color range, and I love using it for Christmas and Easter decorations, doilies, and table runners.
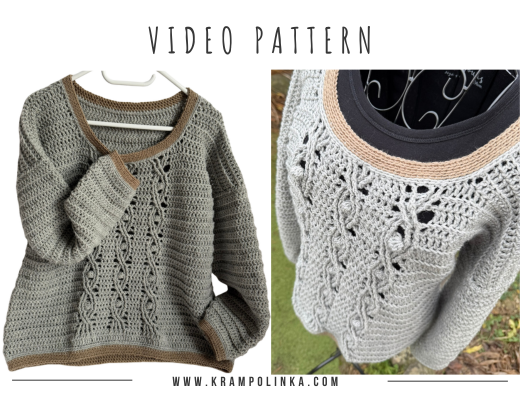
Moonlight is also perfect for larger summer projects such as dresses or flowy skirts.
VIDEO TUTORIAL (Czech Only)
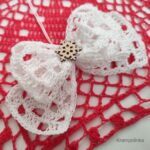
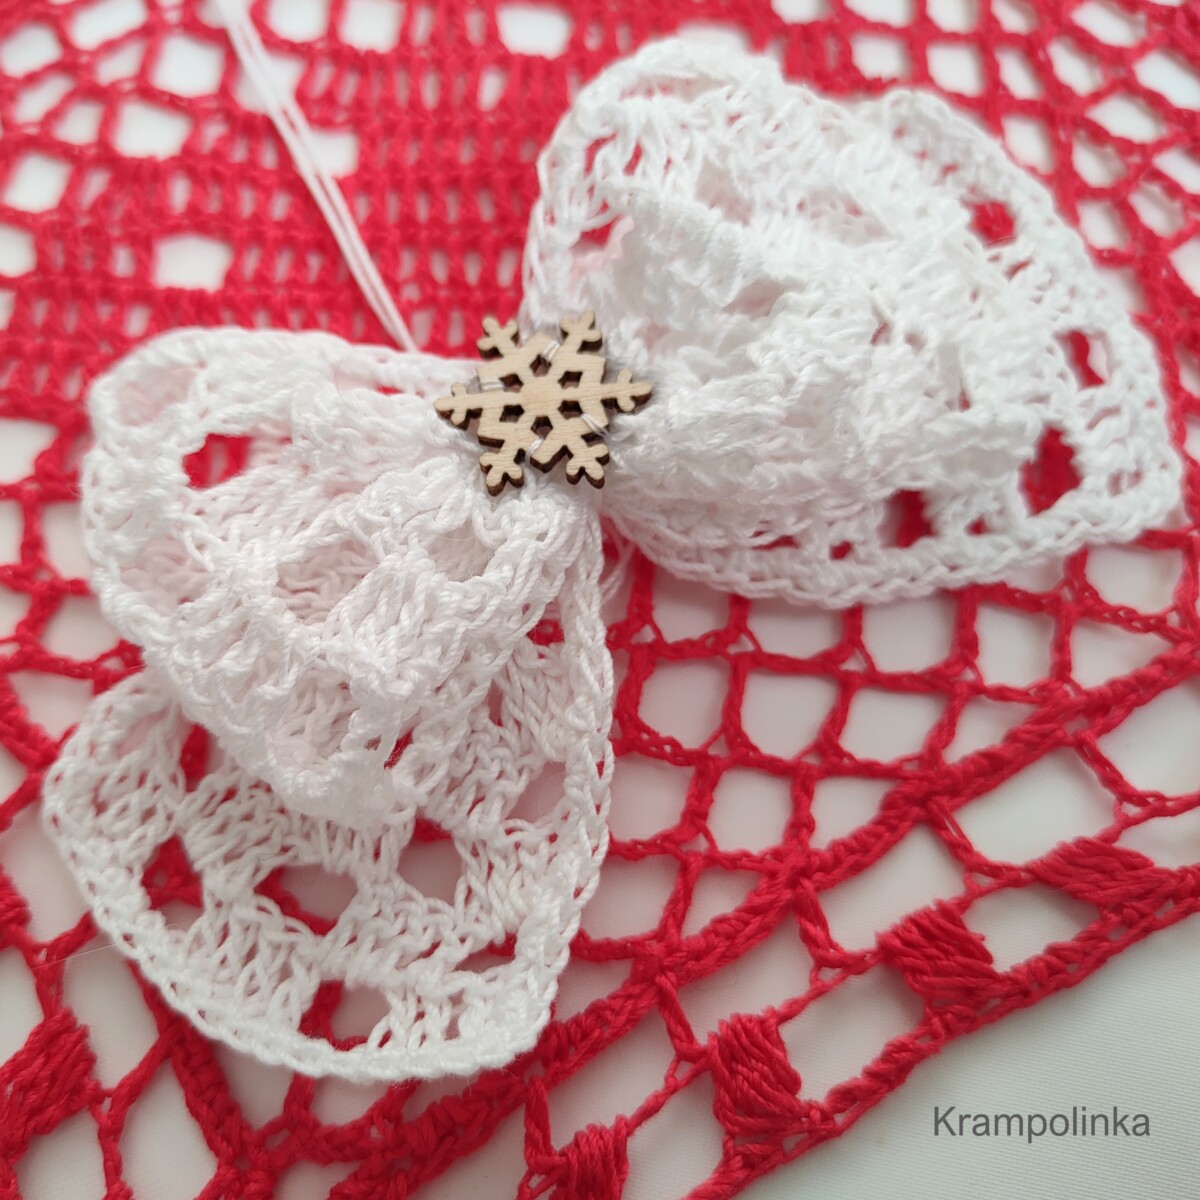
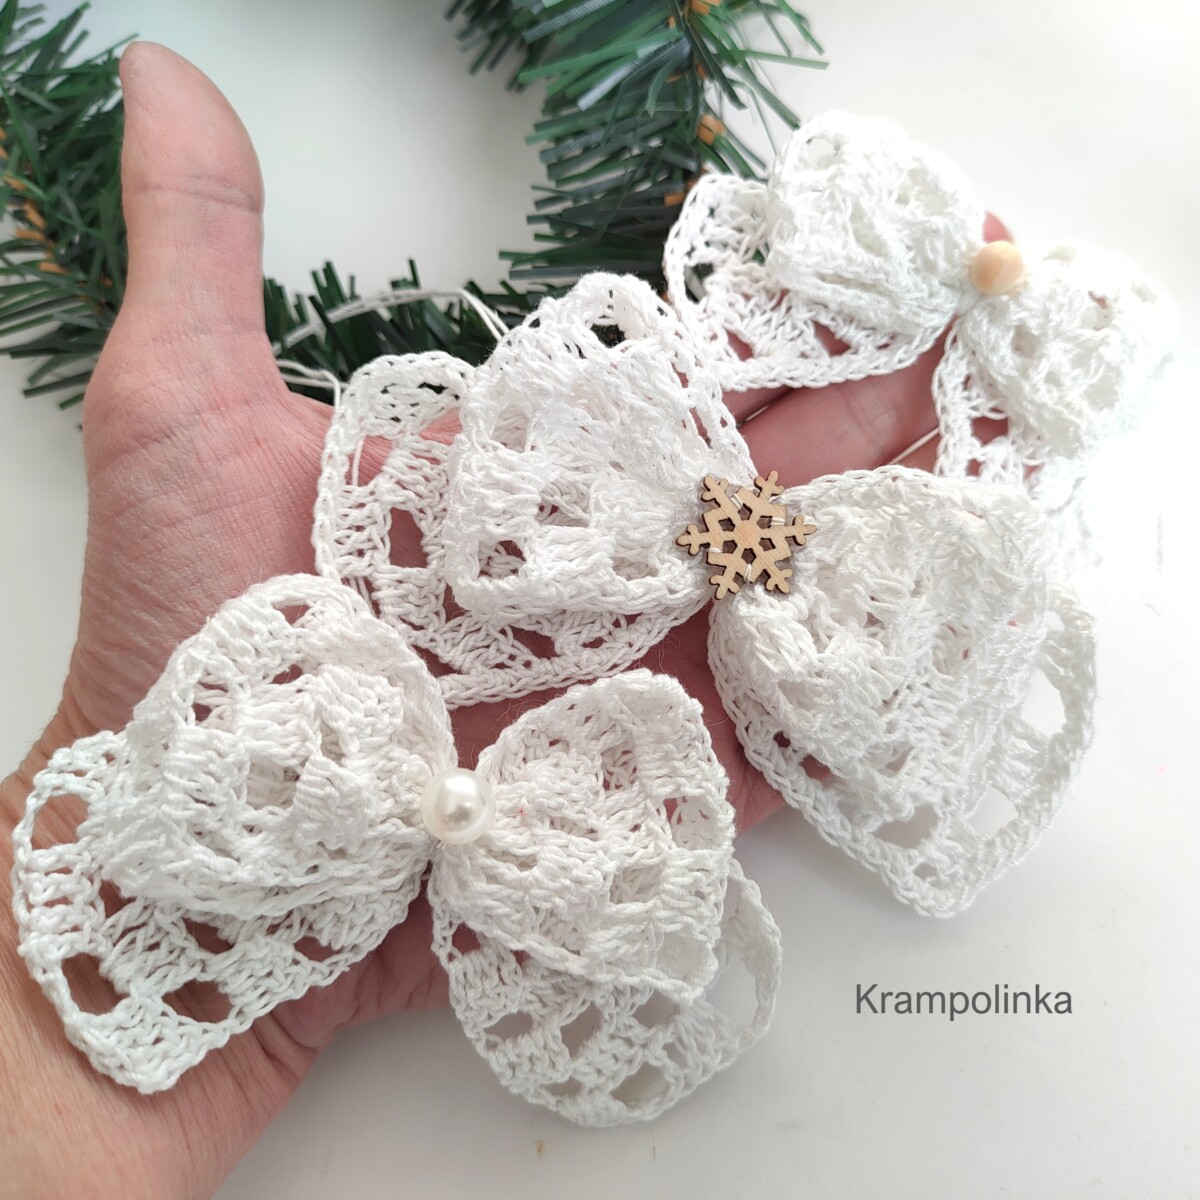
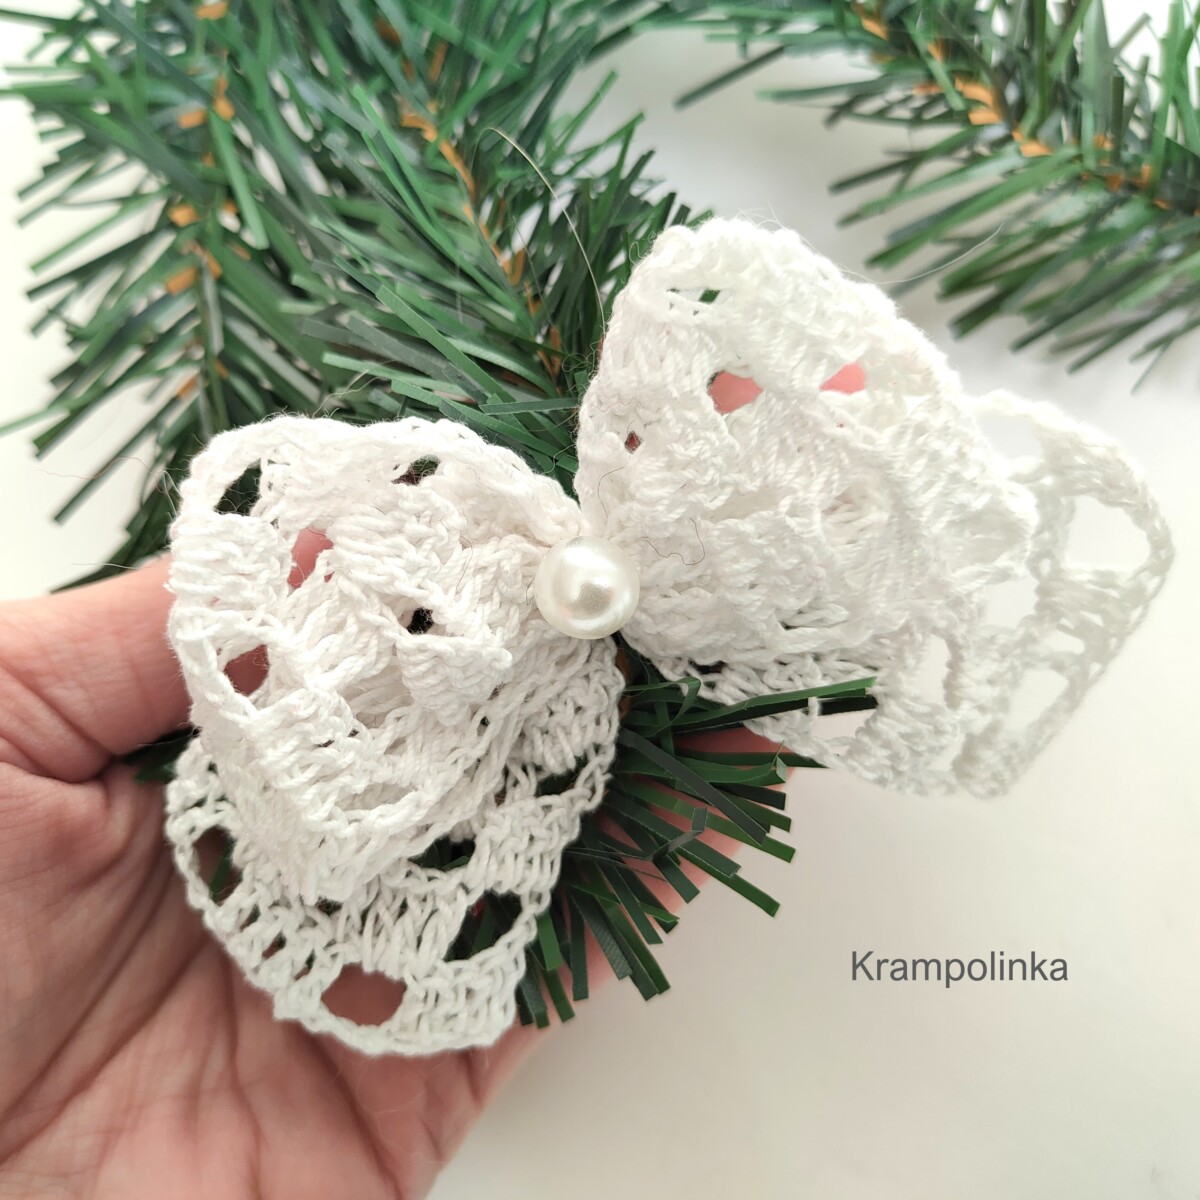
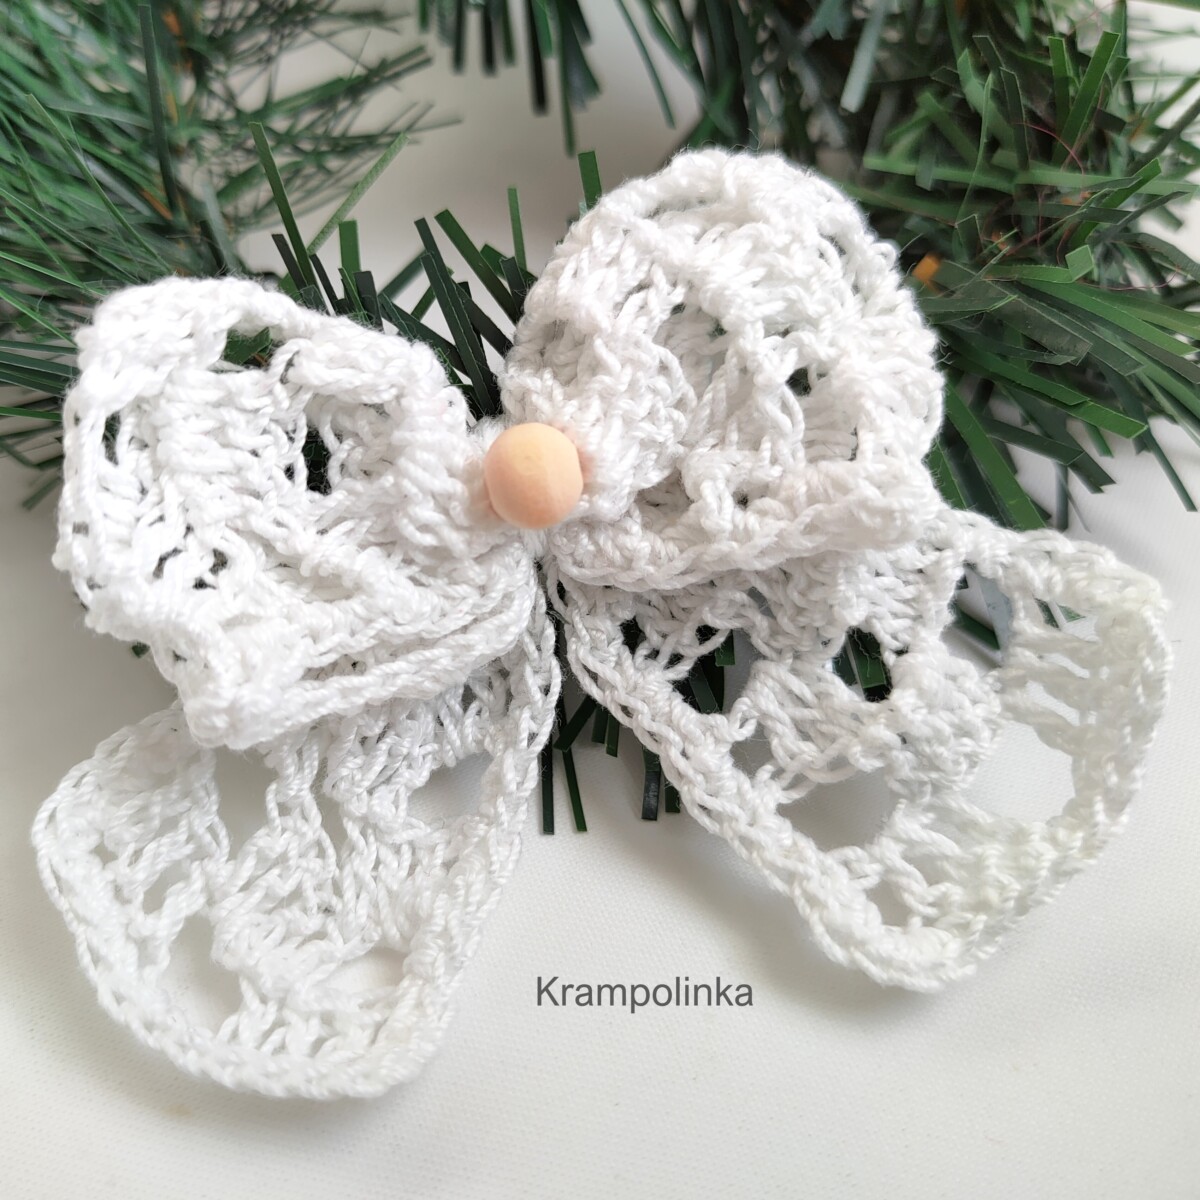
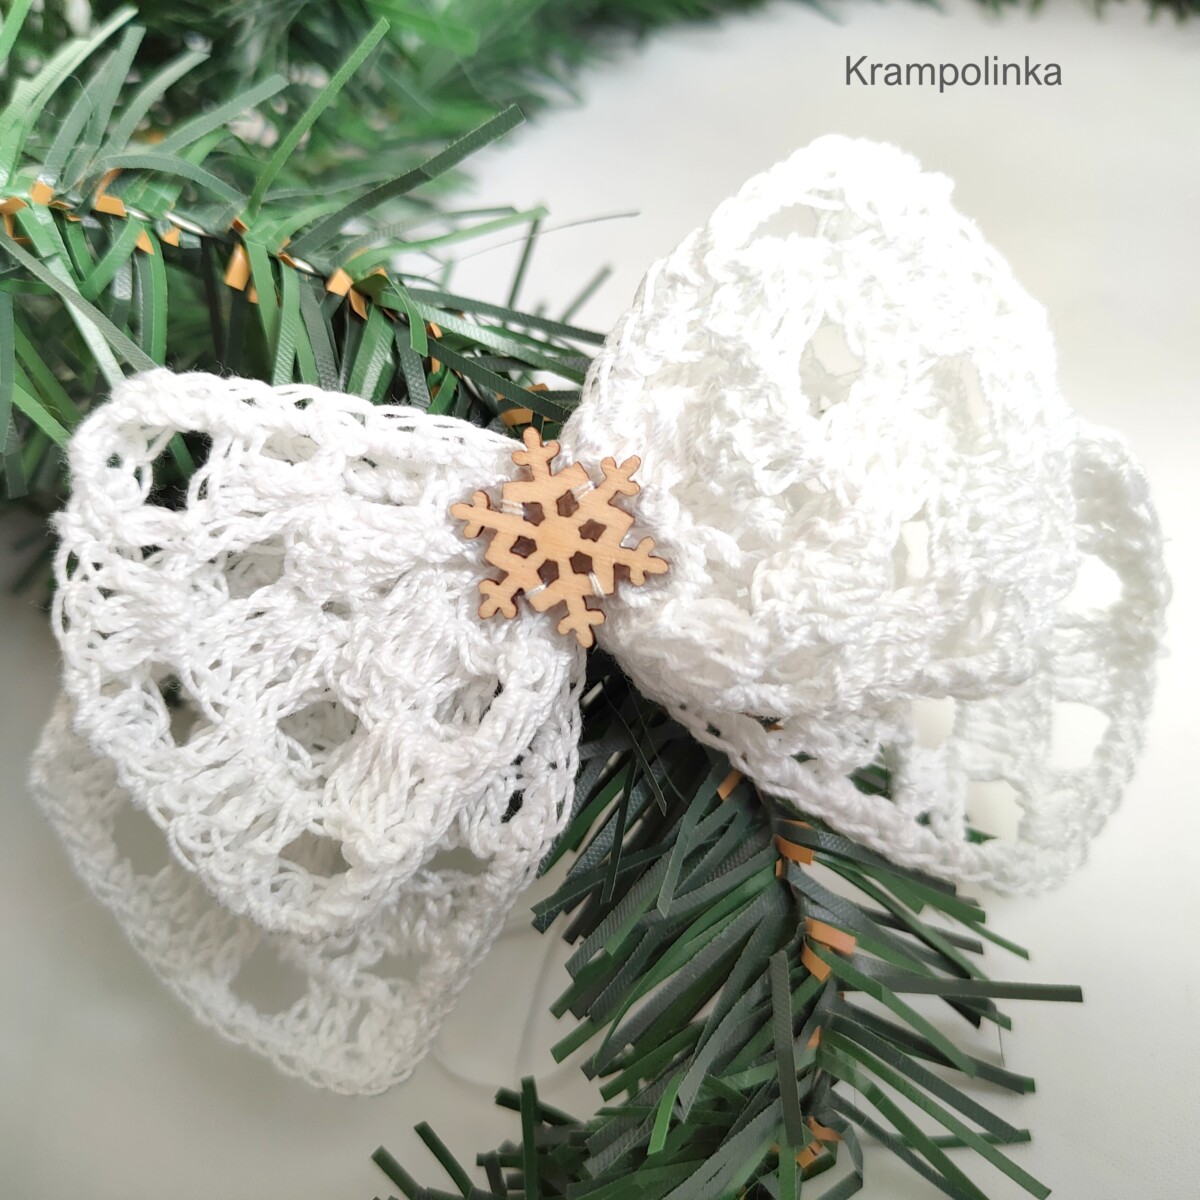
For the bow itself, we’ll crochet two filet strips of different lengths. The shorter strip forms the bottom part of the bow, while the longer strip will be joined and shaped into the top part. Always crochet an odd number of rows, so you finish with the same type of row you started with. Wrap the center with yarn, ribbon, or lace, leaving a longer tail so you can easily attach the bow to a decoration or a Christmas tree. You can embellish the center with a bead or a small button for an extra decorative touch.
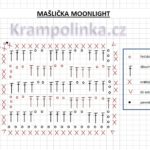
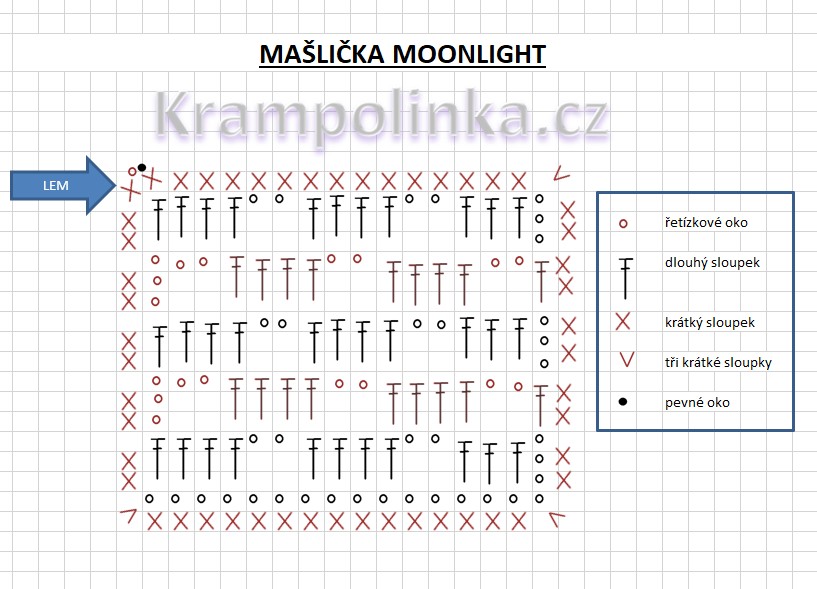
As for the pattern, we’ll be creating open filet squares (one double crochet + two chain stitches) and filled filet squares (two double crochets worked into the chain space + one double crochet into the next double crochet).
We crochet back and forth in rows, alternating the squares in a checkerboard layout, which creates a lovely textured, woven look on the bow. Before joining the two pieces together, we edge both strips with single crochet stitches. This gives the bow stability, so there is no need for starching.
Wishing you lots of success with your Moonlight Bow! Do you feel like inspiring others or sharing your bow creations? You’re welcome to upload your photos to KRAMPOLINKA Facebook Group. On Instagram, please use the hashtag #maslickamoonlight for easy searching. If you tag me in your finished project, I’ll be happy to share your creation in my Instagram Stories. Thank you so much for supporting each other, inspiring one another, and spreading positive energy. I hope your Christmas Moonlight Bow turns out beautifully and brings charm to your home.
Moonlight Bow
Yarn: Vlna Hep Moonlight, white no. 8002 – you can purchase the ball in your favorite yarn shop
Yardage needed: one ball makes many bows
Hook: 2 mm
Size: small bow 10 cm, large bow 13 cm (measured including the tips)
Notions: yarn needle with a large eye, button or bead for decoration
Time estimate: approx. 60 minutes per bow
Skill level: beginner-friendly
We start crocheting from a loose magic ring. How to create a magic ring is shown in the video tutorial. Continue crocheting in rounds. Each round begins with a turning chain substitute (2 CH instead of the first DC) and ends with a slip stitch (SL ST). The turning chain does not count as a stitch.
Stitches and Abbreviations
sl st – slip stitch (PO)
ch – chain (ŘO)
sc – single crochet (KS)
dc – double crochet (DS)
Notes
We crochet the bow starting from a foundation chain. The number of stitches should be divisible by three plus one edge stitch. Each row begins with a turning chain, meaning 2–3 chains to replace the first double crochet.
The row ends with a double crochet into the 2nd or 3rd chain of the previous row’s turning chain. Turn your work after each row. The turning chain for a single crochet is one chain.
Large Bow, bottom Part of the Moonlight Bow (hook 2 mm)
Row 1: Crochet a foundation chain of 15 ch + 1 ch.
Row 2: Ch 3 (counts as first dc), dc into the next ch, dc into the next ch, dc into the next ch → 1 filled filet square. Ch 2, skip 2 sts, dc into the 3rd st → 1 open filet square.
Then work: filled square, open square, and end with a filled square. The last dc of the filled square goes into the very last chain. Turn.
Row 3: Ch 3 (counts as first dc), ch 2, skip 2 dc, dc into the 3rd st → open square. Then crochet: dc in dc, dc in dc, dc in dc → filled square. Then open square, filled square, and finish with an open square.
The last dc goes into the last chain of the previous row’s turning chain. Turn.
Row 4: Ch 3 (counts as first dc), 2 dc into the ch-space, dc into the dc → filled square. Ch 2, skip 2 dc, dc into the 3rd dc → open square. Then work: filled square, open square, and end with a filled square.
The last dc goes into the turning chain. Turn.
Rows 5–15: Repeat Rows 3 and 4, ending on a row where both the first and last filet squares are filled. Do not fasten off – continue with the border.
Border – Bottom Part (hook 2 mm)
Row 1: Ch 1 (counts as sc), sc into the same stitch. Along the side edge, work 2 sc per row. In the corner, work 3 sc. Along the short bottom edge, sc into every foundation chain. Along the top short edge, sc into each dc and work 2 sc into each ch-space. Finish with sc and sl st into the turning chain. Fasten off.
Top Part of the Moonlight Bow (hook 2 mm)
Row 1: Chain 15 ch + 1 ch.
Row 2: Ch 3 (counts as first dc), dc into next ch, dc into next ch, dc into next ch → filled square. Ch 2, skip 2 sts, dc into the 3rd st → open square. Then: filled square, open square, and end with a filled square.
Last dc goes into the last chain. Turn.
Row 3: Ch 3, ch 2, skip 2 dc, dc into the 3rd st → open square. Then: dc in dc, dc in dc, dc in dc → filled square. Then: open square, filled square, end with open square.
Last dc goes into the turning chain. Turn.
Row 4: Ch 3, 2 dc into ch-space, dc into dc → filled square. Ch 2, skip 2 dc, dc into 3rd dc → open square. Then: filled square, open square, end with filled square. Last dc into turning chain. Turn.
Rows 5–19: Repeat Rows 3 and 4, ending on a row where the first and last squares are filled. Do not fasten off – continue to the border and joining.
Border & Joining – Top Part (hook 2 mm)
Row 1: Ch 1 (counts as sc), sc in the same stitch. Along the long side: 2 sc per row. In the corner: 3 sc. Along the bottom short edge: sc into every foundation chain. Along the top short edge: sc into each dc and 2 sc into each ch-space. Finish with sc and sl st into the turning chain. Do not fasten off. Fold the short edges together and seam them with 16 sc or sl st. Fasten off.
Finishing
Turn the top part so the seam is on the wrong side. This seam marks the center of the bow’s top loop. Lay the top part onto the bottom strip, positioning the seam directly in the center. Prepare a long tail of yarn and wrap both pieces firmly together to form the bow shape. Tie a knot on the wrong side of the bottom piece and trim the ends long enough to tie the bow onto a decoration. Decorate the center with a button or bead. Shape the bow with your fingers.
SMALL MOONLIGHT BOW – Bottom Part of the Moonlight Bow (hook 2 mm)
Row 1: Crochet a foundation chain of 9 ch + 1 ch.
Row 2: Ch 3 (counts as first dc), dc into next ch, dc into next ch, dc into next ch → filled filet square. Ch 2, skip 2 sts, dc into 3rd st → open filet square. Then work a filled filet square. Last dc goes into the very last chain. Turn.
Row 3: Ch 3 (counts as first dc), ch 2, skip 2 dc, dc into the 3rd st → open square. Then: dc in dc, dc in dc, dc in dc → filled square. Then: open square. Last dc into the turning chain from the previous row. Turn.
Row 4: Ch 3 (counts as first dc), 2 dc into ch-space, dc into dc → filled square. Ch 2, skip 2 dc, dc into 3rd dc → open square. Then: filled square. Last dc into the turning chain. Turn.
Rows 5–15: Repeat Rows 3 and 4, finishing on a row where both the first and last squares are filled. Do not fasten off – continue with the border.
Border – Bottom Part (hook 2 mm)
Row 1: Ch 1 (counts as sc), sc into the same stitch. Along the long side: 2 sc per row. In the corner: 3 sc. Along the short bottom edge: sc into each foundation chain. Along the top short edge: sc into each dc and 2 sc into each ch-space. Finish with sc and a sl st into the turning chain. Fasten off.
Top Part of the Moonlight Bow (hook 2 mm)
Row 1: Crochet 9 ch + 1 ch.
Row 2: Ch 3, dc into next ch, dc into next ch, dc into next ch → filled square. Ch 2, skip 2 sts, dc into 3rd st → open square. Then: filled square. Last dc into last chain. Turn.
Row 3: Ch 3, ch 2, skip 2 dc, dc into 3rd st → open square. Then: dc in dc, dc in dc, dc in dc → filled square. Then: open square. Last dc into the turning chain. Turn.
Row 4: Ch 3, 2 dc into ch-space, dc into dc → filled square. Ch 2, skip 2 dc, dc into 3rd dc → open square. Then: filled square. Last dc into turning chain. Turn.
Rows 5–19: Repeat Rows 3 and 4, finishing on a row with filled squares at both ends. Do not fasten off – continue to border and joining.
Border and Joining – Top Part (hook 2 mm)
Row 1: Ch 1 (counts as sc), sc into the same stitch. Along the long side: 2 sc per row. Corner: 3 sc. Along the bottom short edge: sc into each foundation chain. Along the top short edge: sc into each dc and 2 sc into each ch-space.
Finish with sc and sl st into the turning chain. Do not fasten off. Fold the short ends together and join with 10 sc or sl st. Fasten off.
Copyright Notice
This pattern is for personal use only. For commercial use, please contact me directly. Always include the source credit: www.krampolinka.com. The pattern is designed specifically for this yarn, hook size, and my personal tension. If you use a different yarn, hook, or tension, your final product may vary in size or shape.
Enjoy this free pattern and you can follow my latest projects, tutorials, ideas, reviews, video podcasts, tips, and tricks:
- Krampolinka YouTube videos (subtitled since 2024)
- Krampolinka Instagram
- Krampolinka FB group
-
- Crochet christmas Bow
-

- Filet Crochet Simple Bow
-

- Easy tutorial for crochet christmas bow
-

- We crochet two separate parts
-

- Then we join them together to make a bow
-
- Crochet diagram – Bow Moonlight

No Comments