
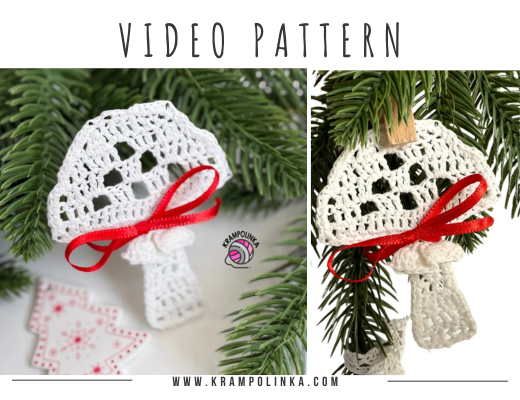
In today’s video tutorial, we will crochet a toadstool ornament for the Christmas tree. We will be working with Vlna Hep Moonlight yarn.
Vlna Hep Moonlight is 100% cotton. One skein weighs 100 g and has a length of 550 m. This yarn is perfect for crocheting Christmas ornaments, tablecloths, dreamcatchers, and decorative items. In summer, it’s also ideal for crocheted garments such as long dresses, tops, and skirts.
VIDEO TUTORIAL
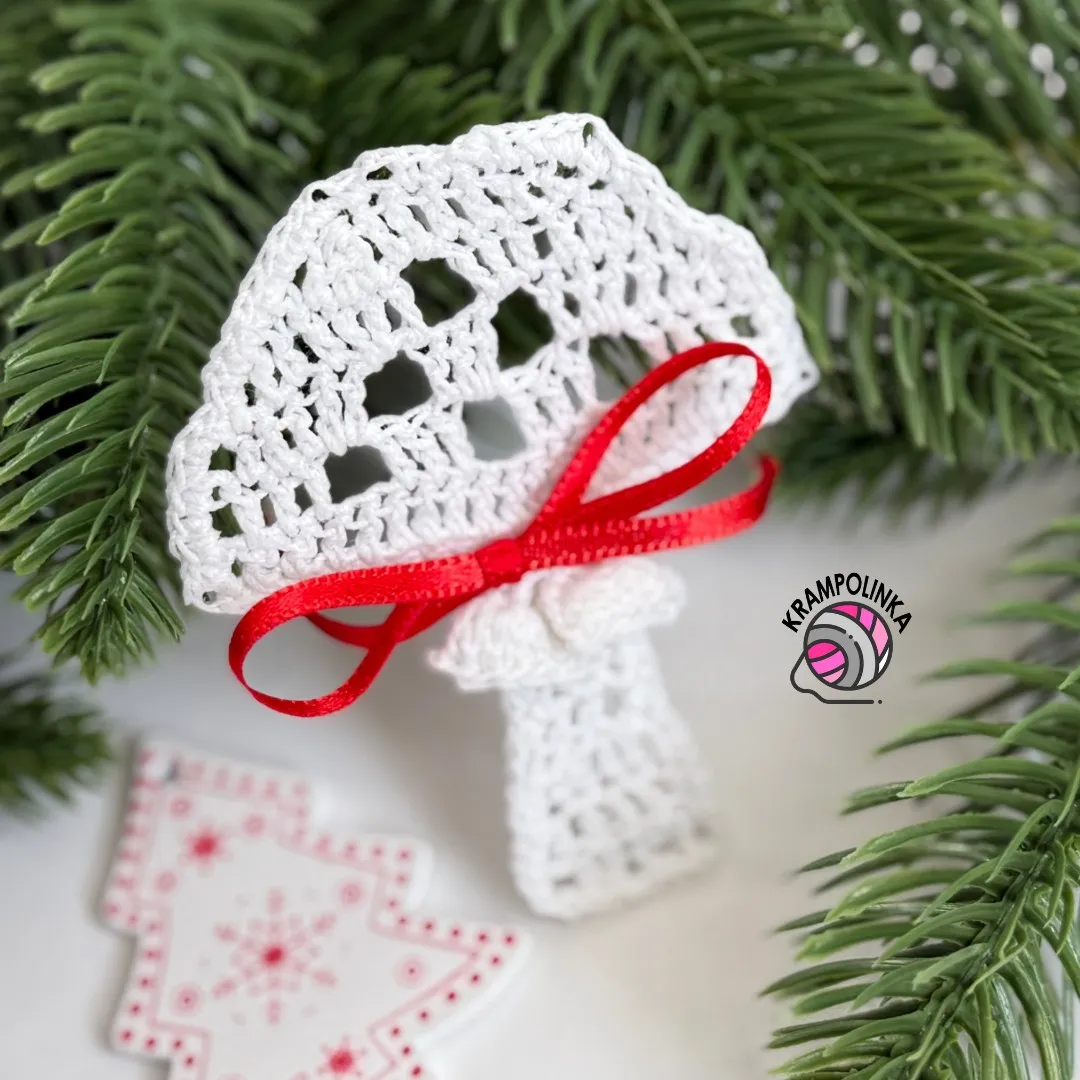
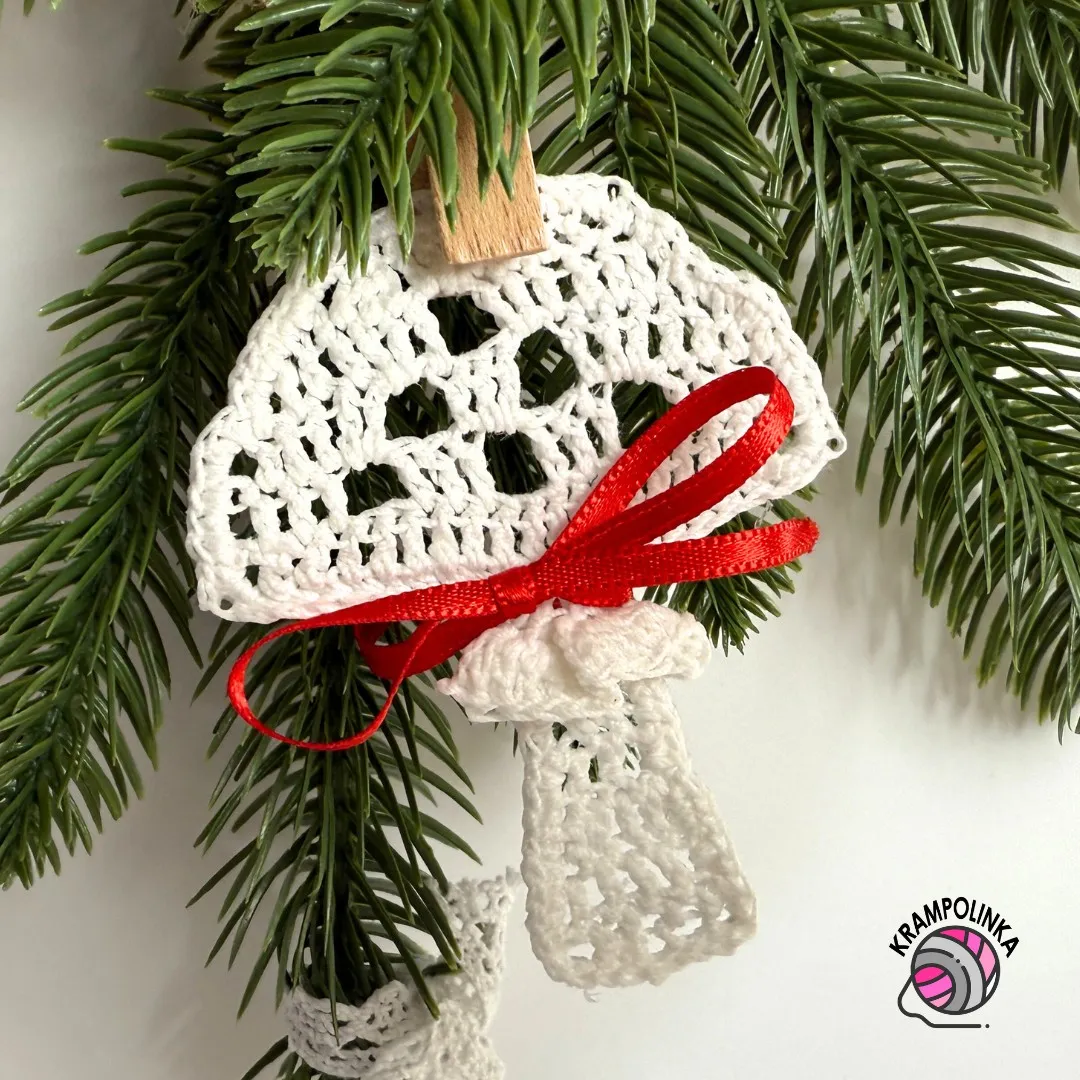
- As for the toadstool, we will crochet it in two steps. First, we will crochet the cap and work a border around it. Then we will crochet the stem with a little frill. Instead of crocheting the “frill,” you can also use a small bow.
- For the pattern, we use chain stitches, single crochet, and double crochet stitches.
- If you want to adjust the size, you can choose a thicker yarn, such as Vlna Hep Camilla or Alize Bella, which will result in a larger finished piece.
TIPS FOR YOU:
I stiffened the toadstool with Alba Effekt liquid starch. For blocking, I use thin surgical pins from the pharmacy (they do not rust) and a polystyrene board. You can also simply steam it with a steam iron. The toadstool will keep its shape. Good luck with your Moonlight Toadstool!
Would you like to inspire others or share your experience with making this Moonlight toadstool? Please add your photos in KRAMPOLINKA Facebook Group. For easy searching on Instagram, please use the hashtag #muchomurkamoonlight. If you tag me on Instagram, I’ll be happy to share your project in my Stories.
CHRISTMAS MUSHROOM
Yarn: Vlna Hep Moonlight, white color 8002 (available in your favorite e-shop)
Yarn usage: 1 skein is enough for many toadstools
Size: width 5.5 cm, height 7.5 cm
Hook: 1.8 mm (Tulip)
Accessories: red ribbon, jute twine or thread for hanging, yarn needle with large eye
Time needed: approx. 45 minutes
Skill level: Beginner
Stitches (US terms):
ch – chain
sl st – slip stitch
sc – single crochet
dc – double crochet
Mushroom Cap – 1.8 mm hook
Row 1: Ch 19 + 3 turning chains, turn.
Row 2: Work dc into the 4th chain from the hook. Dc in each chain across. Turn. (20)
Row 3: Ch 3 (counts as dc), dc in next 3 dc.
For the spots, work filet spaces: ch 2, skip 2 stitches, dc in next stitch (repeat 3×),
ch 2, skip 2 sts, dc (3×),
ch 2, skip 2 sts, dc (4×). Turn.
Row 4: Ch 3, dc2tog over the next two dc.
Dc in dc, 2 dc under ch space, ch 2, skip 2 sts,
dc in dc, 2 dc under ch space, ch 2, skip 2 sts,
dc in dc, 2 dc under dc, dc in dc,
dc3tog over the next three dc. Turn.
Row 5: Ch 3, dc2tog over next two dc.
Dc in dc (2×), 2 dc under ch space,
ch 2 over three dc, 2 dc under ch space,
dc in dc and dc3tog over the next three dc. Turn.
Row 6: Ch 3, dc2tog over next two dc.
Dc in dc, 2 dc under ch space, dc in dc, dc in dc,
dc3tog over the next three dc.
Do not fasten off – continue with the edging.
Cap Edging – 1.8 mm hook
Round 1: Ch 1, sc in the same stitch.
Work 2–3 sc along the horizontal edge where dc were joined, otherwise 2 sc per section.
In the corners, work 3 sc. Continue working sc into chain spaces.
Work the opposite side in the same way.
Before finishing the round, make a hanging loop at the top:
sc – ch 2 – sc in one stitch.
Join with sl st.
Stem – 1.8 mm hook
Row 1: Join yarn to the back loop of the sc in the 8th stitch of the lower edge of the cap.
Ch 3 (counts as dc), dc in back loop 3×. Turn.
Row 2a: Ch 2–3, work 5 dc into one stitch.
Work in back loops only, 5 dc into each stitch across. Turn.
Row 2b: Ch 2–3. Dc in back loops of the first row (3×). Turn.
Rows 3–4: Ch 2–3, dc in each dc (3×). Turn.
Row 5: Ch 2–3, 2 dc in the same stitch.
Dc in next sts, and 2 dc in the last stitch. Turn.
Row 6: Ch 2–3, dc in each dc. Turn.
Row 7: Ch 2–3, dc2tog over next two dc, dc,
dc2tog over the last two dc.
Continue with the edging of the stem.
Stem Edging – 1.8 mm hook
Round 1: Join yarn into the cap area.
Ch 1, sc in the same stitch.
Work 2 sc along straight rows and 3 sc where dc were joined or increased.
Finish with sl st into a stitch of the cap edging.
Finishing
Weave in all yarn ends. Starch or steam press. Attach a cord for hanging and decorate as desired.
Copyright Notice
This pattern is for personal use only. For commercial use, please contact me directly. Always include the source credit: www.krampolinka.com. The pattern is designed specifically for this yarn, hook size, and my personal tension. If you use a different yarn, hook, or tension, your final product may vary in size or shape.
Enjoy this free pattern and you can follow my latest projects, tutorials, ideas, reviews, video podcasts, tips, and tricks:
- Krampolinka YouTube videos (subtitled since 2024)
- Krampolinka Instagram
- Krampolinka FB group
-

- Crochet mushroom Christmas ornament.
-

- Handmade mushroom Christmas decor.
-
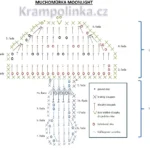
- Crochet diagram


No Comments