
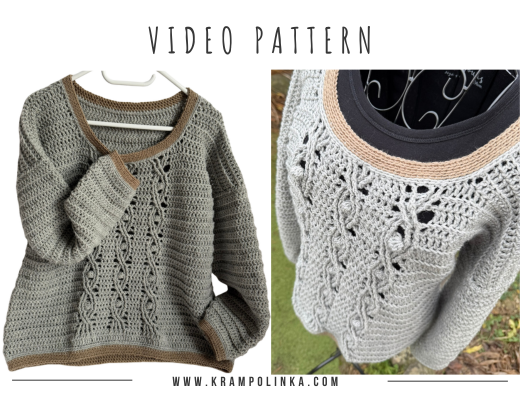
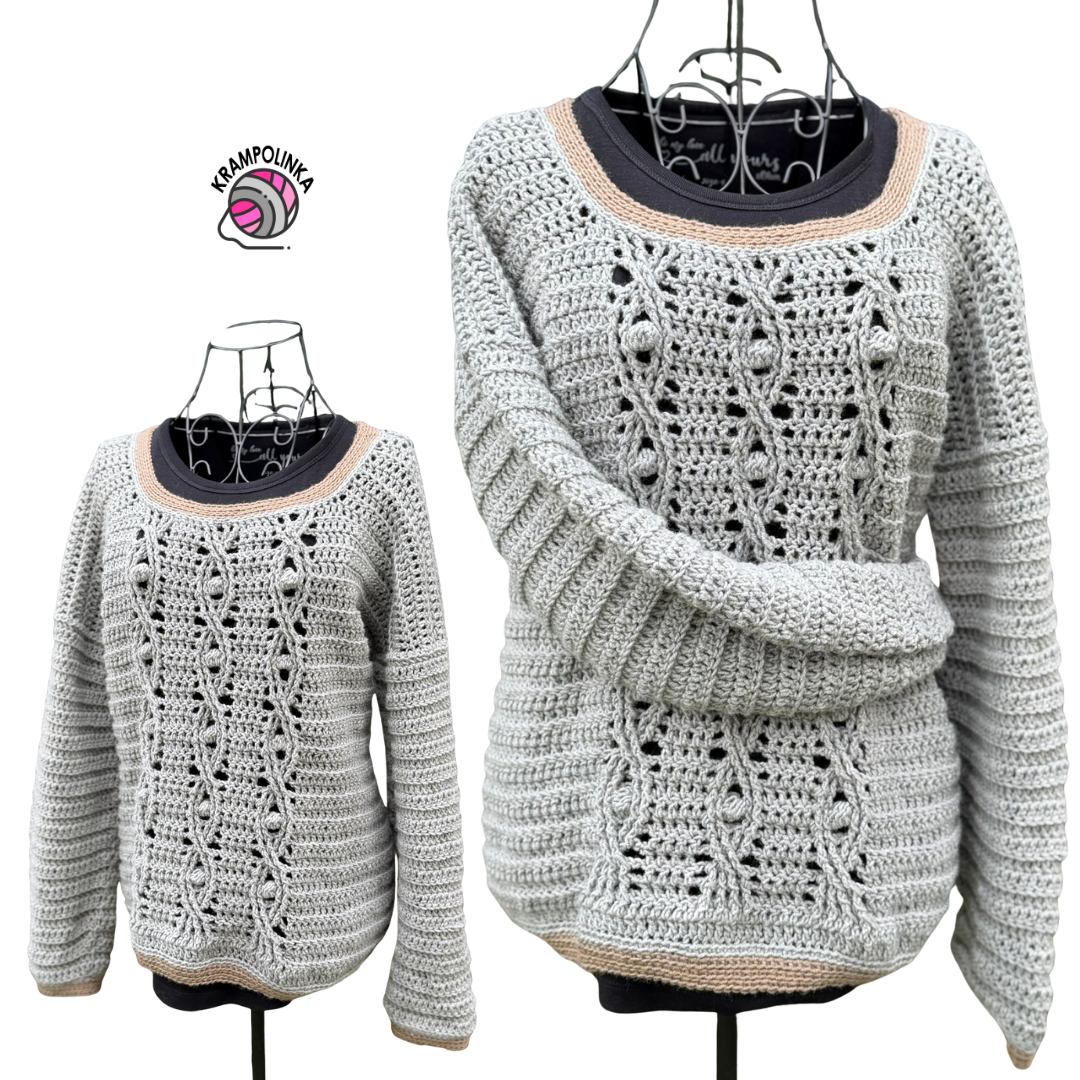
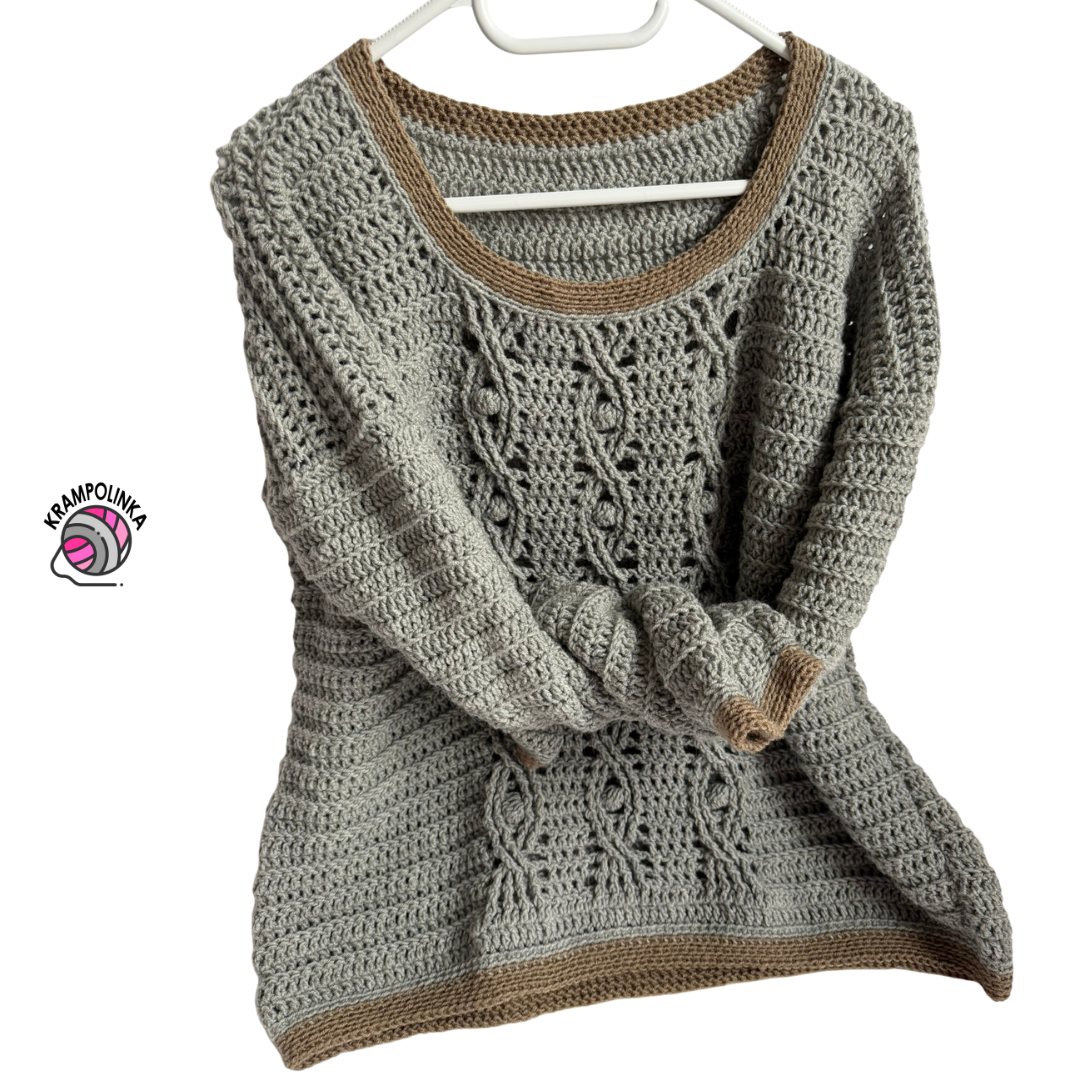
Today, we’ll crochet a sweater with a cable stitch pattern using YarnArt Super Merino yarn.
We will crochet the cable stitch sweater using YarnArt Super Merino yarn, which comes in 100 g skeins with a yardage of 280 meters and a composition of 25% wool and 75% acrylic. The estimated yarn usage for an oversized sweater in size 42–44 is approximately six skeins in one color, or six plus one skein for a two-color version. We also shared an unboxing of the YarnArt skeins in the podcast Povídání u klubíčka #115.
-
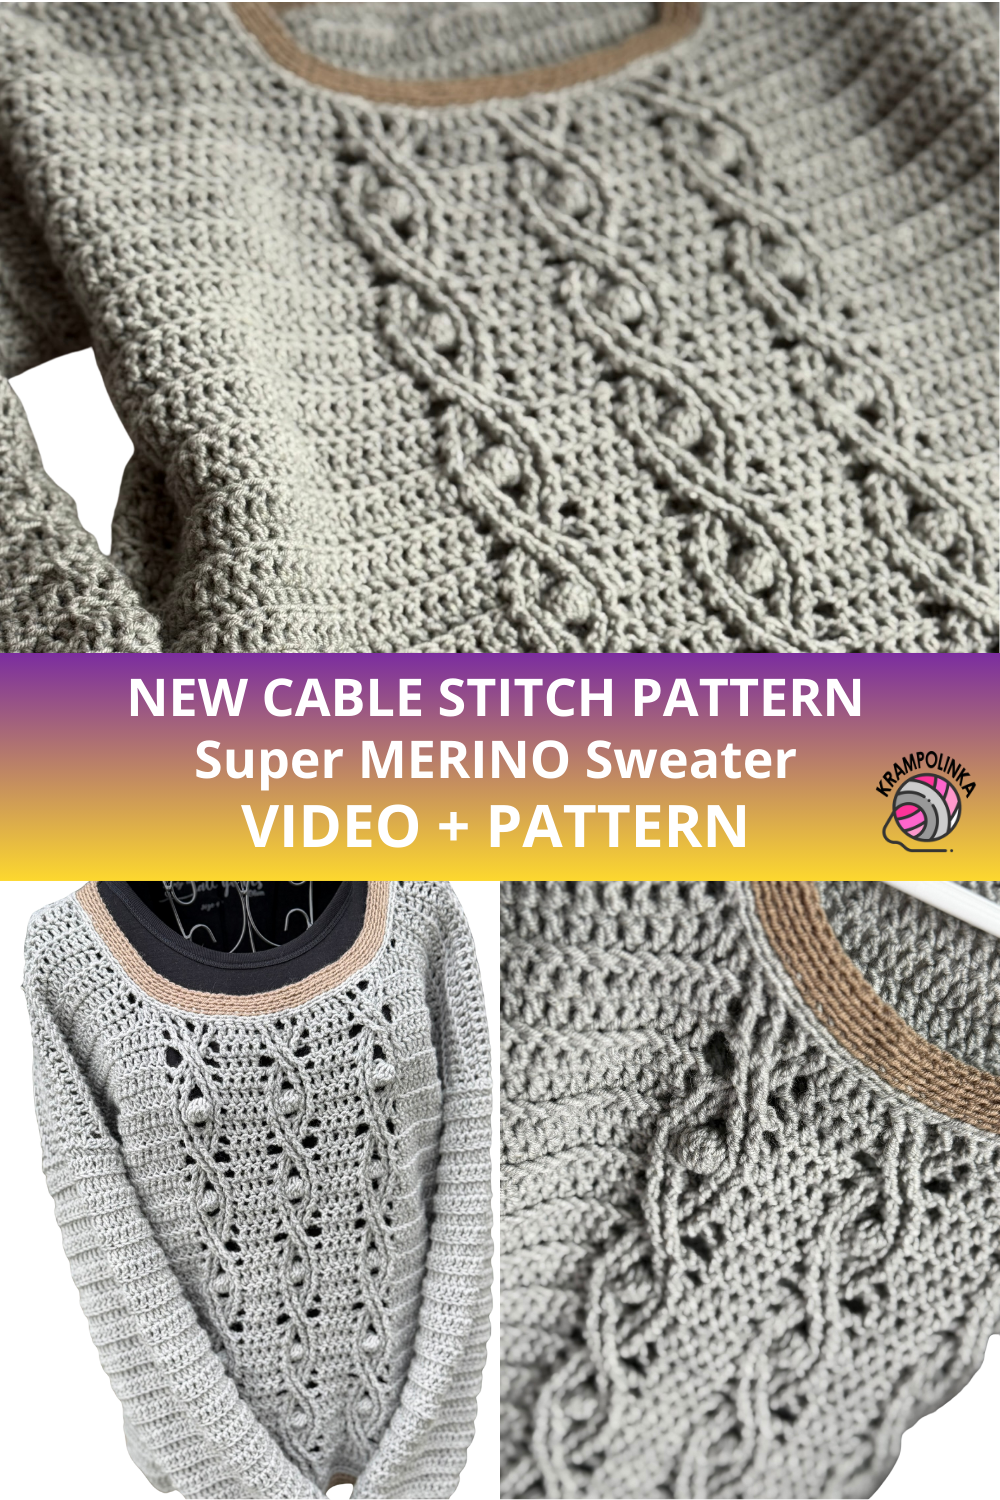
- Pin for crochet cable pattern super merino sweater
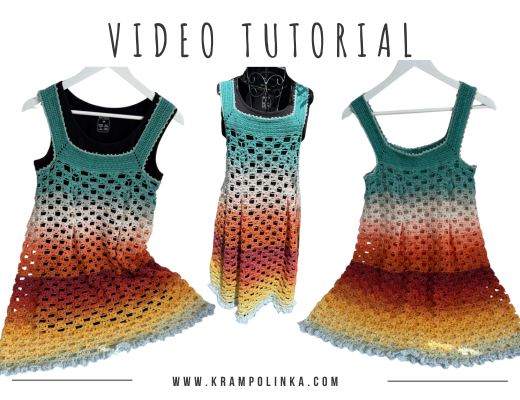
VIDEO TUTORIAL (Czech but ENGLISH SUBTITLES INCLUDED) PREMIERE December 10th, 19:00
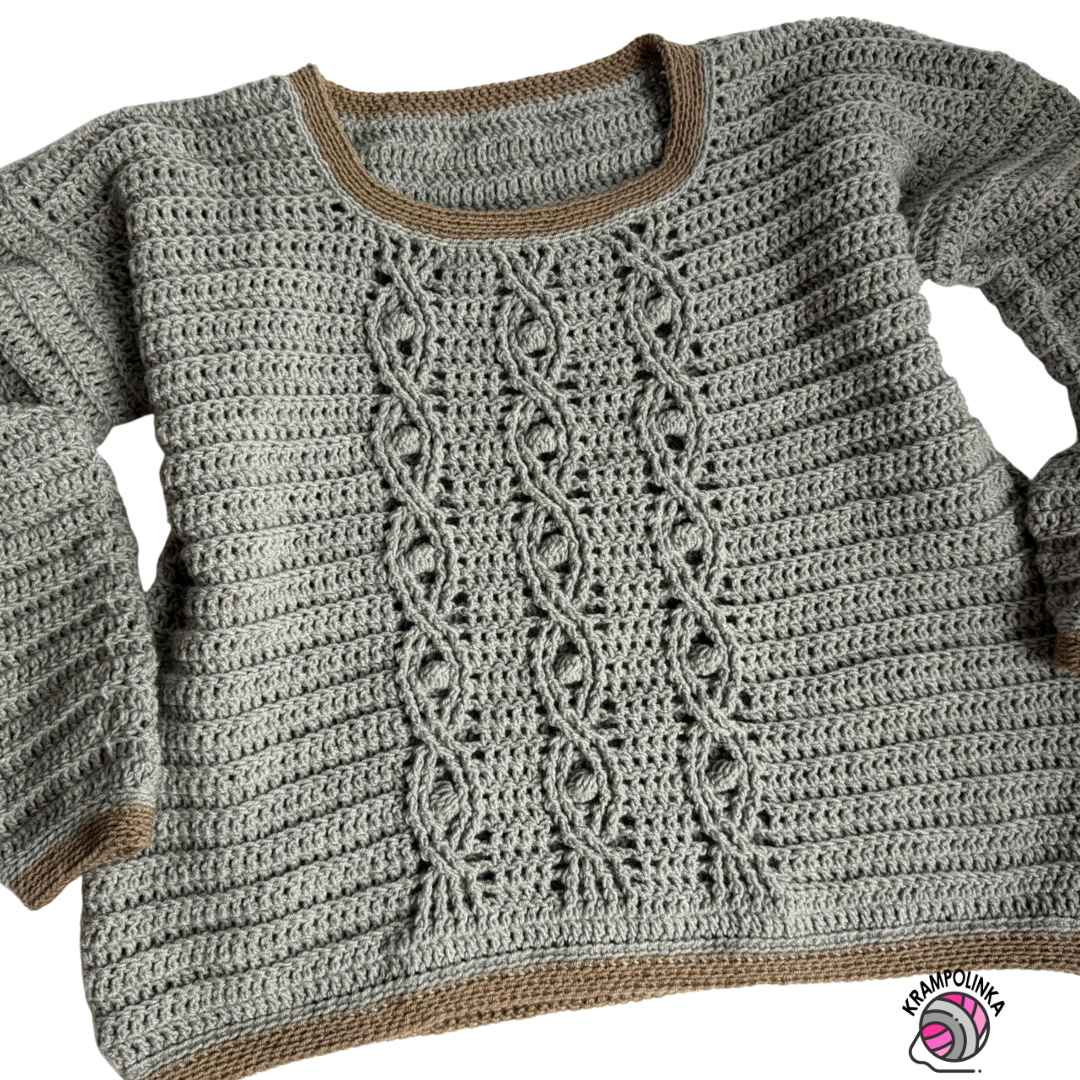
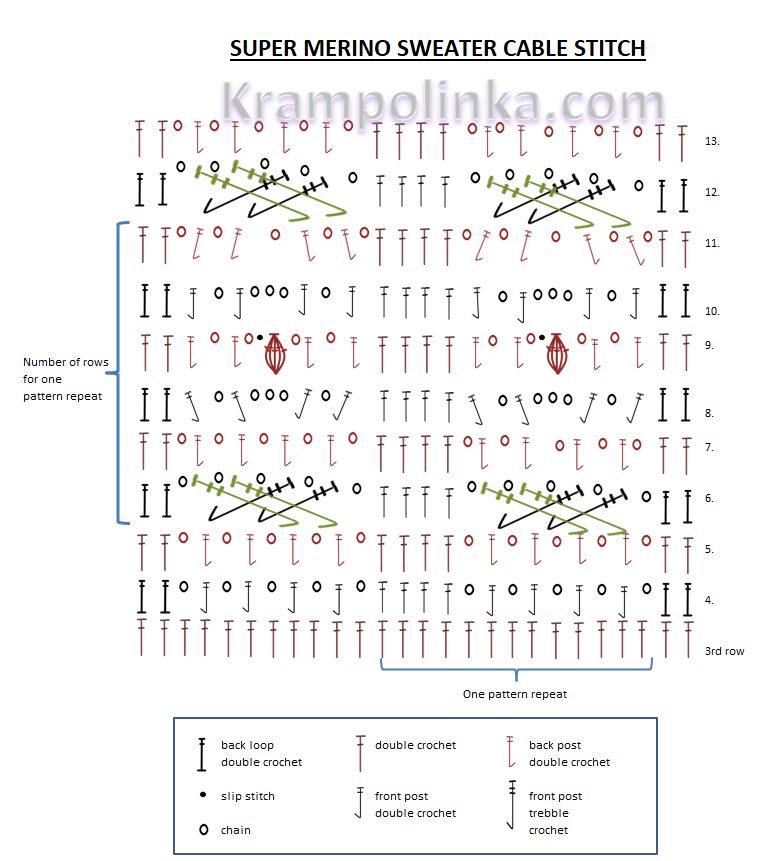
As for the crocheting itself, we start with a foundation chain and work row by row back and forth. The front panel features the cable stitch pattern, while the back panel is worked without a pattern. The cable stitch pattern is worked over 35 stitches, arranged as follows: 9 stitches for the first cable, 4 stitches of the pattern in between, 9 stitches for the second cable, 4 stitches of the pattern in between, and 9 stitches for the third cable. The cable pattern is repeated over 6 rows. The foundation chain requires an odd number of stitches. Once both the front and back panels are finished, we join them at the shoulders and underarms, then crochet the sleeves and finish by edging the entire sweater.
For beginners, I recommend starting with the back panel. Even the basic stitch pattern looks beautiful on its own, and if the cable stitch doesn’t turn out as expected, I believe you can still easily create a simple, timeless, and very wearable piece from the yarn. I would say the pattern is unisex and looks best in a solid color yarn. I would avoid bold variegated yarns and very dark colors, as the cable texture can easily get lost.
TIP: I recommend trying the sweater on and comparing it to a favorite loose-fitting garment while working.
I hope your Super Merino sweater turns out beautifully and that you enjoy wearing it. Would you like to inspire others or share your experiences with crocheting or styling this sweater? Feel free to upload your photos to KRAMPOLINKA Facebook Group. For easy searching on Instagram, please use the hashtag #svetriksupermerino. If you tag me, I’ll be happy to share your post in my Stories.
Stitch Count Table for Cable Pattern Sweater (S–XXL)
The cable stitch pattern is worked over a fixed 35 stitches, and the remaining stitches are evenly divided between the left and right sides.
| Size | Sweater width (cm) | Odd number of stitches – Row 1 | Stitches outside cables (total) | Stitches per side |
|---|---|---|---|---|
| S | 50 cm | 73 sts | 38 sts | 19 + 19 |
| M | 55 cm | 79 sts | 44 sts | 22 + 22 |
| L | 60 cm | 87 sts | 52 sts | 26 + 26 |
| XL | 65 cm | 95 sts | 60 sts | 30 + 30 |
| XXL | 70 cm | 101 sts | 66 sts | 33 + 33 |
SUPER MERINO SWEATER
Yarn: YarnArt Super Merino, color no. 195.
Yarn usage: 6 skeins
Hook sizes: 4 mm, 5 mm, and 6 mm
Finished measurements:
• Width: 60 cm
• Front length: 59 cm
• Sleeve length: 45 cm
Size: 42–44 (EU)
Notions: Yarn needle with a large eye, decorative label
Estimated time: approx. 30 hours
Skill level: Adventurous beginners
Abbreviations
- ch – chain
- dc – double crochet
- FPdc – front post double crochet
- BPdc – back post double crochet
- dc in back loop – double crochet worked in the back loop only
- herringbone sc – herringbone single crochet
- FPtr – front post treble crochet
- sl st – slip stitch
Row 1: Using a 6 mm hook, chain 86 chains and turn.
Row 2: Switch to a 5 mm hook. Ch 2 (counts as the first dc), dc in each chain across. You will have a total of 87 dc including the turning chain. Turn.
Row 3: Ch 2 (counts as the first dc). Working on the wrong side, dc in each dc across. Total of 87 dc including the turning chain. Turn.
Before continuing, switch back to a 6 mm hook. Divide the work in half and place a stitch marker into the 44th stitch. The cable pattern is worked over 35 stitches. From the center marker, count 17 stitches to the right and 17 stitches to the left. The row layout is: 26 edge stitches, 17 cable stitches, 1 center stitch, 17 cable stitches, and 26 edge stitches. On the right side, work dc in the back loop only for the side sections and front post stitches for the cable pattern. On the wrong side, work dc in dc and back post stitches for the cable pattern.
Row 4 (right side): Ch 2 (counts as first dc), 25 dc BLO. Work the first cable as follows: ch 1, skip 1 stitch, FPdc four times, ch 1. Between the cable patterns, dc in dc four times. Repeat the cable sequence for the second cable. For the third cable, work only ch 1, skip 1 stitch, FPdc four times, ch 1. Then work 25 dc BLO, counting stitches carefully. The last stitch is worked into the second chain of the turning chain. Turn.
Row 5 (wrong side): Ch 2 (counts as first dc), 25 dc. Work the first cable as follows: ch 1, skip 1 stitch, BPdc four times, ch 1. Between the cable patterns, dc in dc four times. Repeat for the second cable. For the third cable, work only ch 1, skip 1 stitch, BPdc four times, ch 1. Then work 25 dc, counting stitches carefully. The last stitch is worked into the second chain of the turning chain. Turn.
Row 6 (right side): Ch 2 (counts as first dc), 25 dc BLO. Work the first cable as follows: ch 1, skip the first two post stitches, FPtr around the third FPdc, ch 1, FPtr around the fourth FPdc, ch 1. Return and work FPtr around the first FPdc, ch 1, and FPtr around the second FPdc, ch 1. Between the cable patterns, dc in dc four times. Repeat the cable sequence for the second cable. For the third cable, work the same cable sequence only. Then work 25 dc BLO, counting stitches carefully. The last stitch is worked into the second chain of the turning chain. Turn.
Row 7 (wrong side): Ch 2 (counts as first dc), 25 dc. Work the first cable as follows: ch 1, BPdc four times, ch 1. Between the cable patterns, dc in dc four times. Repeat for the second cable. For the third cable, work only ch 1, BPdc four times, ch 1. Then work 25 dc, counting stitches carefully. The last stitch is worked into the second chain of the turning chain. Turn.
Row 8 (right side): Ch 2 (counts as first dc), 25 dc BLO. Work the first cable as follows: FPdc, ch 1, FPdc, ch 3, FPdc, ch 1, FPdc. Between the cable patterns, dc in dc four times. Repeat for the second cable. For the third cable, work only FPdc, ch 1, FPdc, ch 3, FPdc, ch 1, FPdc. Then work 25 dc BLO, counting stitches carefully. The last stitch is worked into the second chain of the turning chain. Turn.
Row 9 (wrong side): Ch 2 (counts as first dc), 25 dc. Work the first cable as follows: BPdc, ch 1, BPdc, ch 1, bobble made of 5 dc worked together, sl st, ch 1, BPdc, ch 1, BPdc. Between the cable patterns, dc in dc four times. Repeat for the second cable. For the third cable, work the same sequence only. Then work 25 dc, counting stitches carefully. The last stitch is worked into the second chain of the turning chain. Turn.
Row 10 (right side): Work the same as Row 8.
Row 11 (wrong side): Work the same as Row 7.
Row 12 (right side): Work the same as Row 6.
Rows 13–38: Repeat Rows 7–12, ending with Row 8.
Row 39 (front neckline, wrong side, 6 mm hook): Ch 2 (counts as the first dc), work 23 dc into dc. Turn.
Row 40 (right side): Ch 2 (counts as the first dc), work 22 dc BLO, and work the last dc into the second chain of the turning chain. Turn.
Rows 41–45: Repeat Rows 39 and 40. Fasten off. Repeat the same process for the second half of the neckline. Join the yarn on the wrong side at the neckline edge and work across 24 stitches.
Row 1 (back panel, 6 mm hook): Chain 86 ch, turn.
Row 2 (5 mm hook): Ch 2 (counts as the first dc), dc in each chain across. 87 dc total including the turning chain. Turn.
Row 3: Ch 2 (counts as the first dc). Working on the wrong side, dc in each dc across. 87 dc total including the turning chain. Turn.
Row 4 (6 mm hook): Ch 2 (counts as the first dc). On the right side, work dc BLO across. At the end of the row, work the last dc into the second chain of the turning chain. Count stitches. Turn.
Rows 5–43: Repeat Rows 3 and 4.
Row 44 (back neckline, wrong side, 6 mm hook): Ch 2 (counts as the first dc), work 23 dc into dc. Turn.
Row 45 (right side): Ch 2 (counts as the first dc), work 22 dc BLO, and work the last dc into the second chain of the turning chain. Do not fasten off; join the back panel to the front panel at the shoulders. Repeat the neckline shaping and shoulder joining for the second half. Join the yarn on the wrong side at the neckline edge and work across 24 stitches.
For seaming the shoulders, use a 6 mm hook. Place the front and back pieces together with the right sides facing each other. Join the shoulders using slip stitches worked on the wrong side. Insert the hook through the stitch of the front piece and the corresponding stitch of the back piece and join with a slip stitch. Seam across 24 stitches. Fasten off and repeat the same process on the second shoulder.
For seaming the sides, use a 6 mm hook. Place the pieces together with the right sides facing each other. Join using slip stitches worked on the wrong side. Join the yarn at the bottom edge and work one slip stitch through both edge stitches, then the next slip stitch into the edge stitch only. Crochet loosely so the seam does not pull in. Continue seaming up to a height of 32 rows, adjusting the armhole depth to suit the width of the arm. Do not fasten off and continue directly on the right side with the sleeve.
For the sleeve, use a 6 mm hook.
Row 1 (right side): Ch 2 (counts as the first dc). This row is worked with two stitches per one horizontal row. The first row forms a decorative foundation made of double crochets. Yarn over, insert the hook behind the center strand of the post of the previous stitch, then behind the edge stitch, yarn over and pull through the first loop. You now have three loops on the hook; complete as a double crochet. This technique creates a “covering” row that hides the sleeve join and forms a decorative edge. It is recommended to watch the video tutorial for this step. Finish the row with a slip stitch. Turn.
Row 2 (wrong side): Ch 3 (counts as the first dc). Dc in each dc across. Finish the row with a slip stitch into the second chain of the turning chain. Turn.
Row 3 (right side): Ch 3 (counts as the first dc). Dc in the back loop only across. Finish the row with a slip stitch into the second chain of the turning chain. Turn.
Rows 4–33: Repeat Rows 2 and 3. From Row 16, begin shaping the sleeve by decreasing. At the beginning and end of the specified rows, work two stitches together. Continue working the pattern between decreases. Decreases are worked in Rows 19, 23, 26, 29, 31, and 33. Turn after each row.
For the sleeve cuff, use a 6 mm hook.
Rows 34–36: Work using the same color as the sweater. Ch 1 (counts as herringbone single crochet). Work herringbone single crochet in the back loop only on the right side. Finish each row with a slip stitch.
Row 37: Ch 1 (counts as slip stitch). Work slip stitches in the back loop only across. Finish with a slip stitch and fasten off. Repeat for the second sleeve.
For the neckline edging, use a 4 mm hook.
Row 1: Using the same color as the sweater and working on the right side, join the yarn at the back of the neckline. Ch 1 (counts as the first herringbone single crochet). Work herringbone single crochet in the back loop of the stitches along the back and front neckline. Along the sides of the neckline, work two herringbone single crochets per one horizontal row. Finish with a slip stitch.
Rows 2–4: Ch 1 (counts as herringbone single crochet). Work herringbone single crochet in the back loop only across. Finish each row with a slip stitch. Fasten off after the last row.
For the bottom hem, use a 6 mm hook.
Row 1: Join the yarn at the side seam. Ch 1 (counts as the first herringbone single crochet). Work herringbone double crochet into the chain stitches across. Finish with a slip stitch.
Rows 2–4: Ch 1 (counts as herringbone single crochet). Work herringbone single crochet in the back loop only across. Finish each row with a slip stitch. Fasten off after the last row.
Copyright Notice
This pattern is for personal use only. For commercial use, please contact me directly. Always include the source credit: www.krampolinka.com. The pattern is designed specifically for this yarn, hook size, and my personal tension. If you use a different yarn, hook, or tension, your final product may vary in size or shape.
Enjoy this free pattern and you can follow my latest projects, tutorials, ideas, reviews, video podcasts, tips, and tricks:
- Krampolinka YouTube videos (subtitled since 2024)
- Krampolinka Instagram
- Krampolinka FB group
-
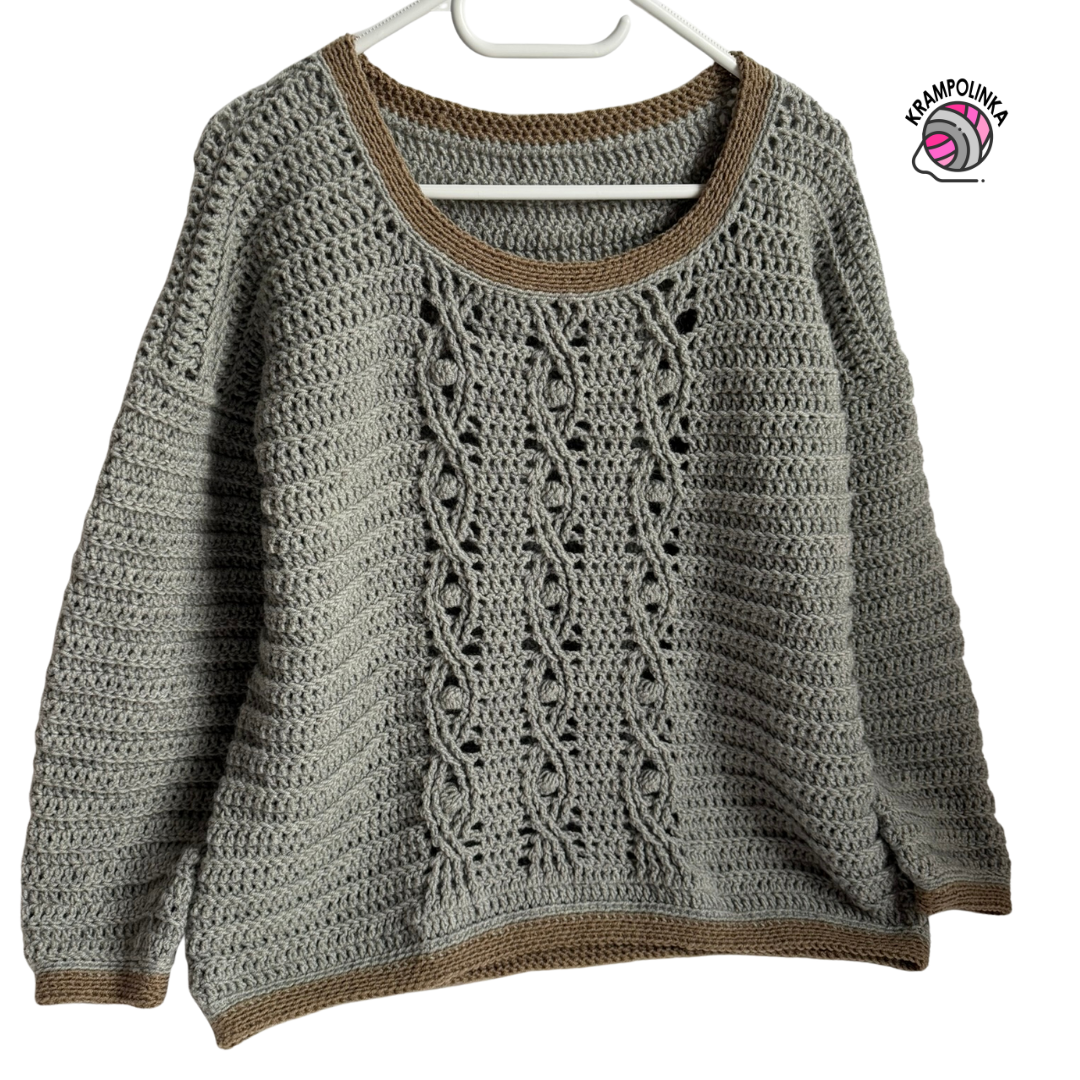
- Crochet Super Merino sweater with a bold cable stitch pattern, soft, warm, and timeless.
-

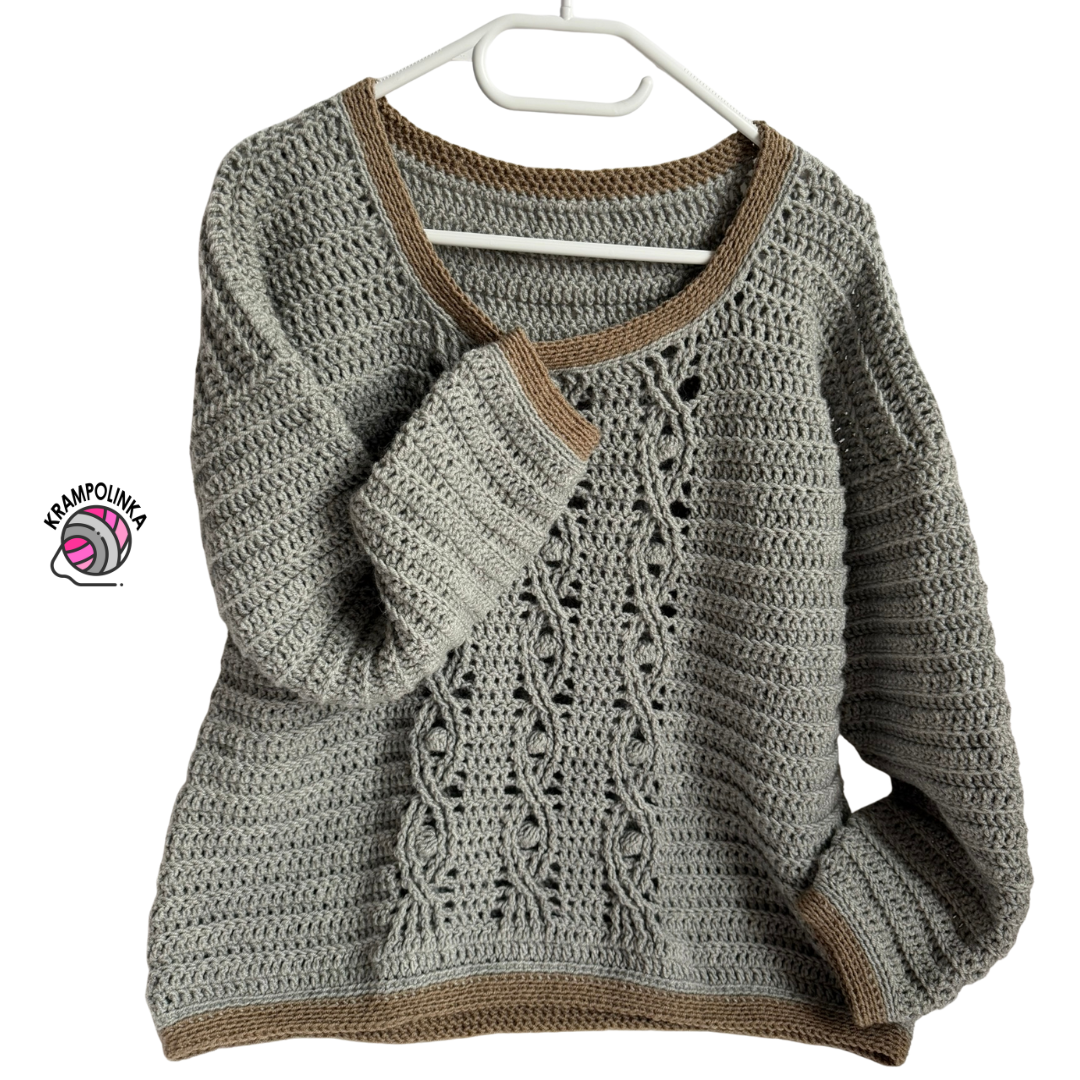
- Super Merino sweater worn casually for everyday comfort.

-

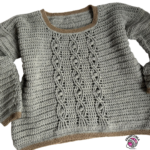
- Front panel with cable design contrasted by a clean, simple back.
-
- Unisex cable stitch sweater that works for multiple styles.
-
- YarnArt Super Merino yarn used for the sweater – perfect for textured crochet.
-
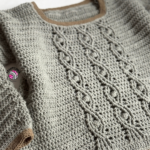
- Close-up of the cable stitch detail highlighting texture and structure.

-
- Oversized crochet sweater made from YarnArt Super Merino yarn.
-
- Cable stitch crochet pattern

No Comments