
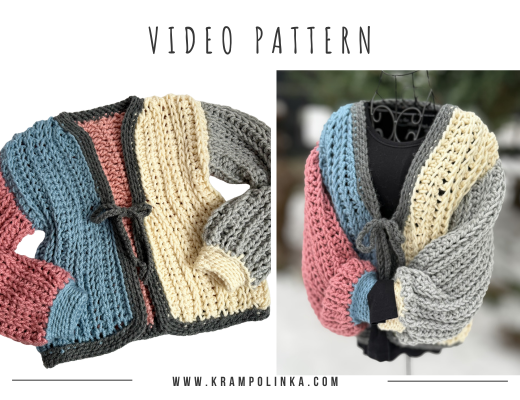
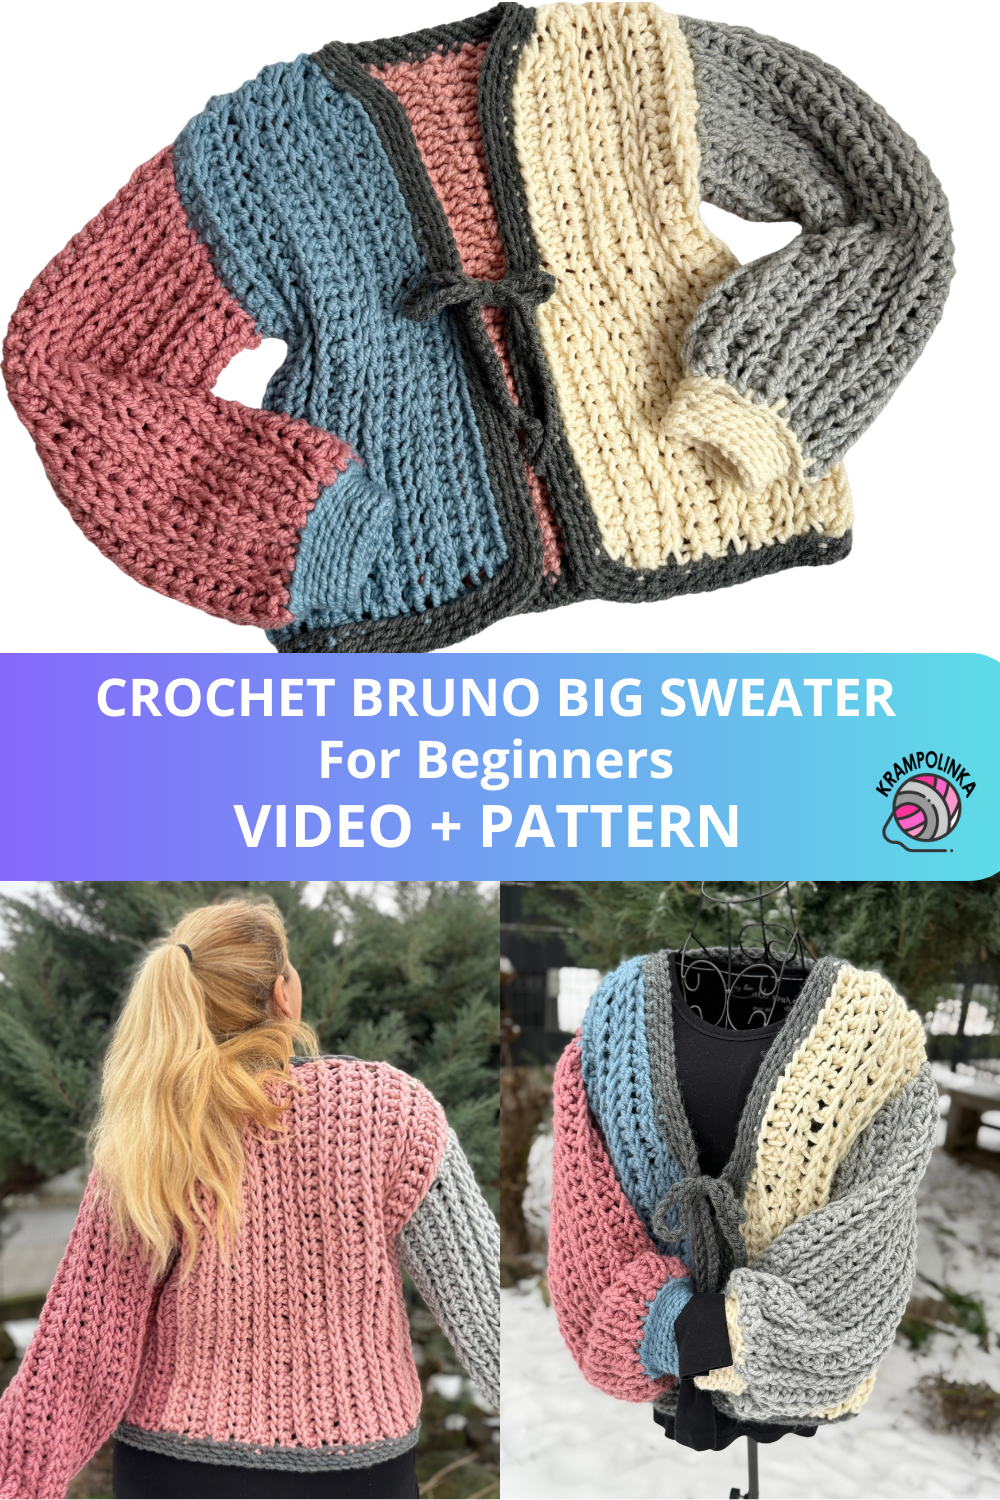
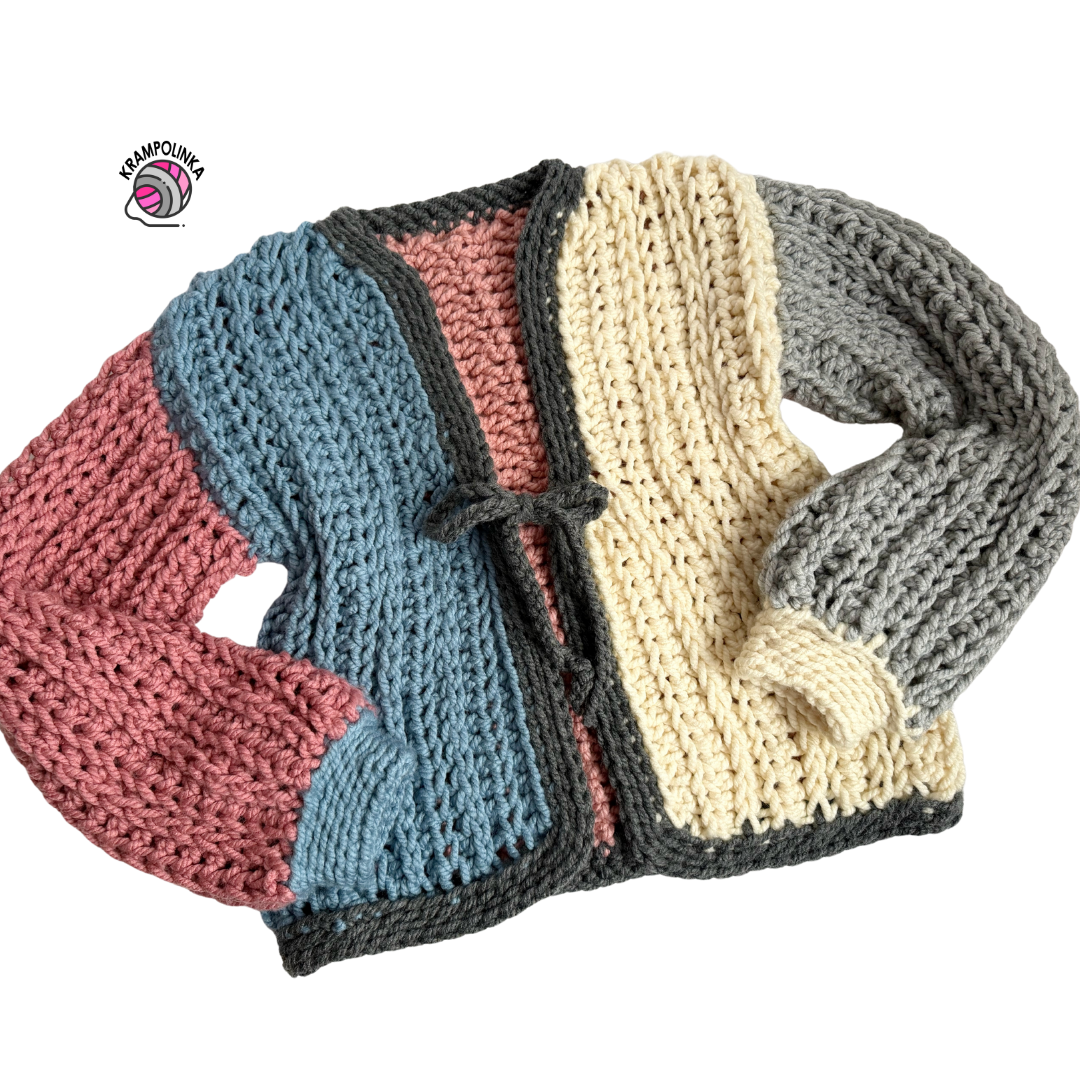
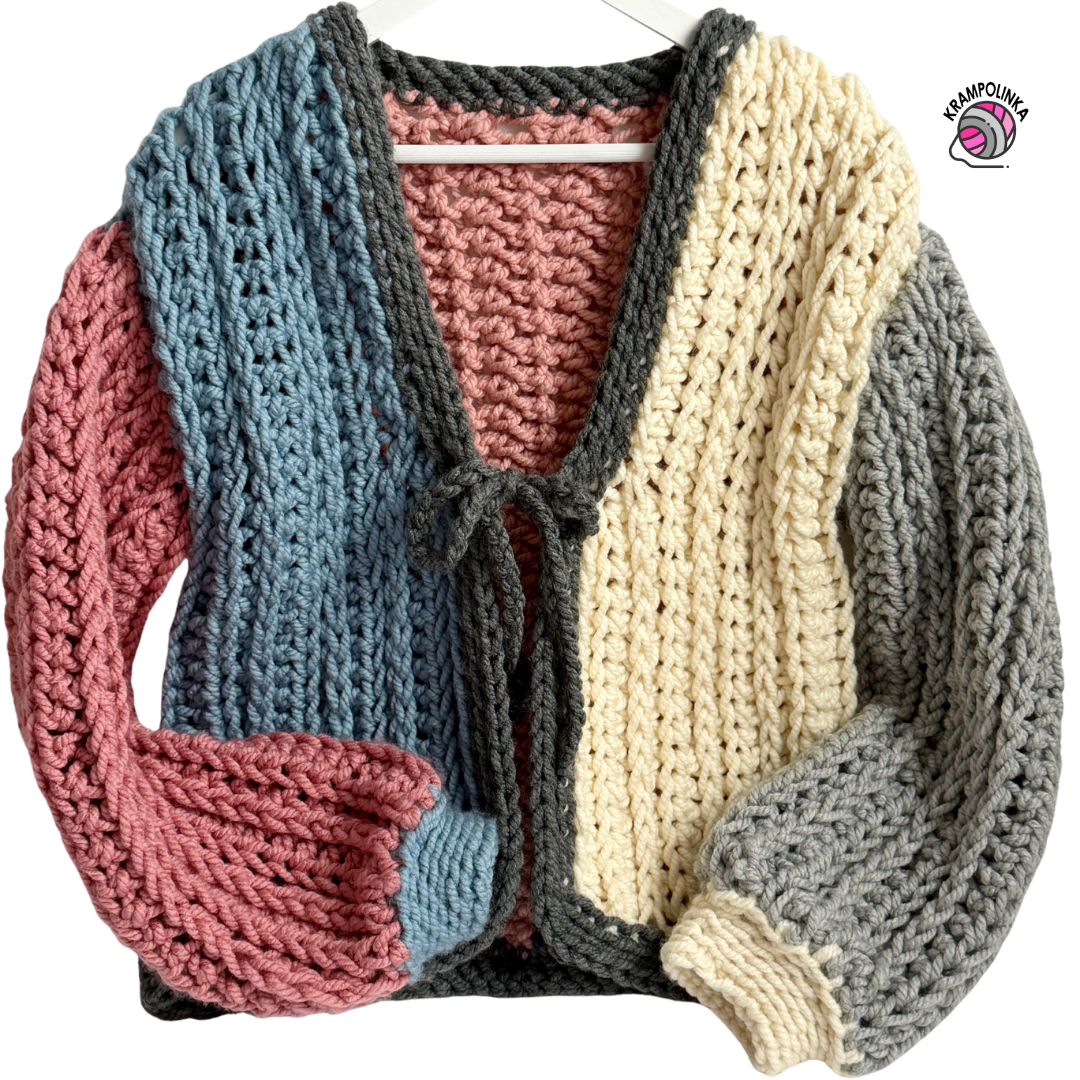
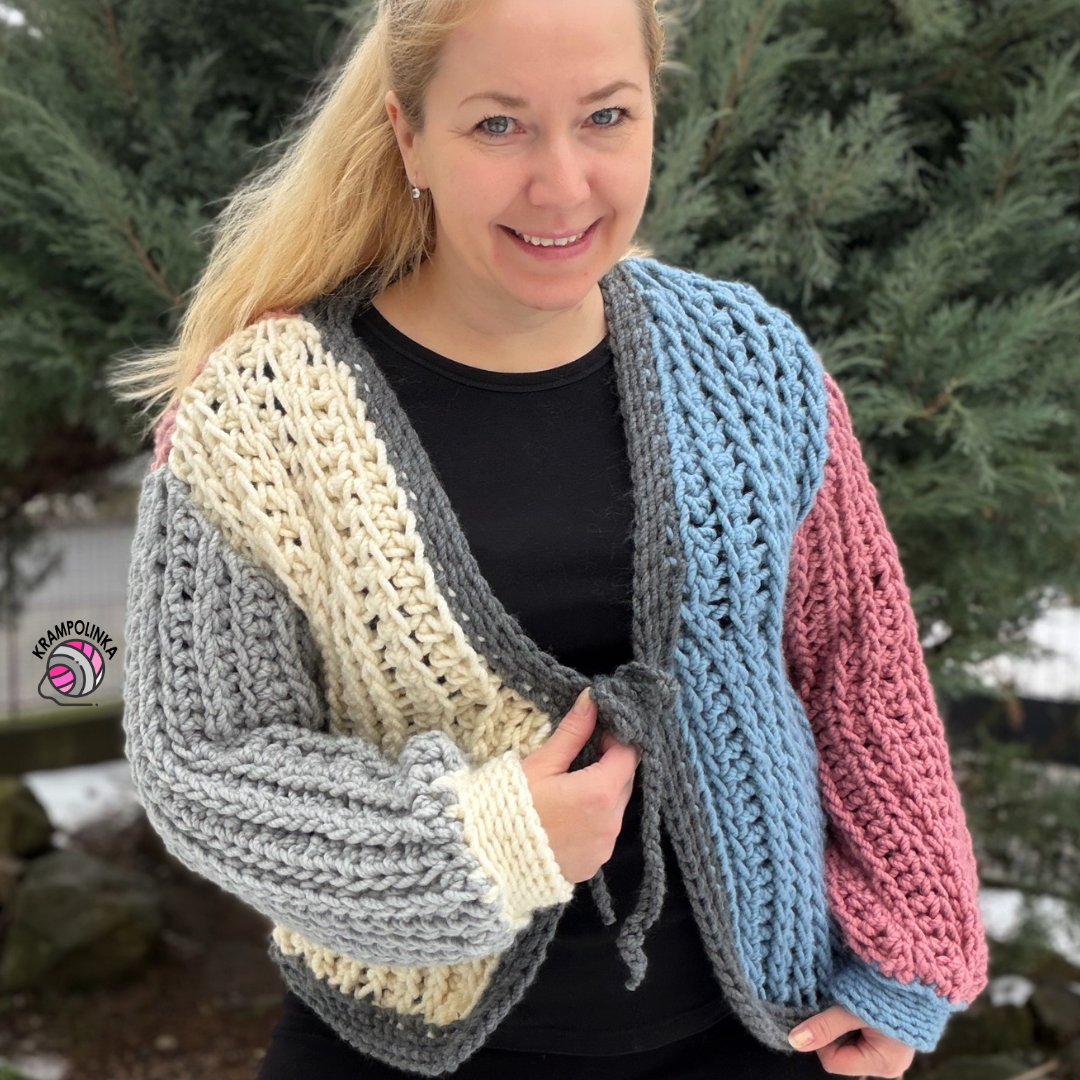
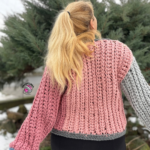
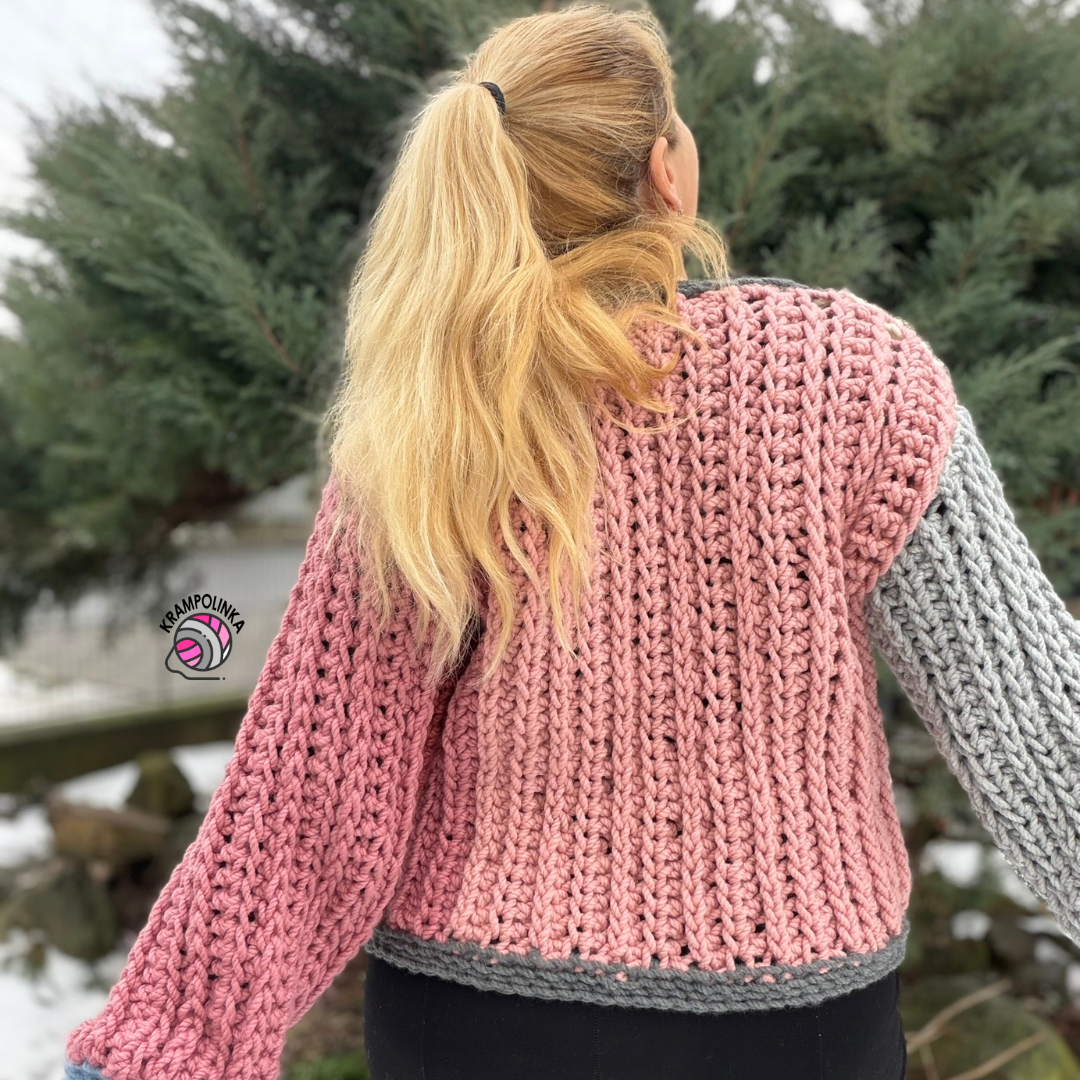
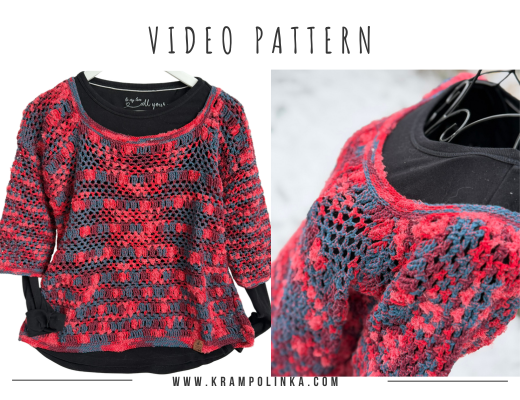
An oversized sweater crocheted in a single day. With the new VlnaHep Bruno Big yarn and a 18 mm hook, even beginners can make it.
When we were unboxing the huge skeins of VlnaHep Bruno Big yarn in the podcast Povídání u klubíčka #122, the original plan was completely different — a winter beanie. But the thickness and texture of the yarn practically called for a bigger project. In the end, it turned into a winter oversized sweater crocheted with a truly large hook.
-
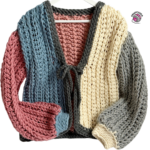
- PIN IT for later. Your ShorCut to Bruno Big Oversized Crochet Sweater
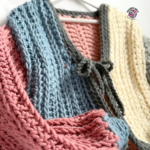
For size 42–44, I used 8 skeins in multiple colors of VlnaHep Bruno Big (200 g / 120 m, 100% acrylic). If you choose a single-color version, you’ll need about 5 skeins. The finished sweater weighs nearly one kilogram, is warm and dense, yet can be completed within a single day. The key is having a 18 mm hook.
We unboxed the yarn package in the podcast Chatting Over Yarn #122, and you can watch the replay here. You can find the article about VlnaHep Bruno Big yarn here.
VIDEO TUTORIAL PREMIERE – January 27, 2026 at 7:00 PM 🎬(English Subtitles)
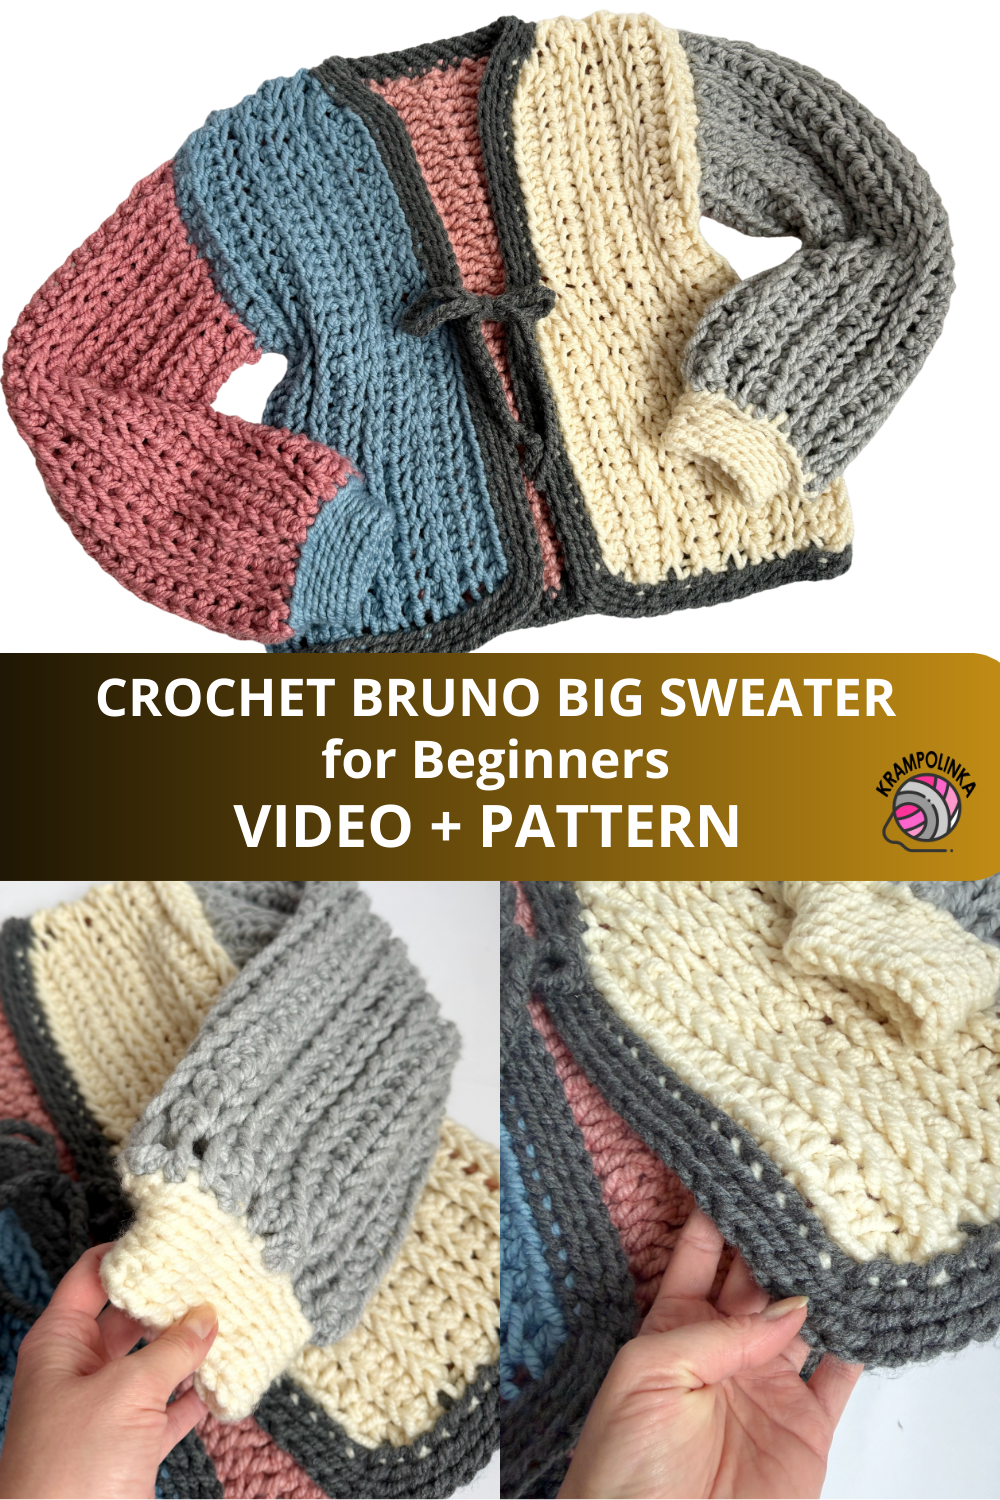
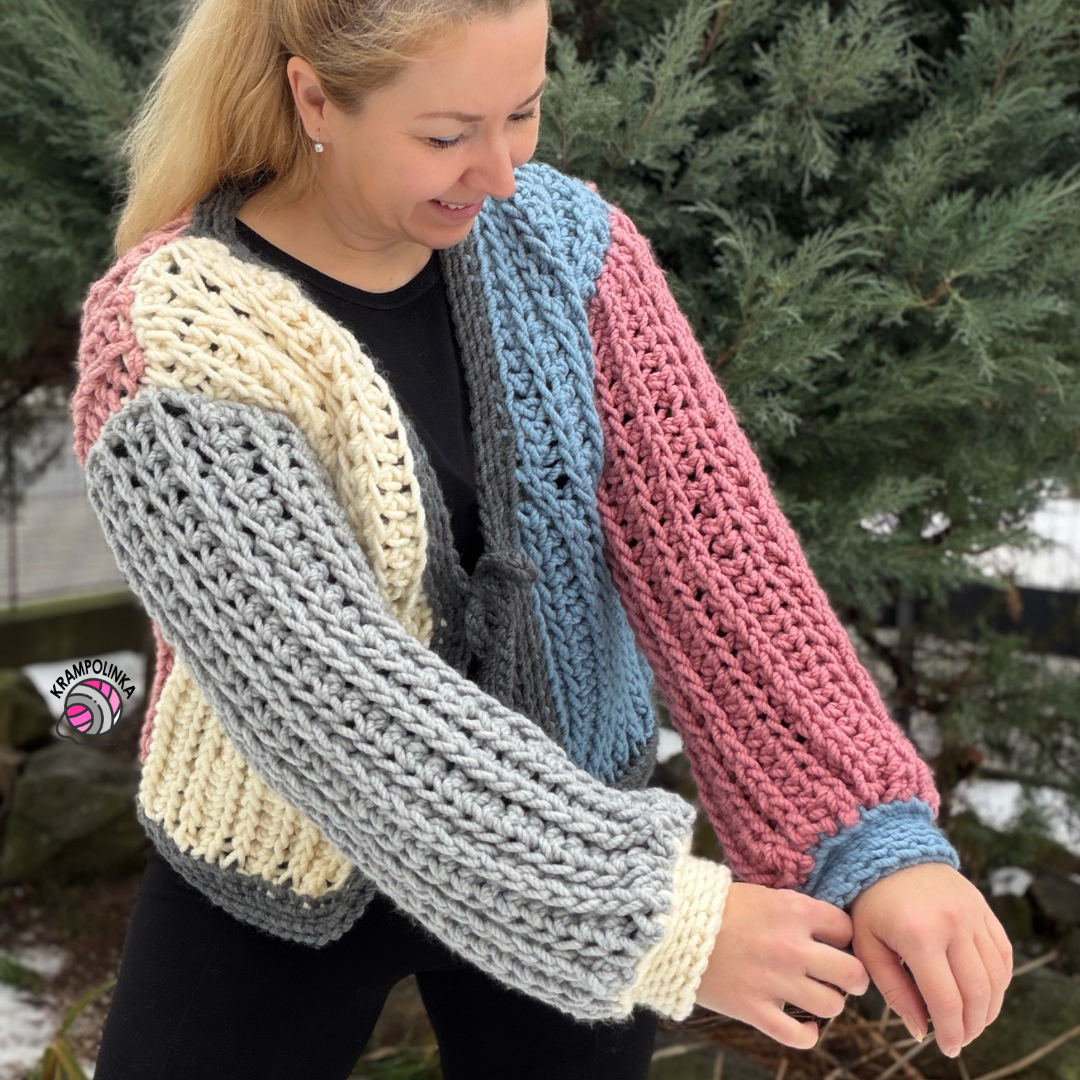
The sweater construction is very simple. We crochet flat, working back and forth: one back panel, two shaped front panels, and two rectangles for the sleeves. The individual pieces are then crocheted together, the entire sweater is finished with edging, and the project is complete.
The stitch pattern used is easy yet effective. On the wrong side, we work half double crochets into the front bottom loop; on the right side, we work half double crochets into the third loop. The resulting texture resembles knitted fabric. For the edging, I used single crochet in a herringbone-style pattern.
Tip: Adjusting the size is very easy. Simply measure the front length of your favorite sweater and adjust the length of the foundation chain in the first row accordingly. To maintain softness and the correct structure, I recommend sticking to the specified hook size. The sweater is designed to be worn to the waist — the chosen material adds volume and creates a pronounced oversized effect.
I hope your Bruno Big sweater turns out beautifully and that you enjoy wearing it. Would you like to inspire others or share your experience with crocheting or styling this sweater? You can share your photos in the Krampolinka Facebook group. On Instagram, please use the hashtag #svetrbrunobig so others can easily find your projects. If you tag me in your creations made using my patterns, I can reshare them in my Instagram Stories to inspire others.
BRUNO BIG SWEATER
Yarn: VlnaHep Bruno Big
Yarn consumption: 5 skeins (200 g each) in one color, or 8 skeins in multiple colors
Hooks: 18 mm, 12 mm, and 10 mm
Measurements: 52 cm width, 54 cm front length, 48 cm sleeve length
Size: Designed for size 42–44 and height 168 cm
Other tools: Large-eye needle, label for decoration
Time estimate: approx. 15 hours
Skill level: Beginner-friendly
Abbreviations:
ch – chain
sl st – slip stitch
hdc – half double crochet
hdc FLO – half double crochet in the front loop only
hdc 3rd loop – half double crochet in the third loop
sc herringbone – single crochet in herringbone pattern
-
- PIN IT to Pinterest. Crochet Bruno Big Sweater
Back Panel – 18 mm hook
Row 1: Chain 32.
Row 2: Ch 2 (counts as first hdc). Work hdc into each chain across, turn. (33)
Row 3: Ch 2 (counts as first hdc). Work hdc in the front loop only (FLO) across. Count your stitches. Work the last stitch into the 2nd chain of the turning chain. Turn. (33)
Row 4: Ch 2 (counts as first hdc). Work hdc in the third loop across. Count your stitches. Work the last stitch into the 2nd chain of the turning chain. Turn. (33)
Rows 5–20: Repeat Rows 3 and 4. Fasten off.
Note: The back panel used one full skein and part of a second skein.
Front Panel – 18 mm hook (make 2)
Row 1: Chain 32.
Row 2: Ch 2 (counts as first hdc). Work hdc into each chain across, turn. (33)
Row 3: Ch 2 (counts as first hdc). Work hdc in the front loop only across. Count your stitches. Work the last stitch into the 2nd chain of the turning chain. Turn. (33)
Row 4: Ch 2 (counts as first hdc). Work hdc in the third loop across. Count your stitches. Work the last stitch into the 2nd chain of the turning chain. Turn. (33)
Rows 5–8: Repeat Rows 3 and 4.
For the right front panel, continue and shape the neckline. For the left front panel, fasten off and rejoin yarn later.
Right Front Panel – 18 mm hook
Row 9: Ch 2 (counts as first hdc). Working on the wrong side, crochet hdc in the front loop only across the first 18 stitches. Turn. (19 stitches total including turning chain)
Row 10: Ch 1, skip 1 stitch, work sc in the third loop, then 16 hdc in the third loop, and 1 hdc into the turning chain. Fasten off.
Note: The back panel used one full skein and part of a second skein.
Left Front Panel – 18 mm hook
Row 9: Join yarn into the 19th stitch (counted from the bottom edge). Ch 2 (counts as first hdc). Working on the wrong side, crochet hdc in the front loop only across 18 stitches. Turn. (19 stitches total)
Row 10: Ch 2 (counts as first hdc). Work 16 hdc in the front loop only. At the end of the row, make a slip stitch and fasten off.
Sleeve – 18 mm hook (make 2)
Row 1: Chain 28.
Row 2: Ch 2 (counts as first hdc). Work hdc into each chain across, turn. (29)
Row 3: Ch 2 (counts as first hdc). Work hdc in the front loop only across. Count stitches. Work the last stitch into the 2nd chain of the turning chain. Turn. (29)
Row 4: Ch 2 (counts as first hdc). Work hdc in the third loop across. Count stitches. Work the last stitch into the 2nd chain of the turning chain. Turn. (29)
Rows 5–16: Repeat Rows 3 and 4.
Row 17: Once the sleeve is wide enough, fold it lengthwise and join the long edges together on the wrong side using slip stitches. Insert the hook into the back loop on one side and into the chain space on the opposite side as you join.
Note: Adjust sleeve length to your arm length by making a longer or shorter foundation chain. The more rows you add, the wider the sleeve will be.
Sleeve Cuff – 10 mm hook
Row 1: Join yarn at the seam. Ch 1, then work herringbone single crochet (sc herringbone) around. (I recommend watching the video for this stitch.) Work on the right side so that the sleeve opening tightens slightly. Typically, work 1 sc herringbone into each horizontal row, and in every third row work 2 stitches (pattern: 1–1–1–2). You should have about 20 stitches total. Join with a slip stitch.
Row 2: Ch 1 (counts as first stitch). Work sc herringbone in the back loop only around. Join with a slip stitch. If you need to decrease, use the pattern: sc herringbone, sc herringbone, skip 1 stitch. This works better than crocheting stitches together with such thick yarn.
Rows 3–4: Ch 1 (counts as first stitch). Continue sc herringbone in the back loop only. Join each row with a slip stitch. Fasten off after the final row. Repeat on the other sleeve.
Note: The herringbone single crochet strengthens and tightens the cuff. You may switch from a 12 mm hook to a 10 mm hook for this part.
Finishing
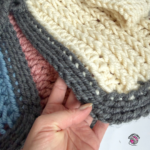
Weave in all ends. Add a decorative label/tag.
Copyright Notice
This pattern is for personal use only. For commercial use, please contact me directly. Always include the source credit: www.krampolinka.com. The pattern is designed specifically for this yarn, hook size, and my personal tension. If you use a different yarn, hook, or tension, your final product may vary in size or shape.
Enjoy this free pattern and you can follow my latest projects, tutorials, ideas, reviews, video podcasts, tips, and tricks:
- Krampolinka YouTube videos (subtitled since 2024)
- Krampolinka Instagram
- Krampolinka FB group
-
- Oversized crochet sweater made in just one day.
-
- Super bulky yarn = instant cozy vibes.

-
- Texture that looks knitted, but it’s crochet.
-
- Chunky stitches, bold winter look.
-

- Beginner-friendly and surprisingly fast.

-
- Warm, heavy and perfect for cold days.
-
- Statement sweater made with a 18 mm hook
-
- Proof that big yarn means quick results.

-
- Soft volume and dramatic oversized fit.


No Comments