
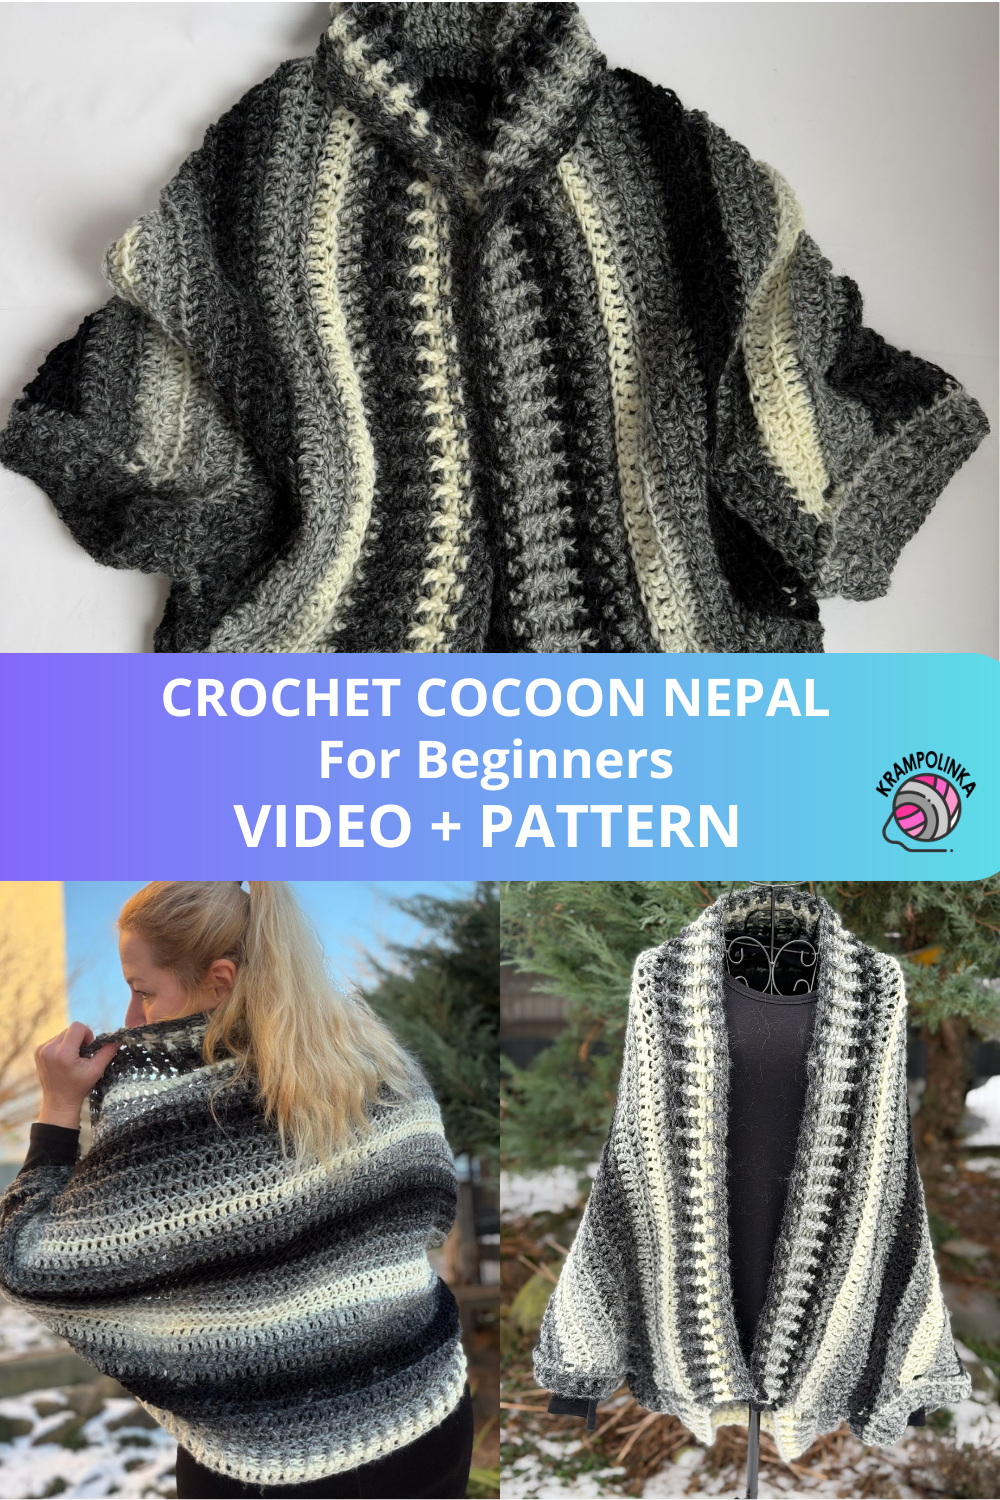
The first cocoon-style crochet sweater of this year is finished! This time I’ve prepared a project that is beginner-friendly and will guide you step by step through the entire process. The result is a comfortable, warm and fluffy sweater you can easily snuggle into.
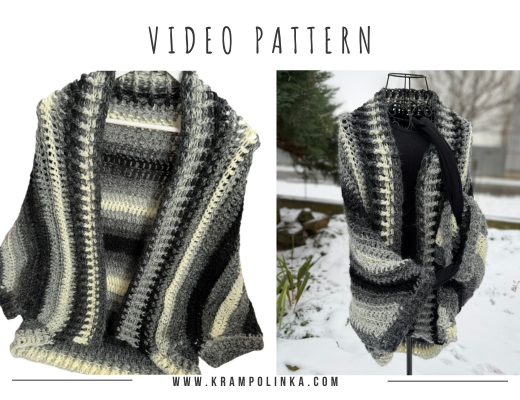
A cocoon sweater is loose-fitting, intentionally oversized and designed with comfort in mind. There are many variations of this style – from light summer versions crocheted from a square or rectangle to warmer designs made for colder seasons. This time I decided to crochet a cocoon sweater in one piece in a trapezoid shape, which allows for continuous crocheting without complicated seaming.
-
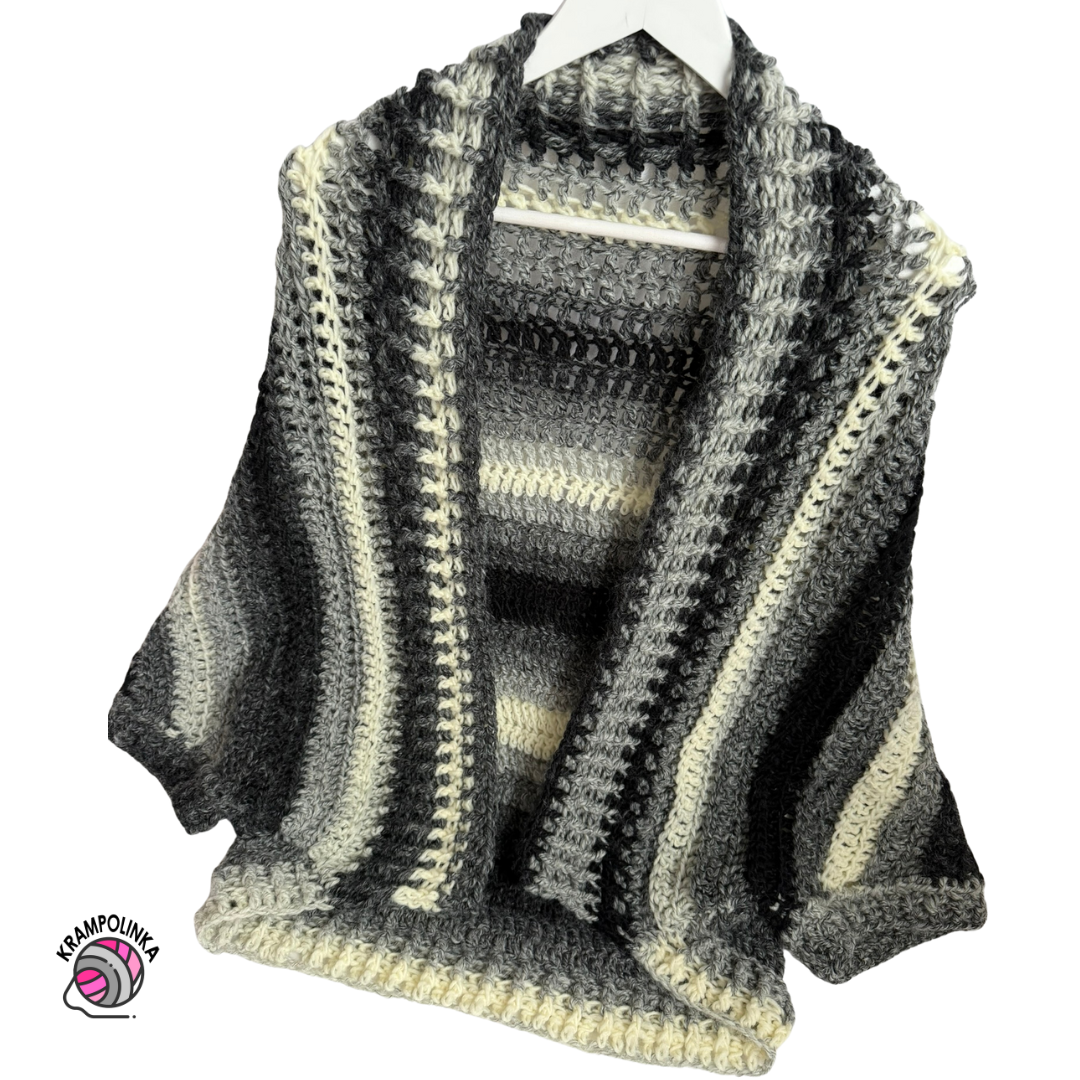
- Save & Pin for later 💛 A warm, fluffy crochet cocoon sweater you’ll want to make!
For this project, I chose Vlna Hep Nepal Ombre yarn. It comes in a 100 g ball with 190 m, composed of 78% acrylic and 22% wool. The yarn is very soft, pleasant to the touch, non-itchy, and thanks to its ombré color combinations it creates an interesting visual effect even with a simple stitch pattern. Crocheting the sweater in one piece combined with this yarn also creates a subtle vertical stripe effect on the front panel.
While crocheting, I intentionally chose a larger KnitPro 10 mm hook. Thanks to it, the finished sweater has a light and fluffy texture, and the work progressed quickly. For size 42–44, I used four balls of yarn. For taller figures or a longer cocoon version, I recommend planning for five balls.
VIDEO TUTORIAL PREMIERE – January 14 at 19:00 (English Subtitles)
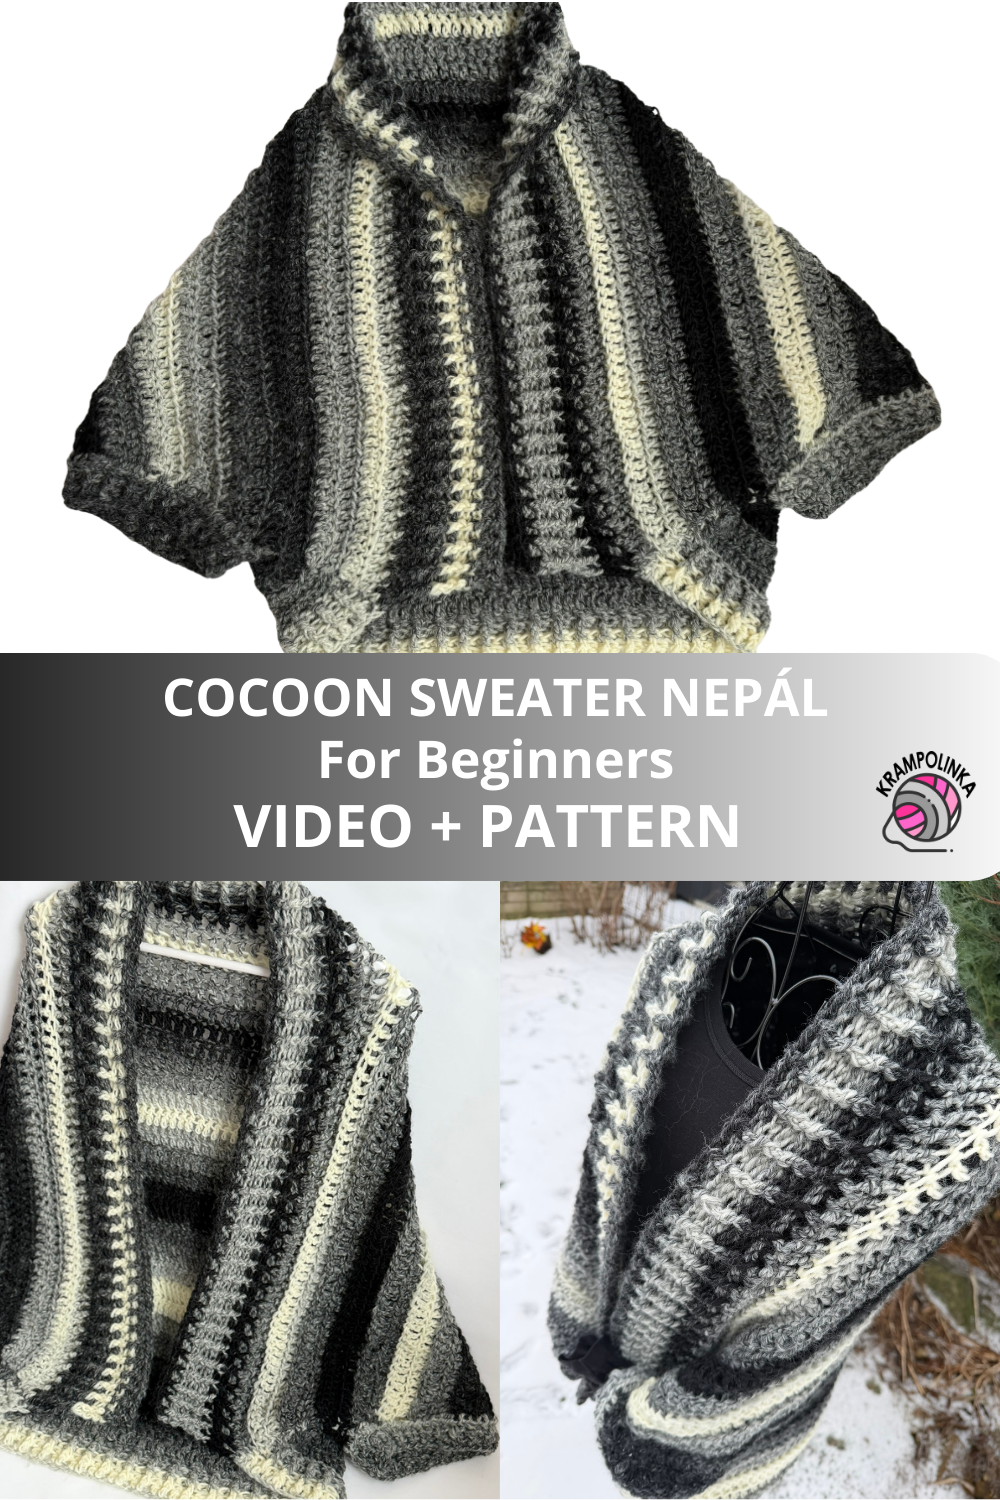
The Cocoon Nepal Sweater is designed primarily for beginners. It has a simple construction and is crocheted in rows, back and forth. The project starts with a ribbed hem, whose length should be more than half of your hip circumference. The ribbing is made using front post and back post double crochets to a height of approx. 6 cm, and then you continue working with double crochet stitches.
On the right side, the double crochets are worked into the back loop only, while on the wrong side they are worked into the front loop only. At the beginning and end of each row, the piece is gradually increased, creating a trapezoid shape. Once you reach a middle height of about 65–70 cm and a length of 150–160 cm (a slightly taller center height is actually an advantage for this style), fold the two outer corners down to the lower edge of the ribbing and join them with a slip stitch.
Next, continue crocheting the front edging in rows back and forth, to a length of approx. 10–15 cm. Then seam the sides at the lower part of the body to shape the sleeves. Finally, finish the sleeves with post stitches, which create a neat border and unify the whole sweater.
TIP: This type of sweater is ideal for crocheting with a gradient yarn cake, which works beautifully especially for summer versions. The shape flatters taller figures in particular. The sweater is not designed to be fastened, and it’s important to keep in mind that this is an oversized fit — it is not shaped to the body but focuses mainly on comfort and freedom of movement. Never hang the sweater on a hanger; always store it folded in your wardrobe.
I hope your Cocoon Nepal Sweater turns out beautifully and that you enjoy wearing it. Would you like to inspire others or share your experience with crocheting or styling this sweater? Feel free to upload your photos to KRAMPOLINKA Facebook Group. For easy searching on Instagram, please use the hashtag #svetrikcocoonnepal. If you tag me, I’ll be happy to share your post in my Stories.
COCOON NEPAL SWEATER
Yarn: Vlna Hep Nepal Ombre, color 7409
Yarn usage: 4 balls for this size, 5 balls for a larger size
Hook size: 10 mm, 8 mm
Measurements: Hip width (laid flat): 65 cm (130 cm circumference), Height: 70 cm
Size: crocheted for size 42–44, height 168 cm
Other tools: yarn needle (large eye), label/tag for decoration
Estimated time: approx. 15 hours
Skill level: beginner-friendly
Abbreviations
ch – chain
sl st – slip stitch
dc – double crochet
FPdc – front post double crochet
BPdc – back post double crochet
BLOdc – double crochet in back loop only
FLOdc – double crochet in front loop only
Herringbone dc (hbdc): yarn over, insert the hook through the center “V” of the previous stitch, bring the hook behind the post, pull up a loop and pull it through the center loop; then finish the double crochet as usual.
(dc = US double crochet / UK treble)
-
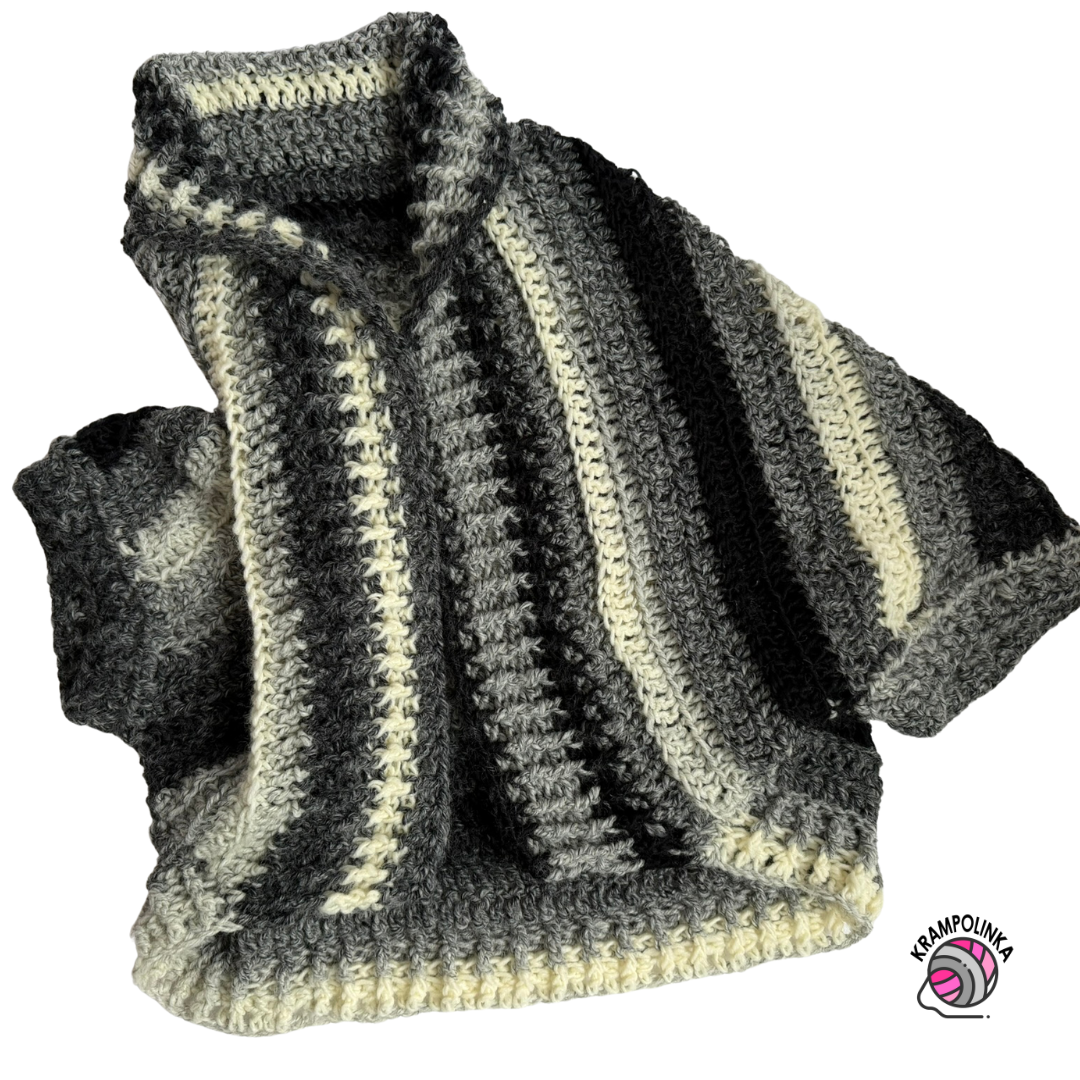
- Pin it for later 🧶✨ Cozy crochet cocoon sweater made with Vlna Hep Nepal Ombre yarn.
Sweater – Bottom Ribbing (Hook 10 mm)
Row 1: ch 62, turn.
Row 2: ch 2/3 (counts as the first stitch), dc in each chain, turn. (63)
We need an odd number of stitches.
Row 3: ch 2/3 (counts as the first stitch), then alternate FPdc and BPdc. Finish with dc into the turning-chain space. Turn.
Row 4: ch 2/3 (counts as the first stitch). Work FPdc into FPdc and BPdc into BPdc. Finish with dc into the turning-chain space. Turn.
Note: Adjust the ribbing height as needed. You can easily add one or two more rows.
Sweater Body Pattern (Hook 10 mm)
Row 5 (RS): ch 2/3 (counts as the first dc), dc next to the turning chain. Then work BLOdc (dc in back loop only).
In the second-to-last stitch, crochet 2 × BLOdc. Finish the row with 2dc in the turning-chain space (worked in two steps). Turn. (65)
Row 6 (WS): ch 2/3 (counts as the first dc), dc next to the turning chain. Then work FLOdc (dc in front loop only).
In the second-to-last stitch, crochet 2 × FLOdc. Finish the row with 2dc in the turning-chain space (worked in two steps). Turn. (67)
Rows 7–33: Repeat Rows 5–6.
If you end up with an even stitch count in the last row (meaning a mistake happened somewhere), increase in the next row to get back to an odd stitch count.
Crochet to size. At this point the piece should measure approximately 150–160 cm in length and 65–70 cm in height. If needed, crochet more rows.
Joining the Corners (Hook 10 mm)
Row 34: ch 2 and use a sl st to join the top corner to the lower edge of the ribbing. Continue with dc in each dc across.
At the end, work dc into the turning-chain space and finish with a sl st to join the second top corner to the lower edge of the ribbing.
Wide Front Border (Worked on RS, Hook 10 mm)
Row 35: ch 2 (counts as dc). Alternate FPdc and BPdc. Finish with dc into the turning-chain space. Turn.
Rows 36–42: ch 2 (counts as dc). Work FPdc into FPdc and BPdc into BPdc. Finish with dc into the turning-chain space. Turn.
Note: Adjust the number of rows to fit your bust circumference. The sweater is not designed to be fastened — it is meant to be worn as an open, throw-on cocoon.
Side Seaming (Hook 10 mm)
On the WS, join the side seam using sl st up to approx. 16 cm. Leave enough space for a wide sleeve opening.
Sleeve Border (Hook 10 mm)
Round 1: Work Herringbone dc (hbdc) – I recommend watching the video tutorial. This stitch works as a “masking/levelling” row to even out the edges and at the same time forms the first border round.
For one horizontal row, crochet 2 hbdc. Finish with a sl st.
Round 2: ch 2 (counts as dc). Work FPdc and BPdc into the stitches around. Finish with a sl st.
Final Border Round (Hook 8 mm)
Round 3: ch 2 (counts as dc). Work FPdc into FPdc and BPdc into BPdc. Finish with a sl st. Fasten off.
Finishing
Weave in all ends. Add a decorative label/tag.
Copyright Notice
This pattern is for personal use only. For commercial use, please contact me directly. Always include the source credit: www.krampolinka.com. The pattern is designed specifically for this yarn, hook size, and my personal tension. If you use a different yarn, hook, or tension, your final product may vary in size or shape.
Enjoy this free pattern and you can follow my latest projects, tutorials, ideas, reviews, video podcasts, tips, and tricks:
- Krampolinka YouTube videos (subtitled since 2024)
- Krampolinka Instagram
- Krampolinka FB group
-
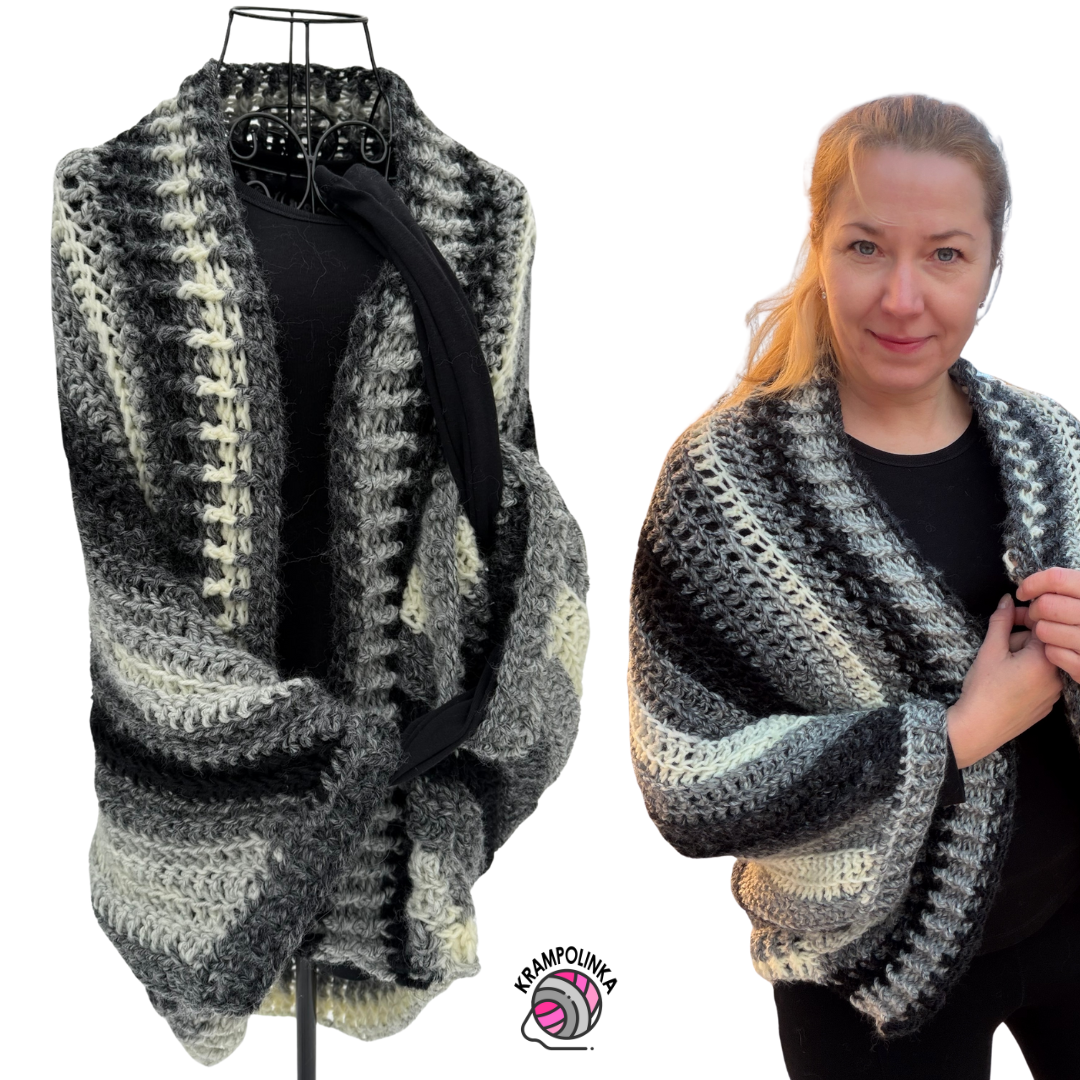
- Cozy crochet cocoon sweater in Vlna Hep Nepal Ombre yarn – soft, warm and perfectly oversized.
-
- Front view: the trapezoid one-piece construction creates a beautiful subtle vertical stripe effect.
-

- Finished look: an easy beginner-friendly cocoon cardigan you can throw on and snuggle into all winter long.
-
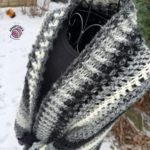
- Close-up detail: fluffy texture, ombré color transitions and simple stitches that look stunning together.

No Comments