
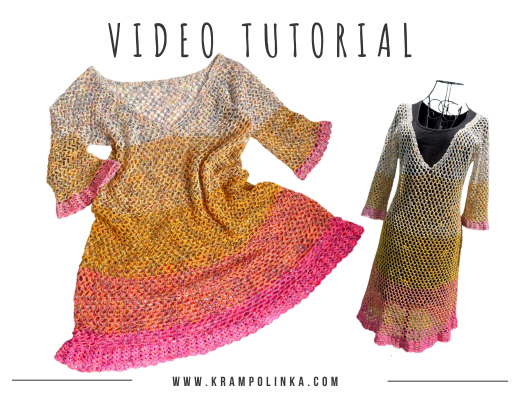
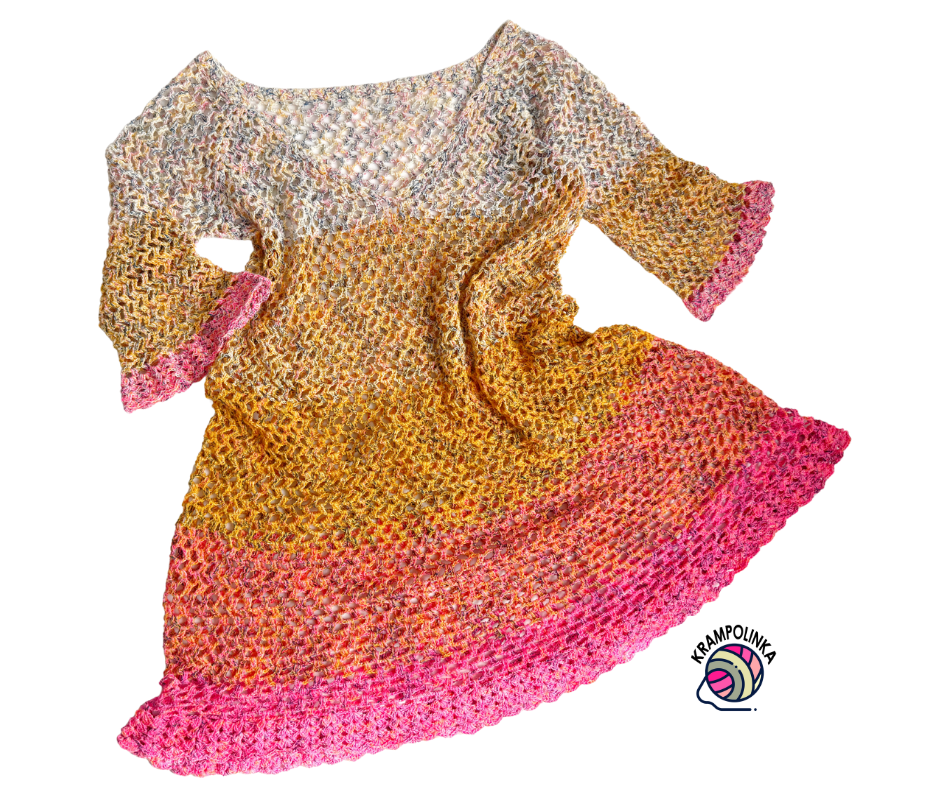
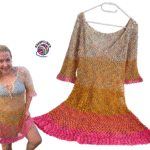
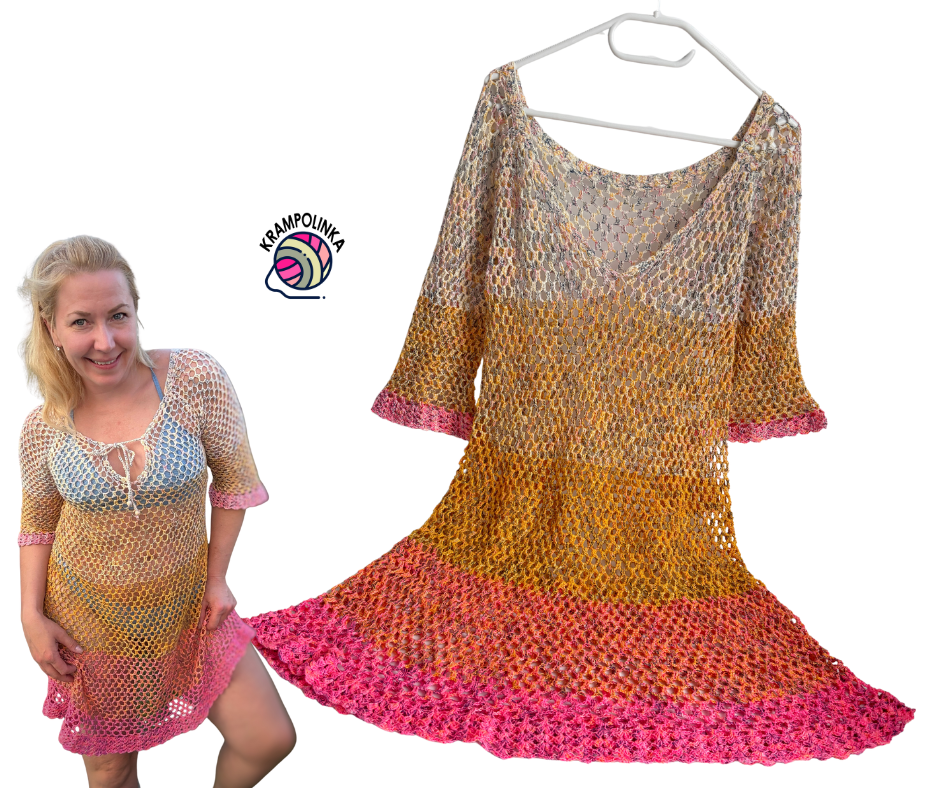
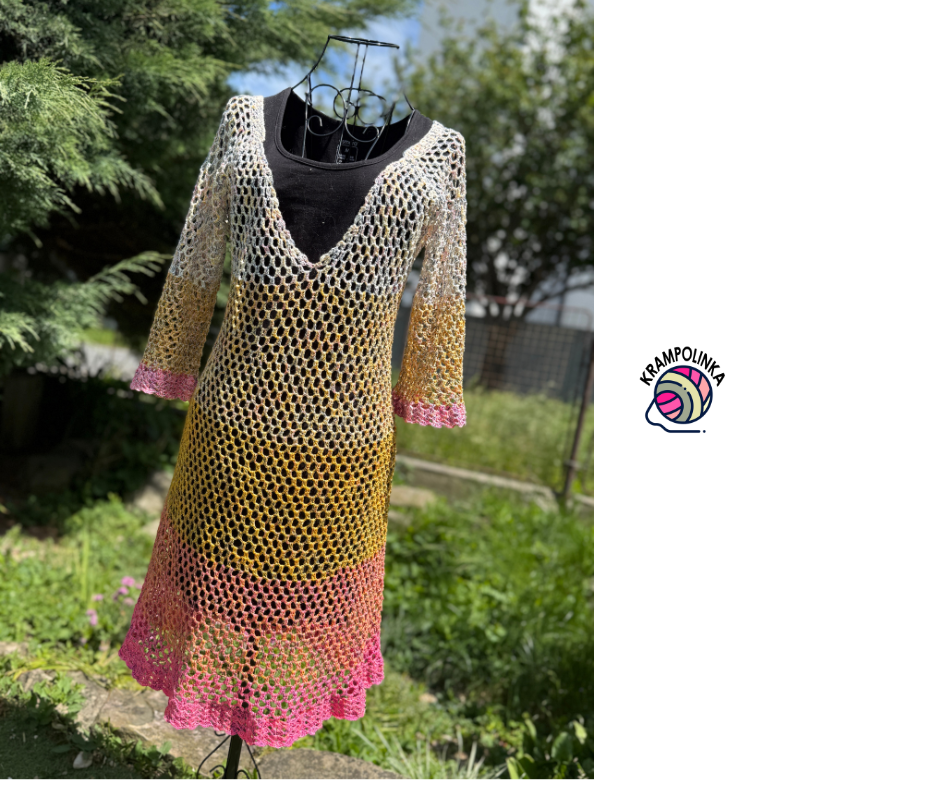
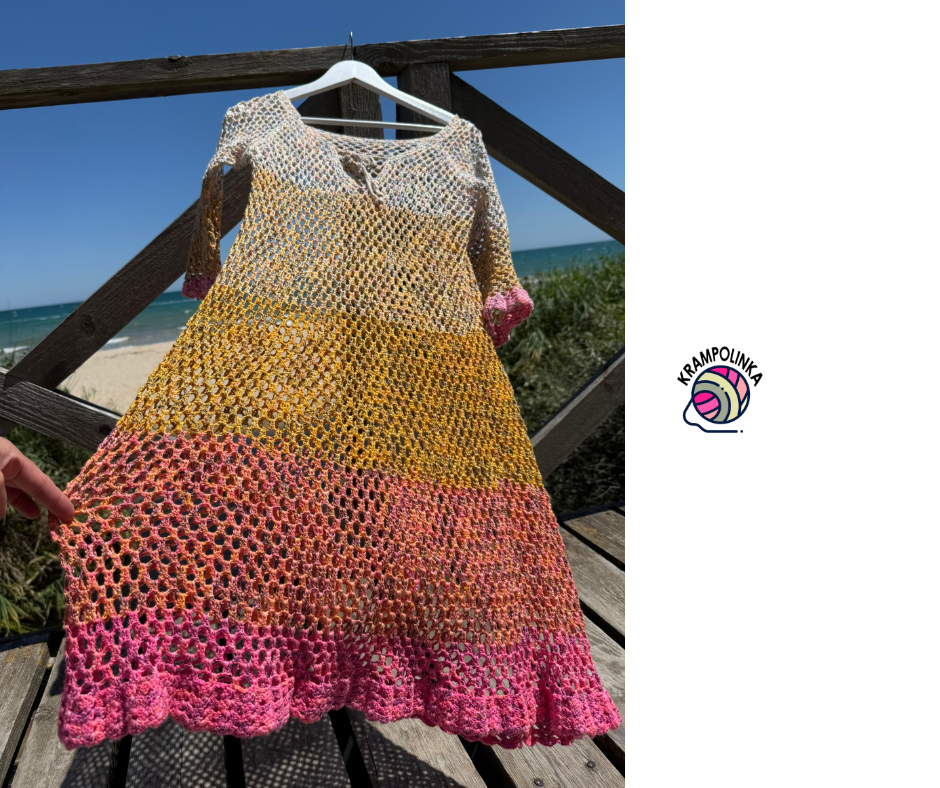
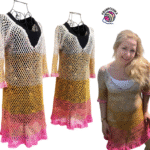
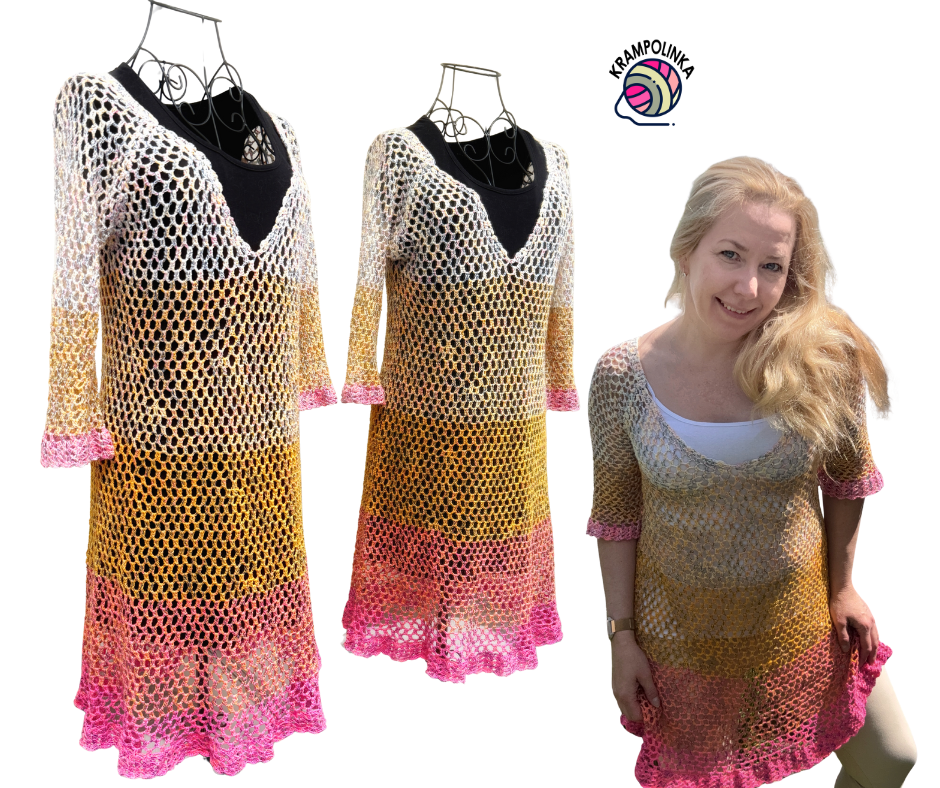
In today’s video tutorial, we’ll crochet a lightweight beach dress – a tunic style with a raglan yoke and “V”-shaped neckline using the multicolored gradient yarn Design Yarn Crazzy.
Design Yarn Crazzy is a three-ply gradient yarn made of 50% cotton and 50% acrylic. The cake consists of two strands in a solid color and one in a multicolor, creating a unique melange effect. You can purchase the yarn as a single cake or as a color-coordinated boxed set. Available from Hravá Klubka.
VIDEO TUTORIAL PREMIERE June 7th 2025 – Czech WITH ENGLISH SUBTITLES
We will crochet the dress top-down, using the raglan method. The neckline is shaped into a “V” while simultaneously forming the edge border. The yoke is worked in rows, turning your work at the end of each row. Increases are made in the raglan corners and front part of the dress.
To ensure better fit and comfort, I added extra rows to the front and back panels before folding the yoke and joining it under the arms. The body and sleeves are then worked back and forth in rows.
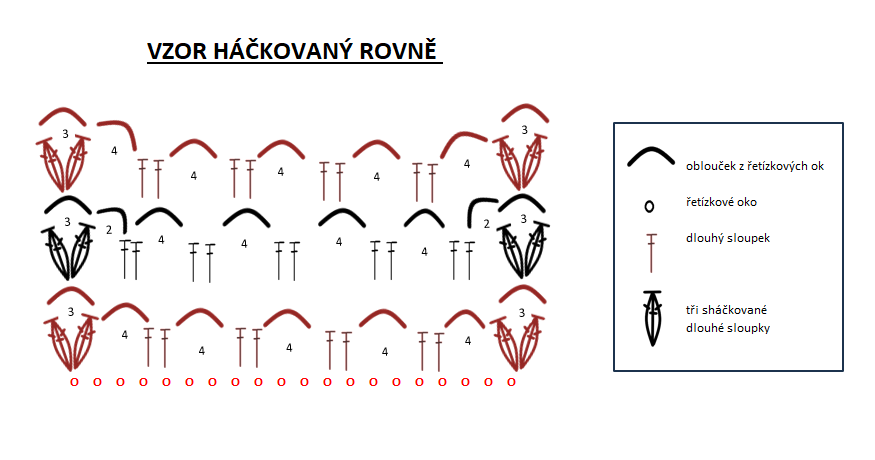
The pattern is super simple – a combination of double crochet stitches and chain spaces – perfect for beginners! We aim for a loose and breathable design, so the lacy texture won’t leave sunburn marks.
Adjust the yoke size according to your body:
- Fewer rows for smaller sizes
- More rows + custom front/back extensions for larger sizes
The armhole depth must always be checked and can be adjusted even after joining the yoke.
BEACH DRESS CRAZZY
Yarn: Design Yarn Crazzy no. 1 (available at Hravá Klubka)
Yarn Amount: approx. 1300 m / 330 g
Hook Sizes: 2.5 mm and 2 mm
Dimensions: Top width: 50 cm, Bottom width: 70 cm, Sleeve length (3/4): 30 cm
Size: approx. EU 42 (bust circumference 96 cm)
Other Tools: Yarn needle with large eye, decorative label, stitch markers
Time Estimate: approx. 50 hours
Skill Level: Total beginner-friendly
Used Crochet Abbreviations (US Terms)
- ch – chain
- sl st – slip stitch
- dc – double crochet
- sc – single crochet
- dc3tog – 3 double crochets crocheted together
- raglan corner – dc3tog, ch3, dc3tog
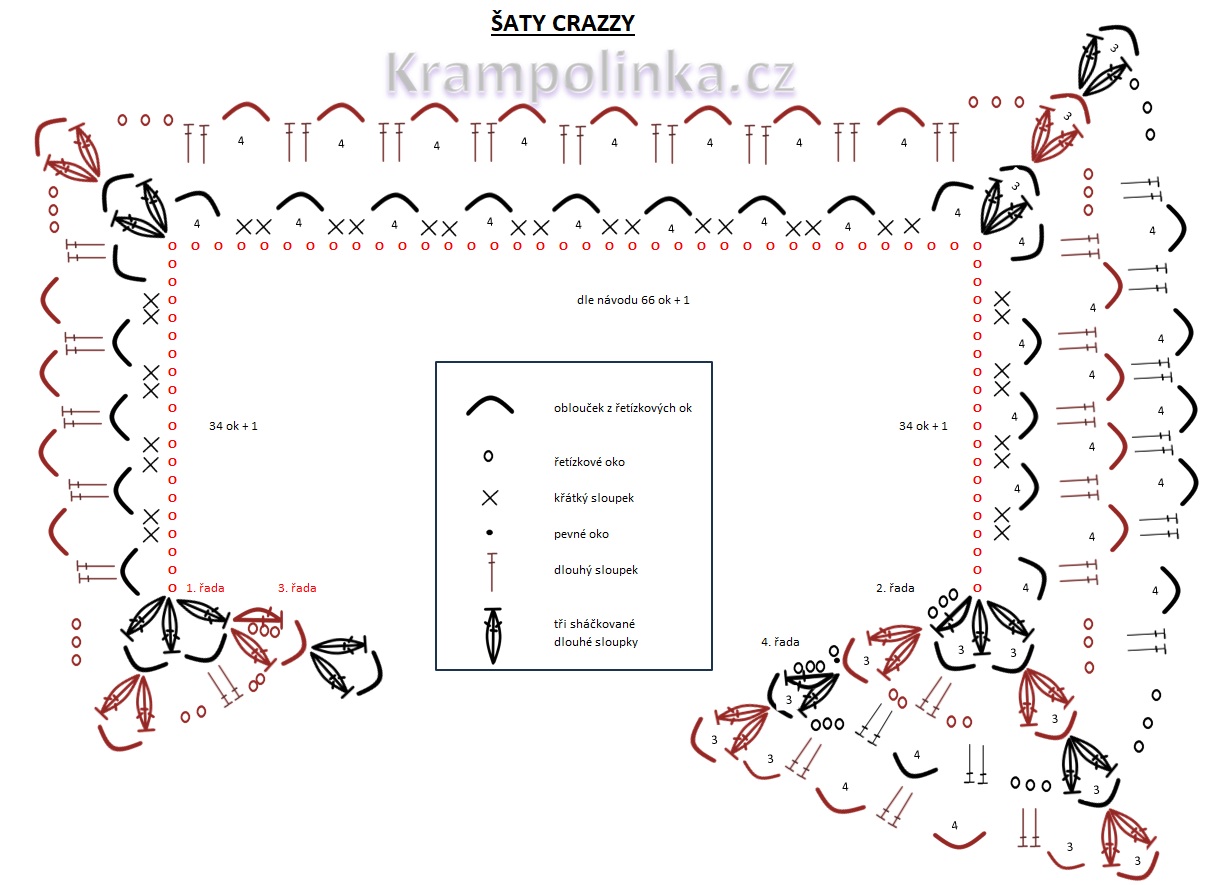
Crazzy Dress – Yoke, hook size 2.5 mm
Row 1:
Crochet a foundation chain of 137 chains.
This corresponds to 2×34+1 chains for the sleeves and 66+1 chains for the back section.
Make a few extra chains just in case – you can always undo them later if not needed. Turn your work.
Row 2:
Begin shaping the neckline and the first raglan corner.
Substitute the first double crochet (dc) with ch3. Then work:
[3dc tog, ch3, 3dc tog, ch3, 3dc tog] into the next stitch.
Now begin the sleeve section:
ch4, skip 2 stitches, 1 single crochet (sc) into next stitch, 1 sc into next. Repeat this sequence 7 times. End with ch4, skip 2 stitches.
Into the third stitch of the previous 3dc-ch3-3dc group, work the next raglan corner: [3dc tog, ch3, 3dc tog].
Continue with the back section:
ch4, skip 2 stitches, 1 sc in next stitch, 1 sc in following stitch. Repeat 14 times. End with ch4, skip 2.
Into the next raglan corner, again work: [3dc tog, ch3, 3dc tog].
Now work the second sleeve section the same way as the first:
ch4, skip 2, sc in next, sc in following stitch. Repeat 7 times, end with ch4, skip 2.
Into the final stitch, work the last raglan corner and neckline shaping:
[3dc tog, ch3, 3dc tog, ch3, 3dc tog]. Turn your work.
➡️ At this point: each sleeve has 8 arches, and the back has 16 arches.
Crazzy Dress – Yoke, hook size 2.0 mm
Row 3:
Start the neckline: ch3 instead of first dc, then 2dc tog, ch3, 3dc tog into the top of the 3dc cluster from the previous row (this only applies in this row).
Then:
ch2, 2dc under the next chain space, ch2.
In each raglan corner, work: [3dc tog, ch3, 3dc tog].
For the sleeves:
ch3, 2dc under first chain space, then repeat [ch4, 2dc under chain space].
End with 2dc and ch3, then raglan corner as above.
Repeat the same for the back section and the second sleeve.
At the end of the row, crochet: ch2, 2dc under chain space, ch2, then finish into the last raglan corner with: 3dc tog, ch3, 3dc tog. Turn.
Row 4:
Ch1, sl st under chain space, then:
ch3, 2dc tog, ch3, 3dc tog under the same chain space = neckline.
Continue with:
ch3, 2dc under chain space, ch4, 2dc under next chain space, ch3, then a raglan corner.
Repeat the same pattern for sleeves and back:
[ch3, 2dc, ch4, 2dc, ch3] and raglan corners: 3dc tog, ch3, 3dc tog under ch-sp.
Finish the neckline with:
ch3, 2dc, ch4, 2dc, ch3, and finally the border: 3dc tog, ch3, 3dc tog. Turn.
Rows 5–13:
Ch1, sl st under chain space, then begin the row with:
ch3, 2dc under the first chain space,
then continue: ch4, 2dc under next chain space.
Each raglan corner is worked as before: 3dc tog, ch3, 3dc tog under chain space.
Always end the row with ch3 before the corner. Turn your work at the end of each row.
➡️ In the last row (Row 13), fasten off the yarn.
📏 Yoke Measurement Tip:
Measure the width of the back yoke. It should be at least half of your bust circumference.
In this pattern:
- Bust = 100 cm
- Back panel width = 50 cm
- Crochet as many rows as needed to reach this width.
Extending the Front Panels – Hook 2.0 mm
Row 14:
If the number of arches on the left and right front differs (e.g. due to bust shaping), crochet each front panel separately, adjusting the number of rows as needed.
After the final row, continue directly with the neckline edge:
ch3, 2dc tog, ch3, 3dc tog under the ch-space.
Then continue with the pattern:
ch3, 2dc under the first arch, then ch4, 2dc under next arch.
At the end of the row:
ch2, work the raglan corner: 3dc tog, ch3, 3dc tog under the chain space. Turn.
Row 15:
We do not increase in the underarm section.
ch1, sl st under chain space, continue with ch3, 2dc tog, ch3, 3dc tog under chain space.
Continue the pattern:
ch4, skip the dc group from the previous row, and work 2dc under the second arch.
Repeat: ch4, 2dc under arch.
At the end of the row (neckline side), increase by working:
2dc under last arch, ch3, and finish with 3dc tog, ch3, 3dc tog for the neckline border. Turn.
Row 16:
Repeat Row 14. Work the second front panel in reverse (mirror image).
You may work a different number of rows on the front and back – that’s okay. Just make sure the neckline fits your bust circumference properly.
Extending the Back Panel – Hook 2.0 mm
Row 14:
Attach yarn at the raglan corner.
Work: ch3, 2dc tog, ch3, 3dc tog under chain space.
Continue the pattern:
ch2, 2dc under first arch, then ch4, 2dc under each arch to the end.
Finish with: ch2, 3dc tog, ch3, 3dc tog at the raglan corner. Turn.
Row 15:
Begin at the raglan corner:
ch1, sl st, then ch3, 2dc tog, ch3, 3dc tog under chain space.
Continue pattern:
ch4, skip dc group from previous row, work 2dc under second arch, continue ch4, 2dc under arch to the end.
At the end of the row:
ch4, skip the last arch, and work 3dc tog, ch3, 3dc tog into the final raglan corner. Turn.
⚠️ Do not fasten off the yarn – continue with the joining row.
Make sure to check the sleeve depth. Add rows as needed to avoid too deep underarms.
Joining the Yoke – Hook 2.0 mm
Row 16:
After turning your work from the previous row, begin joining the front and back panels:
-
ch1, sl st under chain space, then ch3, dc under the same space.
-
Continue the pattern: ch2, 2dc under first arch, then ch4, 2dc under each arch.
-
At the end of the back section: ch2, 2dc.
Now skip the sleeve arches entirely and join directly to the front panel:
Work 2dc under the raglan corner arch of the front panel.
👉 Optional: If you need more width at the underarm, insert 1–3 foundation chains before joining.
Continue across the front panel:
ch2, 2dc under each arch, with ch4 between.
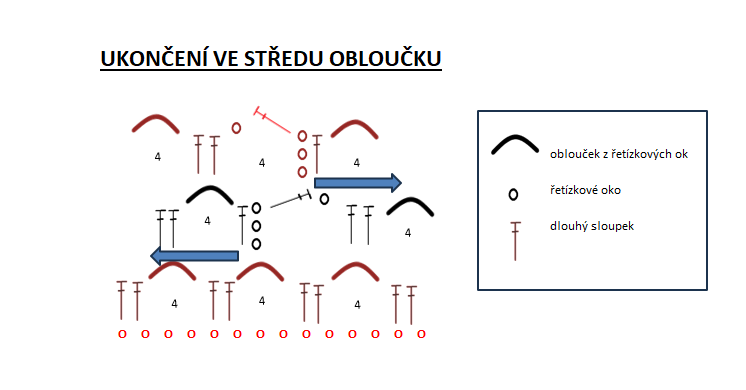
At the neckline center, work:
-
3dc tog into the edge stitch of one front panel,
-
3dc tog into the edge stitch of the opposite front panel.
Finish across the front panel to the other underarm.
At the end: work 2dc under the final arch, then join to the back panel using a slip stitch. Turn.
Body of the Dress – Hook 2.0 mm
Row 17:
Using 3 slip stitches (sl st), move to the first arch.
Ch3 (counts as dc), 1 dc under the same arch.
Work all around: ch4, 2 dc under each arch.
At the end of the row: ch1, dc into the 3rd chain of the starting ch3.
You should now be positioned in the center of the last arch.
🌀 Turn after every row.
Rows 18–25:
Ch3, 1 dc under the arch, then repeat:
ch4, 2 dc under the next arch.
End each row with: ch1, dc into the 3rd ch of the turning chain.
Always turn your work.
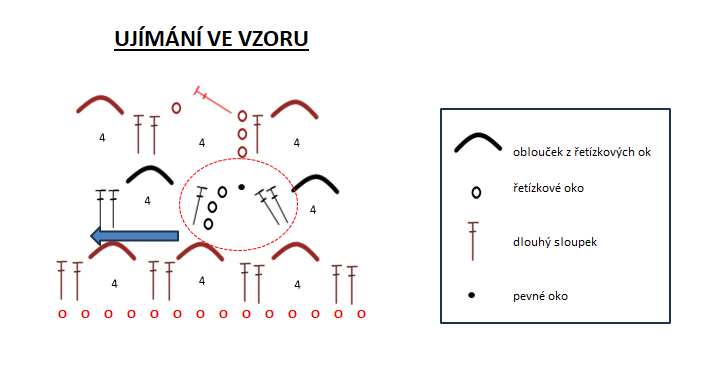
Row 26 – Increase Row:
Ch3, 1 dc under the first arch.
Repeat: ch4, 2 dc under arch.
Every 10th arch, increase as follows:
2 dc under arch, ch2, 2 dc into the dc group from the previous row, ch2, 2 dc under the next arch.
Continue in pattern.
End: ch1, dc into 3rd ch of turning chain, turn.
Rows 27–30:
Repeat row pattern: ch3, 2 dc under each arch, ch4 between.
No increases. Turn after each row.
Row 31 – Increase Row:
Same as Row 26, but increase every 15th repeat.
→ 2 dc under arch, ch2, 2 dc into previous dc group, ch2, continue pattern.
Rows 32–39:
Same as Rows 27–30. No increases. Turn after each row.
Row 40 – Increase Row:
Repeat Row 26. Increase every 10th group.
Rows 41–49:
Regular pattern, no increases. End and turn as before.
Row 50 – Increase Row:
Repeat Row 26 (increase every 10th group).
Note:
You can adjust the frequency and placement of increases according to your height and hip width.
The dress is meant to be loose and airy – feel free to make it slightly wider than usual.
Rows 51–70:
Repeat: ch3, dc under arch, ch4, 2 dc under next arch.
No increases unless desired.
Always end with ch1, dc into 3rd ch, turn.
Bottom Hem – Hook 2.0 mm or 2.5 mm for a wider ruffle
Row 71:
Work into the space between dc stitches from the previous row.
Ch3, 2 dc into that space.
Then work the ruffle pattern:
3 dc, ch2, 3 dc into every space between dc pairs from the previous row.
➡️ Do not join the stitches together.
At the end of the row:
3 dc, ch1, slip stitch into the 3rd chain of the starting ch3.
You should now be in the center of the fan.
❗ Work these rows only on the right side (do not turn).
Rows 72–74:
Repeat Row 71.
You may adjust the number of ruffle rows as desired.
Color Distribution for the Dress:
- Rows 1–17 – Color No. 1
- Rows 18–34 – Color No. 2
- Rows 35–50 – Color No. 3
- Rows 51–65 – Color No. 4
- Rows 66–74 – Color No. 5
You can of course adjust the color sequence based on your yarn choice or preference.
Neckline Edging – Hook 2.0 mm – Use Color No. 1 (same as the yoke)
Row 1:
Attach the yarn at the raglan corner.
Work: ch3, then 2dc tog, ch2, 3dc into the same stitch.
Continue the pattern:
[3dc tog, ch2, 3dc] into every 4th stitch (you can follow the placement of the single crochets from the 2nd row of the yoke for alignment).
At the end of the row: turn your work.
Row 2:
Work: ch3, then 2dc tog, ch2, 3dc into the first stitch.
Repeat: [3dc tog, ch2, 3dc] into every 4th stitch as before.
At the end of the row: turn.
Finish by sewing in the loose end or joining with a slip stitch to the edge pattern of the neckline.
Sleeve – Hook 2.0 mm
Row 1:
Attach yarn into a stitch of the underarm chain.
Ch3 (counts as dc), 1 dc into the same stitch.
Continue with: ch4, 2 dc either behind the edge dc, into the raglan corner, or following the stitch placement along the yoke pattern.
⚠️ Important: End the row with ch1, dc into the 3rd ch of the turning chain – so you remain in the center of the arch. Turn.
Row 2:
Ch3, 1 dc under the arch, then continue the pattern:
ch4, 2 dc under each arch.
Decrease at the end: finish the row with sl st, do not work the last arch. Turn.
Rows 3–28:
Repeat the established pattern:
ch3, dc under arch, ch4, 2 dc under arch.
End with: ch1, dc into 3rd chain, to stay centered. Turn.
Flared Sleeve Hem – Hook 2.0 mm
Row 29:
Work on the right side only (no turning).
Ch3 (counts as dc), 2 dc under the arch.
Under the next arch, work:
3 dc, ch2, 3 dc.
👉 Do not join the stitches together (keep the shell shape).
End the row with: ch1, sl st into 3rd ch of turning chain – this keeps you in the center of the shell. Continue working on the right side only.
Rows 30–32:
Ch3, then 2dc, ch2, 3dc under the arch.
Continue working 3dc, ch2, 3dc under the ch-space from the previous row.
Adjust the number of rows based on your preference.
Sleeve Color Distribution:
- Rows 1–12 – Color No. 1
- Rows 13–27 – Color No. 2
- Rows 28–32 – Color No. 3
Neck Tie – Hook 2.0 mm
I crocheted a drawstring cord for the neckline.
I measured 5× the arm span, folded the yarn in half, creating a six-strand bundle.
Attach the yarn to the 7th row of the neckline, and crochet a chain of 80 chains.
Add a bead at the end of the string and secure it by:
- Making a chain stitch,
- Pulling the yarn tail through the center of the bead.
Repeat the same on the opposite side of the neckline.
Finishing
Weave in all loose ends.
Optionally, you can edge the back neckline with a row of single crochet stitches for a neat finish. Add a decorative label or tag if you wish.
Usage and Permissions
This pattern is intended for personal use only. If you would like to use it for commercial purposes, please contact me first. Always include the source link: www.krampolinka.cz when sharing your projects online. The pattern is specifically written for the yarn, hook size, and tension used in this sample. If you use a different yarn or hook, your final bag size and shape may vary.
Enjoy this free pattern and you can follow my latest projects, tutorials, ideas, reviews, video podcasts, tips, and tricks:
- Krampolinka YouTube videos (subtitled since 2024)
- Krampolinka Instagram
- Krampolinka FB group
-
- Beach Dress Crazzy
-
- Size 42 airy and beautiful
-
- Could be worn as a tunic
-
- Tested by the sea

-
- Beautiful gradient Yarn Crazzy
-
- Stylish and trandy
-
- Yoke
-
- Decrease in pattern
-
- Crochet back and forth
-
- How to do do invisible seam

No Comments